
I was so in love with the way the recipe for biscotti turned out last week that I went back to The Pioneer Woman website in search of another recipe to try this week. I was also in the middle of a 72 hour sweets detox with my friend Kara (this blog is not helping my sweet tooth), so I decided to go for something savory to bake. The recipe for Bloomin’ Herb Bread looked super intriguing. I have been seeing recipes all over the place about baking bread in a Dutch oven and this one looked extra tasty. I decided to give the bread a try and I am so excited that I did. I honestly think that I will be trying to bake it again this week to try to perfect it, but there were no complaints in our house.
**UPDATE** So right after writing this post I made another loaf of this delicious bread and tried a different technique to let the dough rise. I will add this technique in the recipe below!**

The ingredients for this bread were about as simple as they come! 4 cups of bread flour but AP is okay too, 4 ounces or 1 stick of melted butter, 1 tablespoon herbs of your choice – I went with dried Italian herb blend because that is what I had but fresh or dry herbs would be awesome here, 1 teaspoon instant yeast, 8 ounces of water, 2 teaspoons salt.


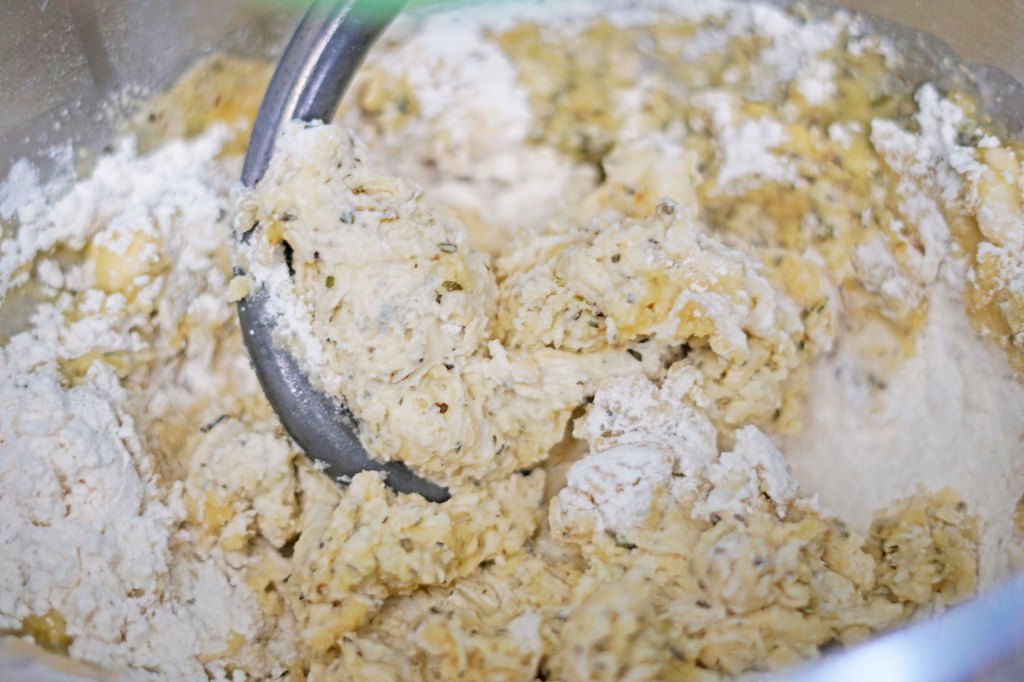
Next, I dumped about a tablespoon of the herb blend into the melted butter and then I dumped all the ingredients into the bowl of my mixmaster fitted with the dough hook attachment. I turned the machine on low and let it run until all the ingredients came together. Then I turned the mixer up to medium and let it run for about 10 minutes.
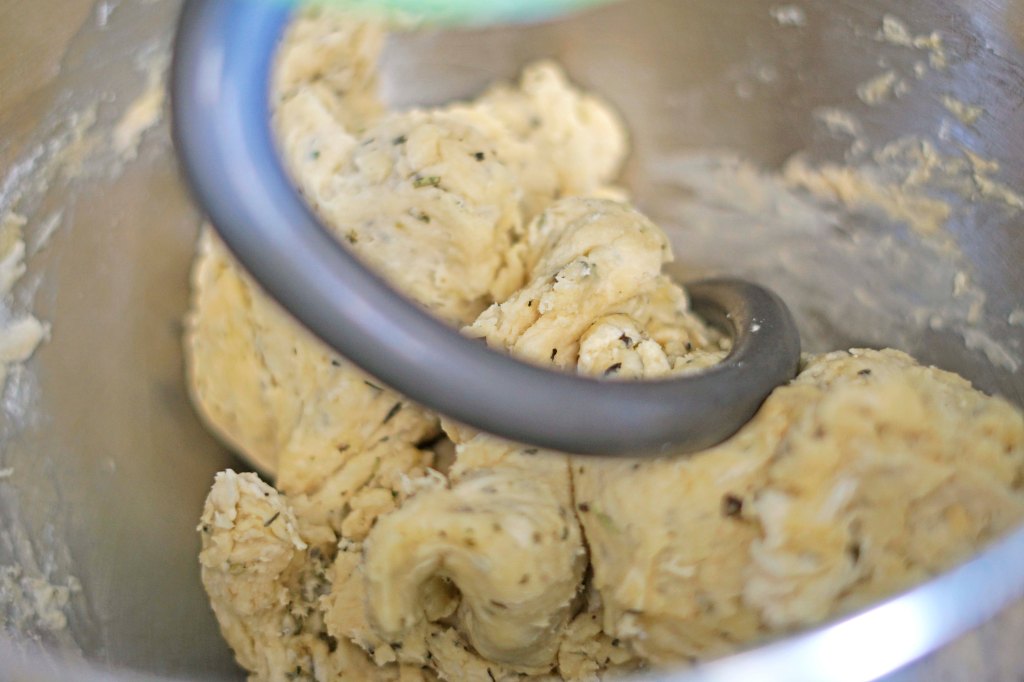

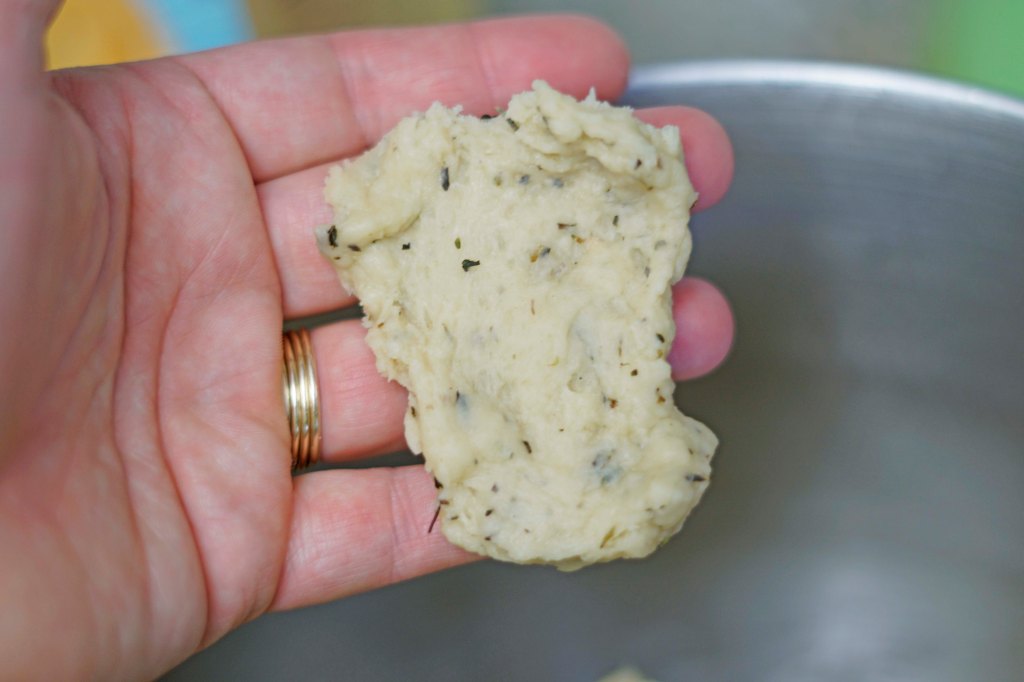
I stopped the mixer a few times to check to see if the dough had reached the windowpane stage. This meant that if I stretched part of the dough between my thumb and fingers I could see through some of it without it ripping. The recipe said that once I could do this then the dough is ready.
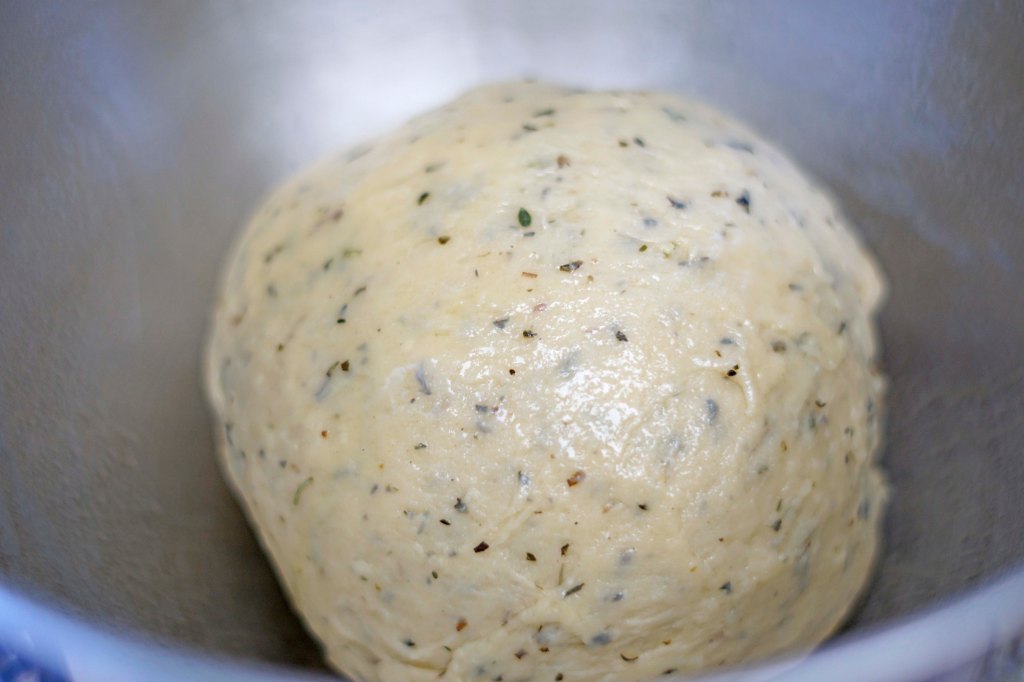
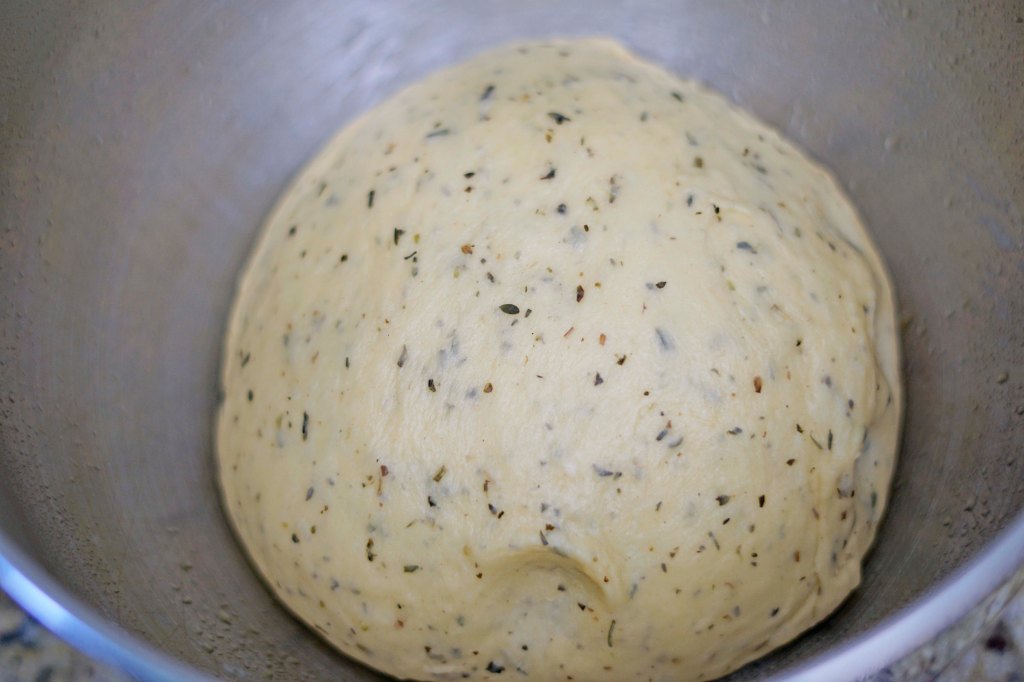
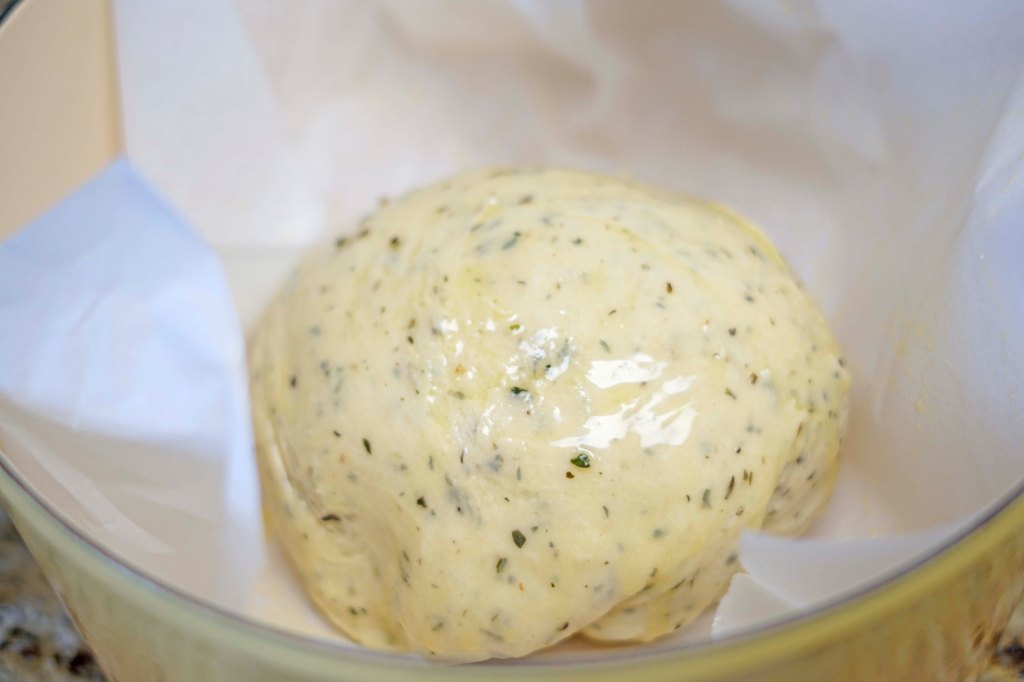
The recipe told me next to spray the bowl with some olive oil spray and cover it with plastic wrap to let it rise for 1 to 4 hours. This window was pretty vague to me. So I set it in a draft free place and let it rise. Looking back at the pictures now, I realize that it was probably only beginning to rise when I stopped after 2 hours and kneaded it a few times to redistributed the yeast. I was impatient and this is the number 1 reason I think I should try to make this again. I preheated the oven to 450 F degrees. After it was re-kneaded, I lined my dutch oven with parchment paper and put the dough inside.


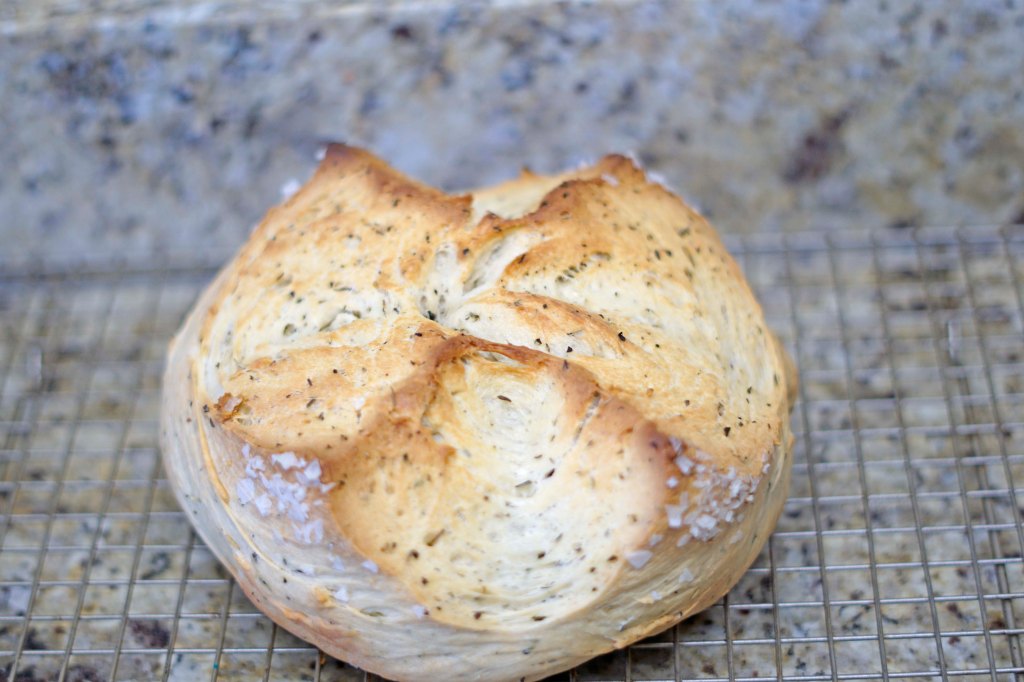
I sprayed the top of the bread with olive oil spray again, sprinkled it with flake salt, and cut an X in the top so that the bread could bloom, and then topped the dutch oven with its lid. Once the oven was at 450 F degrees, I put the bread into the oven in the middle rack position and let it bake for 30 minutes with the lid on. Then I removed the lid and baked it for another 15 minutes. I checked the internal temperature and it was at 190 F degrees. I pulled the bread out of the oven and let it cool for 10 minutes in the pot and then fully on a cooling rack.
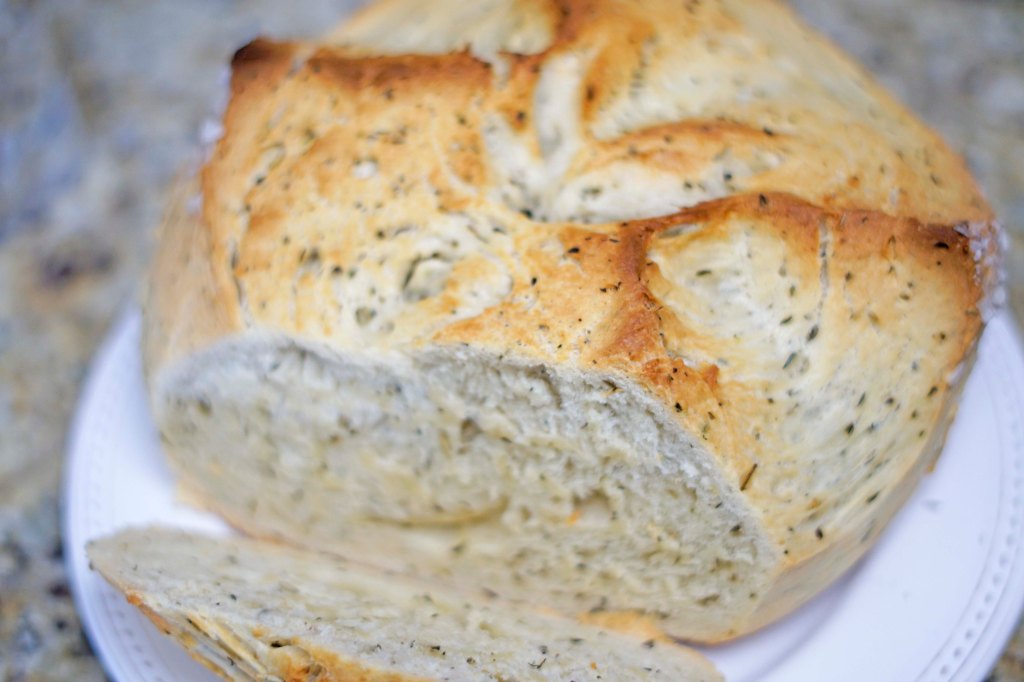

After it was a cool as my impatient self would let it get, I sliced it and slathered some butter on top and basically could not stop eating this bread! I sent my husband the last picture with a text that said “Get excited to come home to this bread tonight!” Honestly the flavor was amazing! The texture was totally to my liking, a little chewy and doughy still ( I think from the under proofing), the bottom was crunchy and the outside was nice and crusty. The Pioneer Woman warns that if it gets too crunchy on the bottom, just slice that part off before serving. So, long story short- this bread is SUPER easy, very delicious and maybe needs just a little more patience than I was willing to give it last week.
Final Thoughts:
- The ingredients for this bread are as simple as the steps
- After making this I realized that it is another egg free recipe for everyone to enjoy
- Since the herb mixture is totally interchangeable you could customize this to any flavors that would fit the meal you are going to serve this with or to any preferences.
Recipe: Bloomin’ Herb Bread
Ingredients
- 4 cups or 20 ounces of Bread Flour or AP
- 1 cup or 8 ounces of fluid Water
- 1/2 cup or 4 ounces of fluid melted butter with 1 tablespoon herbs of choice
- 2 teaspoons Salt
- 1 teaspoon Instant Yeast
- Olive Oil spray
Instructions
- Combine all the ingredients in a stand mixer fitted with the dough hook. Mix the ingredients together on low until they are all combined.
- Then turn the mixer up to medium and knead for about 10 minutes or until the dough reaches the windowpane stage. This is where you can stretch a small piece of dough between your thumb and finger to see if there are some transparent patches without the dough ripping. Once it reaches this stage it is ready.
- Shape the dough into a smooth dome by tucking the ends under the center and spray the bowl and dough with olive oil spray. Cover the bowl with plastic wrap and place in a warm dry place and let rise for 1 to 4 hours or until it has doubled in size.
- **OR** If you would like the dough to rise faster, when you begin mixing the dough – move the racks to the bottom position and then the slot right above that one. Preheat the oven to its lowest setting. When it comes to temperature, turn the oven off. Right before putting the letting the bread rise, boil 2 cups of water in the microwave. Then place a cake pan on the bottom rack of the oven and pour the boiling water into the pan. Place the prepared bowl of dough in the oven to rise instead of letting it rise on the counter. Close the door and let the heat and steam help the bread rise. It took 1 1/2 hours for the bread to actually double in size. You can leave the pan of water in the oven while baking.
- Preheat the oven to 450 F degrees.
- After the first rise, knead the dough again for 1 to 2 minutes by hand to redistribute the yeast. Form the dough into a dome again by tucking the ends under the center.
- Line your Dutch oven with parchment paper. Place the dough inside the pot and spray with olive oil, sprinkle with flake salt and cut an X in the middle of the bread.
- Cover the pot with the lid and place into the preheated oven for 30 minutes.
- Remove the lid and continue to bake for 15 – 30 minutes or until your bread has an internal temperature of 190-200 F degrees and the crust has browned to your liking.
- Cool for 10 minutes in the pot, then continue cooling just the dough on a cooling rack.
- Cut a nice slice, slather with butter and enjoy!
Recipe adapted from The Pioneer Woman
