
The healthy streak has continued in our house this week and we are celebrating with a great big dose of winter citrus. Kevin gifted me a beautiful tart pan two years ago for Christmas, and I somehow managed to never use it. I don’t know what happened. I am going to blame moving a few times not too long after being gifted it and honestly always being a little intimidated by pies and tarts.
I have a tart recipe from Sauce, food magazine from the St. Louis area that I ripped out and have been holding on to for…well…at least 5 years now, but I have never made it. I thought about making it this week when Kevin requested a tart, but it is a rich chocolate and sea salt caramel tart and somehow it just seemed too heavy after all the holiday indulgences. So I settled on an America’s Test Kitchen recipe for Bright Lemon Tart. Citrus is so amazing this time of year and I was super excited when I found a bag of Meyer lemons at my local Trader Joe’s to use in this recipe. They added a nice citrus tang without being too sharp. As nervous as I was to make this recipe, it was super straight forward to make. It did take a little bit of time, but the steps were easy to follow and the result was wonderful.
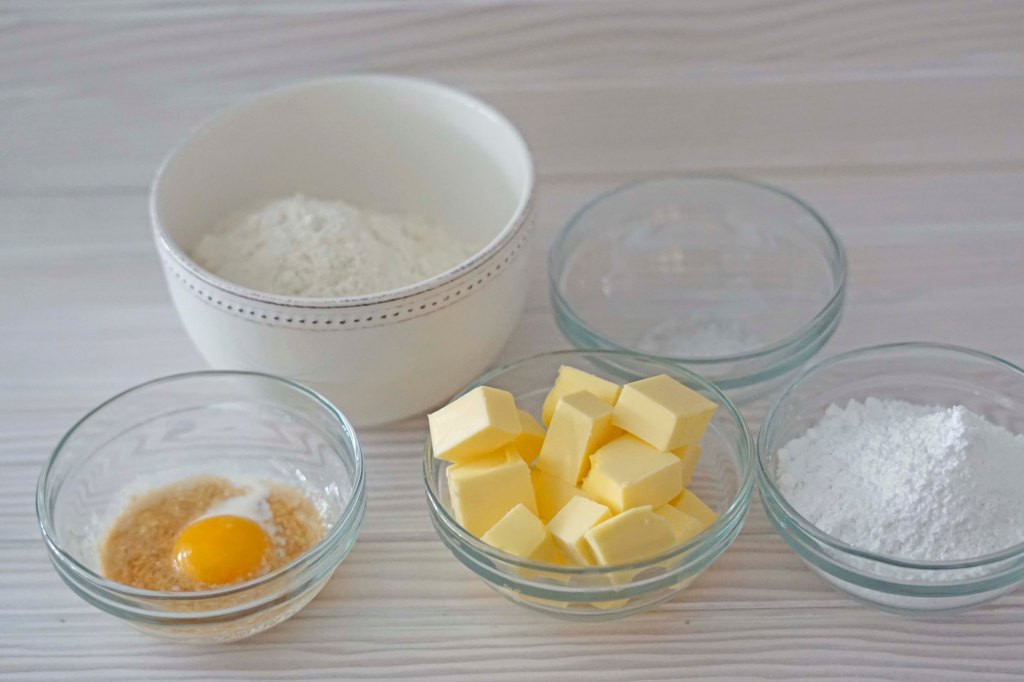
To begin making this recipe, I started with the tart shell. The ingredients are, 1 large egg yolk, 1 tablespoon whipping cream, 1/2 teaspoon vanilla, 1 1/4 cup all purpose flour, 2/3 cup of confectioners’ sugar, 1/4 teaspoon salt and 8 tablespoons unsalted butter, cut into pieces and chilled.

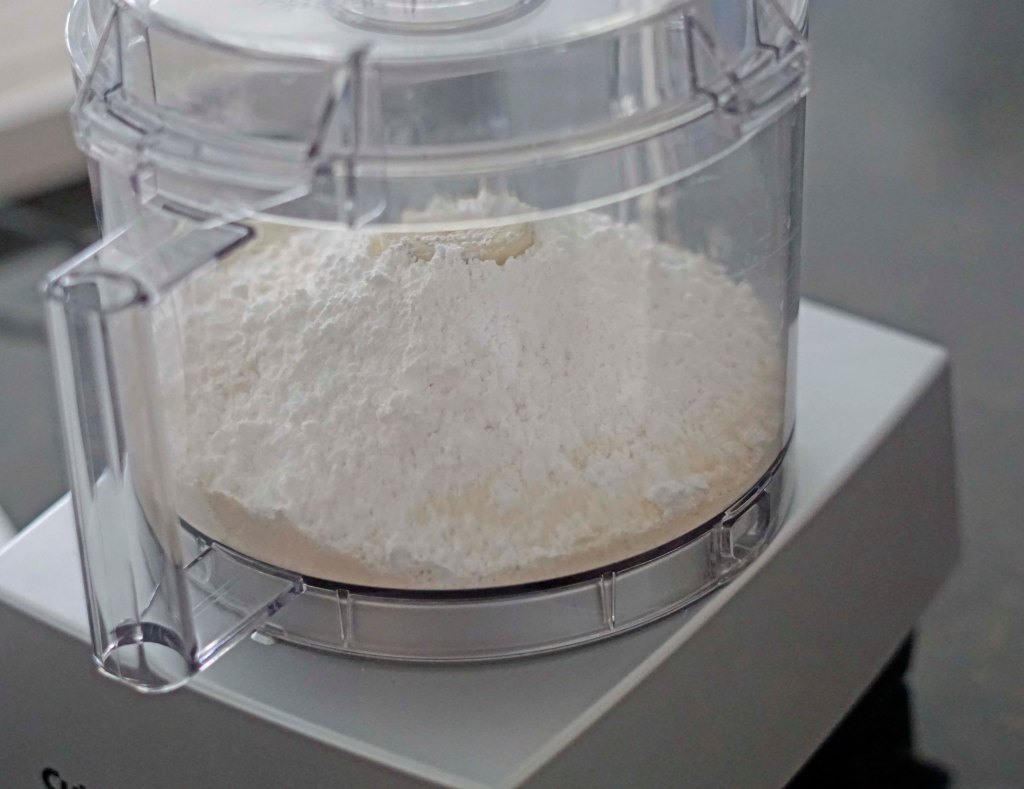
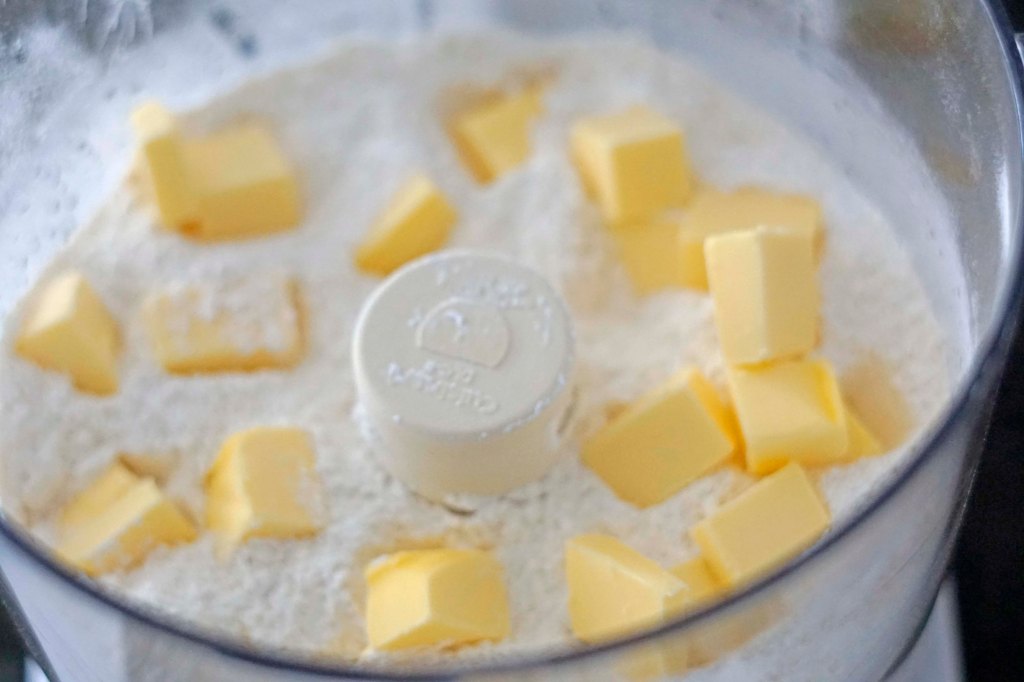

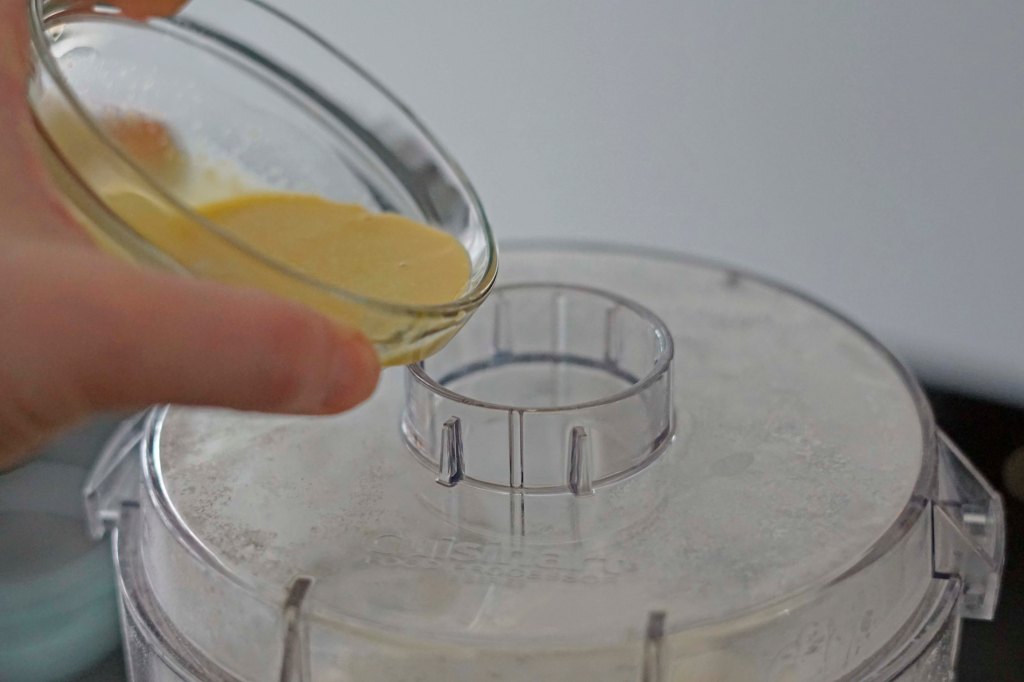
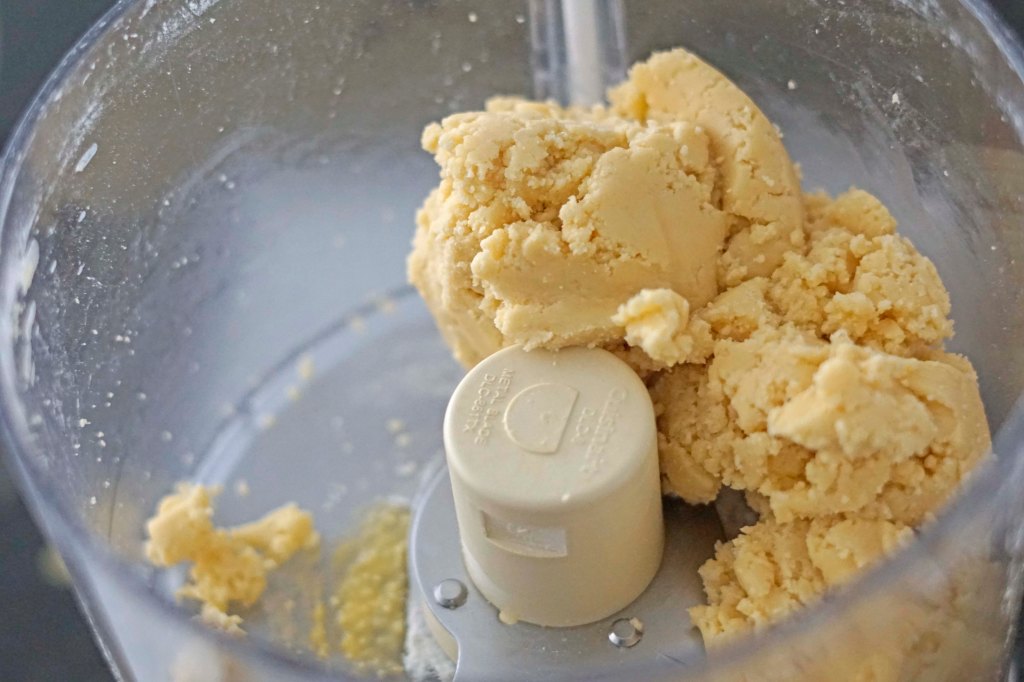
First, I whisked the egg yolk, vanilla and cream all together and set it aside. Then I put the flour, confectioners’ sugar and salt into the bowl of a food processor and pulsed it until it was combined. I scattered the chilled butter on top and pulsed it 15 times to made the perfect combination of dry ingredients and small pieces of butter. While the food processor was running, I poured the liquid mixture into the top of the food processor and let it run for about 12 – 15 seconds. You will know that it is finished as soon as the dough comes together around the blade.
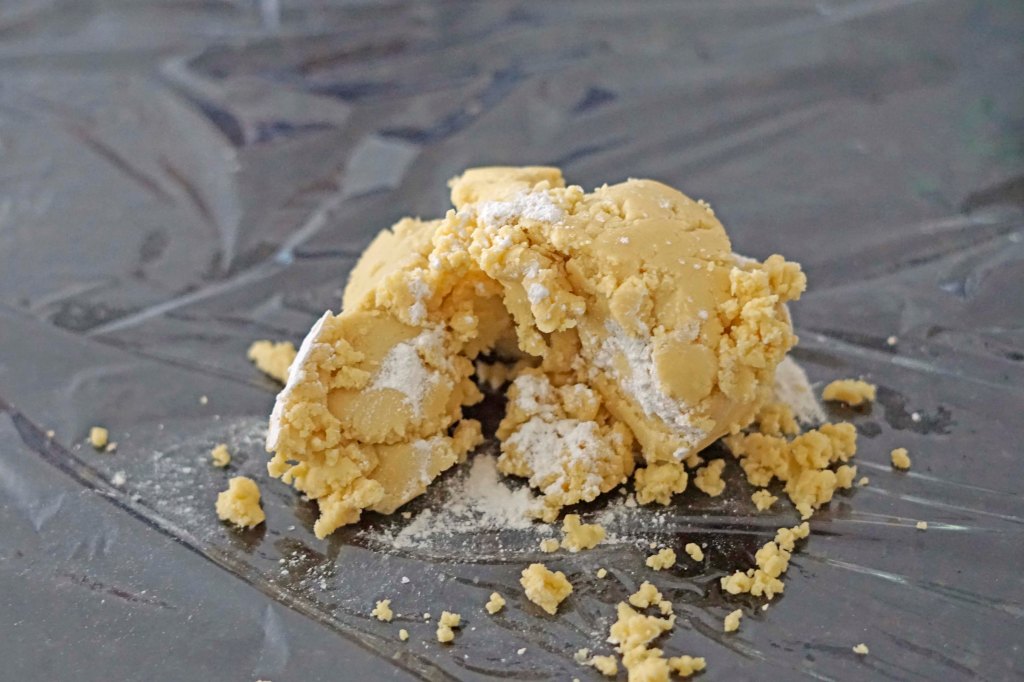

I dumped the dough out onto a a large piece of plastic wrap and used the sides of the plastic wrap to bring it all together, by folding the sides over the top of the dough, being carful not to handle it too much. I then wrapped it tightly in a disk shape and placed it in the fridge. It needs at least 1 hours to chill, but I ended up leaving mine for almost 2 full days, until I had a good time to finish the tart.

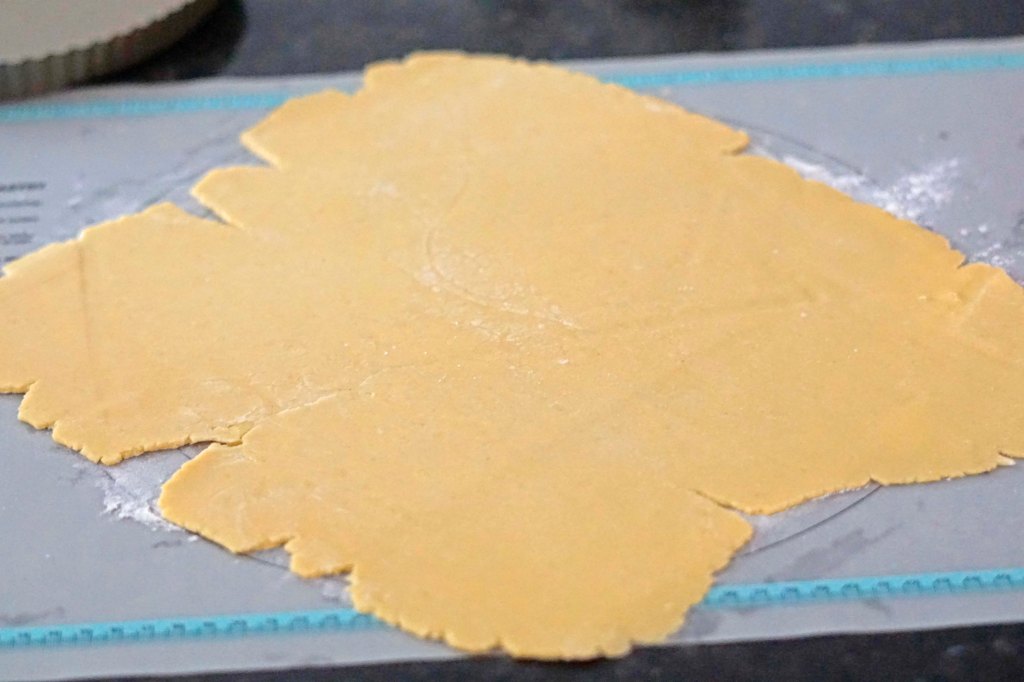

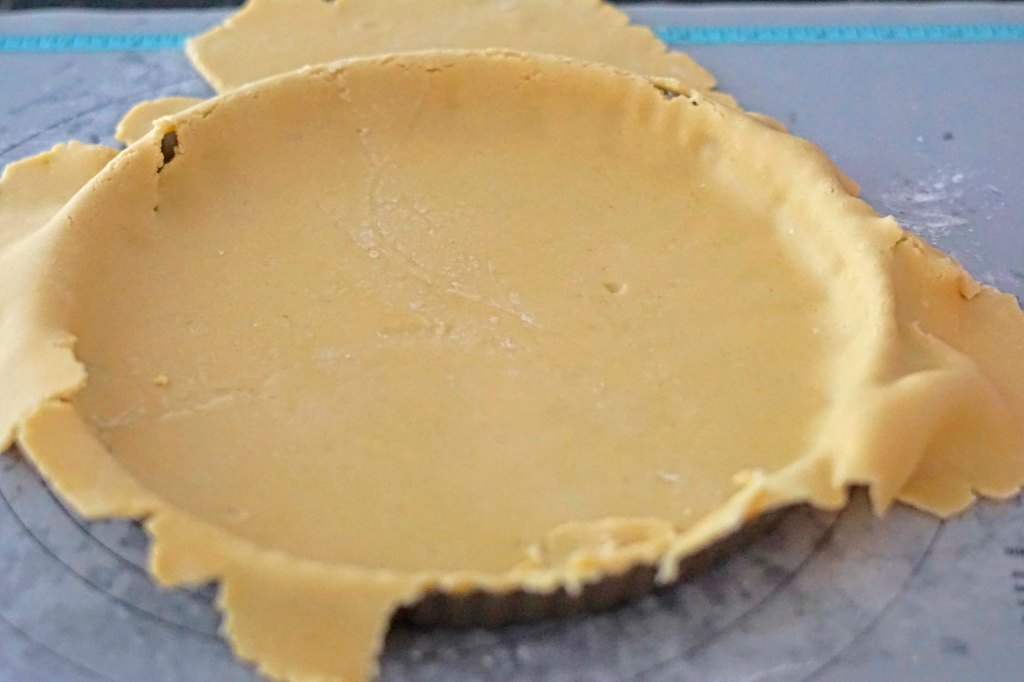
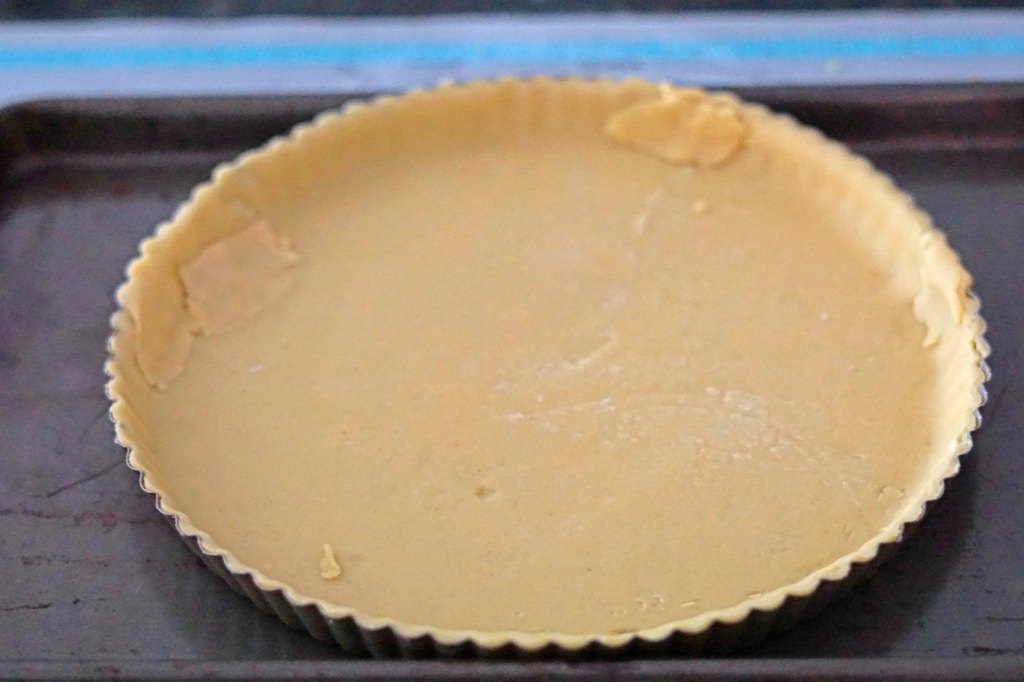
When I was ready for the next steps, I left the dough on the counter for 10 minutes to warm slightly and then rolled it out on a lightly floured dough mat. I rolled the dough around my rolling pin to transfer it to the tart pan. I gently unrolled it on top of the pan and picked up the sides of the dough and gently allowed the dough to sink into the sides of the pan. Then I rolled the rolling pin over the top of the pan to trim off the extra dough. I also used some of the extra dough to patch a few places that became thin or had small holes. I also channelled my Great British Bake Off knowledge and used a piece of extra dough rolled in a ball in my hand to gently go around the edge of the pan and squish the dough into the fluting of the pan. Finally, I put the pan on a sheet tray and placed it in the freezer for 30 minutes to firm up. While the dough is freezing, I preheated my oven to 375 F degrees and made sure my rack was in the middle part of the oven.
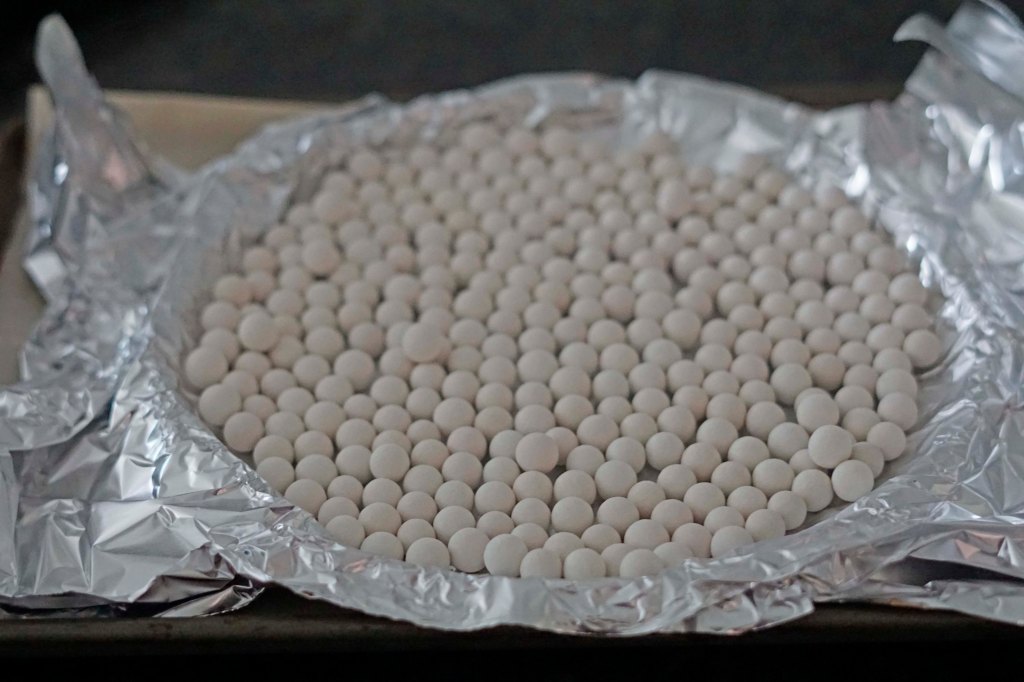
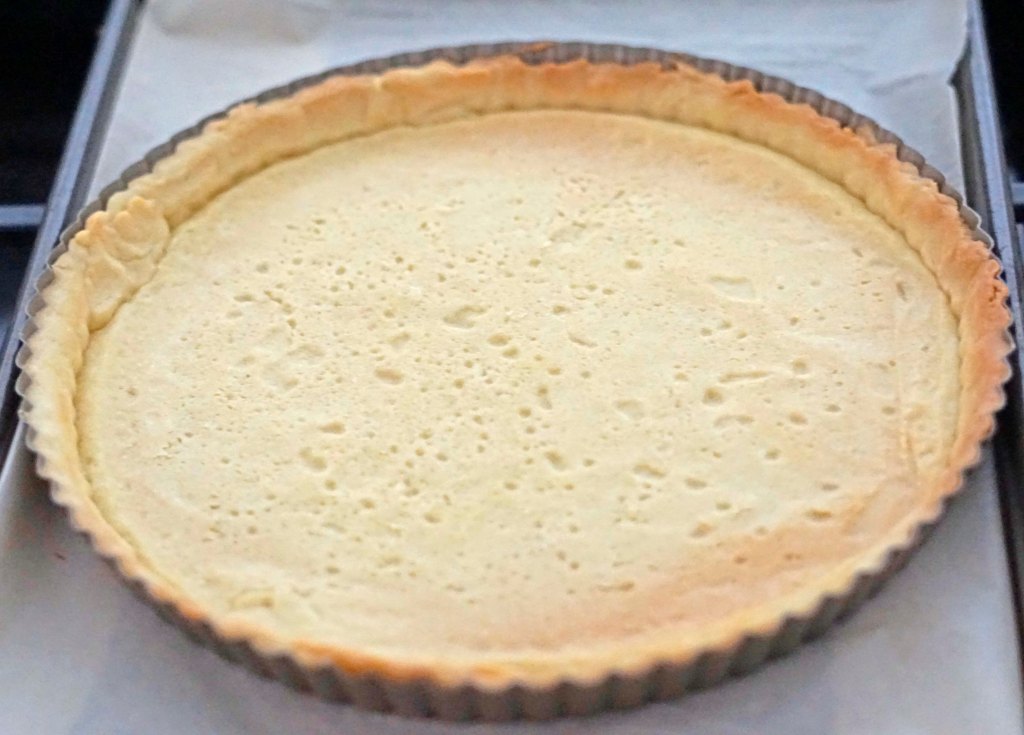

I pulled the shell out of the oven and lined it with two pieces of foil that I pressed into the frozen dough. I put two boxes of ceramic pie weights on top of the dough and placed the sheet pan with the tart on top into the oven for 15 minutes. After the 15 minutes, I rotated the pan 180 degrees and let it cook for another 10 minutes. Then I carefully removed the foil with the pie weights and baked the shell for another 5 minutes. It probably could have gone for another 2 minutes, but I didn’t want it to get too dark. Then I placed the baking sheet and tart pan on a cooling rack to being cooling while I made the lemon filling.

The ingredients for the lemon filling are – 7 egg yolks and 2 whole eggs, 2/3 cup of lemon juice, 1 cup of sugar*, 4 tablespoons butter, 1 pinch of salt, 1/4 cup of lemon zest and 3 tablespoons whipping cream. *If I were to make this with Meyer lemons again, I would reduce the sugar to 3/4 cup, since the Meyer lemons are slightly sweeter and less tart than standard lemons.


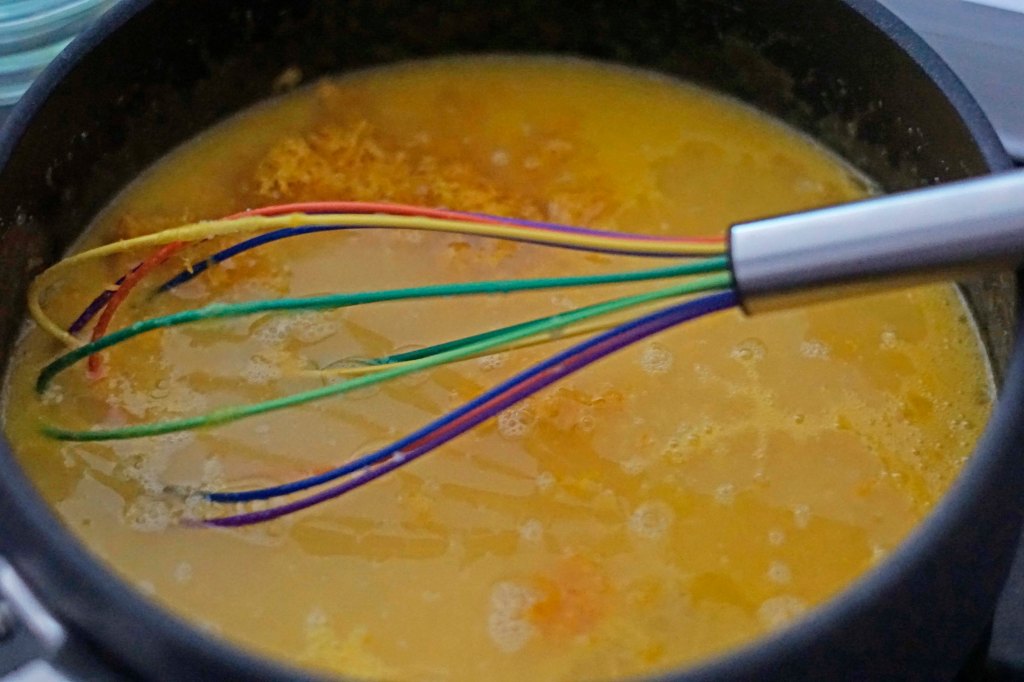
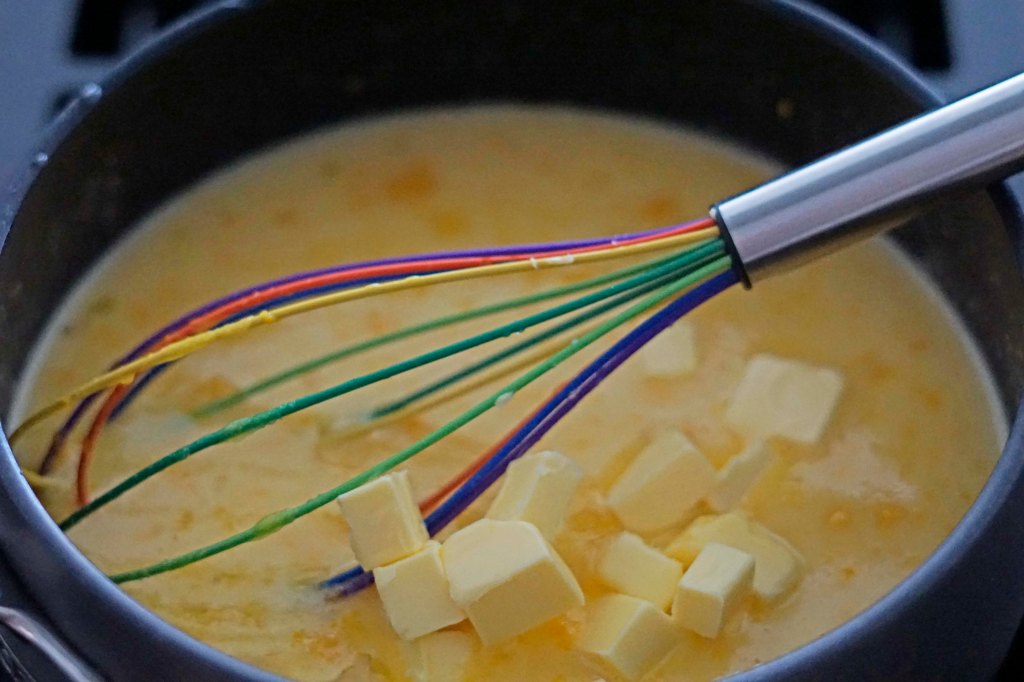
Before beginning, I set a fine mesh strainer over to top of bowl in preparation to strain the mixture. To make the filling, I added the eggs to a medium sauce pan off the heat and whisked them together. Then I whisked in the sugar until it disappeared. Next, the lemon juice, zest and salt. Finally, I added the butter pieces and then put the pot on medium low heat and whisked constantly until an instant read thermometer registered 170 F degrees.


As soon as the thermometer read 170 F degrees, I dumped the mixture on top of the strainer and used my whisk and then a small spatula to push the mixture into the bowl below. At first I thought I had TONS of scrambled eggs in my filling and then I remembered that it was mostly just catching the zest. Don’t forget to scrape the filling off the bottom of the strainer when you are finished because a lot of filling with catch there and you don’t want to waste any of it! Finally, add the whipping cream to the bowl and whisk it all together.


Next, I poured the filling into the baked tart shell and smoothed it out. I placed the baking sheet and tart into the oven and baked it for 10 – 15 minutes. I checked mine at 10 minutes and gave the pan a little shake. The edges still moved too much for my liking, so I baked it for another 2 minutes until only the middle had a small amount of shake left to it. I placed the baking sheet and tart on a cooling rack let it cool for at least 1 1/2 hours.
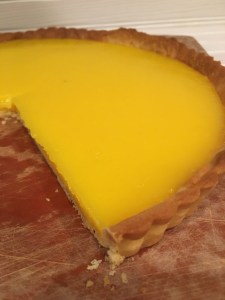
I really wish I had a beautiful final picture to show you here, but sadly, my styled picture looked terrible and Kevin grabbed this one after I had served this as dessert for Kevin and Emily with a generous dollop of whipped cream on the side. The whipped cream added a nice sweet, mellow, creamy touch to the sweet, bright, slightly sharp lemon tart. The pastry was nice and thin and DID NOT HAVE A SOGGY BOTTOM!!! All in all I would say this is a lovely winter dessert for anyone looking for a nice change of pace and a great way to celebrate winter citrus!
Recipe: Bright Lemon Tart
Ingredients:
- Classic Tart Dough
- 1 large egg yolk
- 1 tbsp heavy cream
- 1/2 tsp vanilla extract
- 1 1/4 c all-purpose flour
- 2/3 cup confectioners’ sugar
- 1/4 tsp salt
- 8 tbsp (1 stick) unsalted butter, cut into pieces and chilled
- Lemon Tart Filling
- 7 large egg yolks
- 2 large eggs
- 7 large egg yolks
- 2 large eggs
- 1 cup sugar (Reduce to 3/4 cup if using Meyer lemons)
- 1/4 cup grated fresh lemon zest (4 lemons or Meyer lemons)
- 2/3 cup fresh lemon juice (4 lemons or Meyer lemon)
- Pinch salt
- 4 tablespoons (1/2 stick) unsalted butter, cut into 4 pieces
- 3 tablespoons heavy cream, chilled
Instructions:
Classic Tart Dough
- Whisk the egg yolk, cream, and vanilla together in a small bowl. Process the flour, sugar, and salt together in a food processor until combined. Scatter the butter pieces over the top and pulse until the mixture resembles coarse cornmeal, about 15 pulses.
- With the machine running, add the egg mixture through the feed tube and continue to process until the dough just comes together around the processor blade, about 12 seconds.
- Turn the dough onto a sheet of plastic wrap and flatten into a 6-inch disk. Wrap the dough tightly in plastic wrap and refrigerate for 1 hour. Before rolling the dough out, let it sit on the counter to soften slightly, about 10 minutes.
Lemon Tart
- Roll the dough out into an 11-inch circle on a lightly floured counter and fit into a 9-inch tart pan with a removable bottom. Set the tart pan on a large plate and freeze the tart shell for 30 minutes.
- Adjust an oven rack to the middle position and heat the oven to 375F. Set the tart pan on a large baking sheet. Press a double layer of foil into the frozen tart shell and over the edges of the pan, and fill with pie weights. Bake until the tart shell is golden brown and set, about 25 minutes, rotating the baking sheet halfway through baking.
- Carefully remove the weights and foil and continue to bake the tart shell until it is fully baked and golden, 5-7 minutes longer. Transfer the baking sheet to a wire rack and let the tart shell cool slightly on the baking sheet while making the filling.
- Whisk the egg yolks and eggs together in a medium saucepan. Whisk in the sugar until combined, then whisk in the lemon zest, lemon juice, and salt. Add the butter and cook over medium-low heat, stirring constantly, until the mixture thickens slightly and registers 170 degrees on an instant-read thermometer, about 5 minutes. Immediately pour the mixture through a fine-mesh strainer into a bowl and stir in the cream.
- Pour the lemon filling into the warm tart shell. Bake the tart on the baking sheet until the filling is shiny and opaque and the center jiggles slightly when shaken, 10-15 minutes. Let the tart cool completely on the baking sheet, about 1 1/2 hours. To serve, remove the outer metal ring of the tart pan, slide a thin metal spatula between the tart and the tart pan bottom, and carefully slide the tart onto a serving platter or cutting board.
- Serve the tart with a dollop of whipped cream.
- Enjoy!
Recipe adapted from America’s Test Kitchen

One thought on “Bright Lemon Tart”