
So my sweet neighbor came over the other night while we were having a baking party. I sent her a text that said, “We are making macarons and drinking wine- come over if you want”. Needless to say, she came over within a few minutes. She looked around and goes…”Oh macarons! I thought you meant the coconut macaroons!” Which I responded, “Nope, one o not two”. I instantly knew that had to be the name of this blog post. I have for too long called macarons – macaroons, but now I know the difference. The other day I was watching a kids baking competition show on tv (I know my baking show addiction is getting scary). Most of the kids on the show knew how to make macarons and I thought to myself, if they can do it…I can too! (This is actually the same way I got into running…through Girls on the Run at the school I taught at in St. Louis – if they can run a 5K…I can too!) But back to the macarons – I thought this would be a great new project to try next for the blog.

Luckily for us, our good friends David and David were in town last week and we were able to hang out with them a few times. David Portillo is actually in town for a month for a few performances in Chicago. He is a super talented Opera singer and hopefully we will get the opportunity to get to see him perform again while he is in town. Anyway, he asked if he could come over to try to learn some baking tips – so I put the two projects together – baking with David and learning to make macarons. It turned into quite the baking party though with Emily coming over and Kevin chipping in as well! Look at how awesome he is baking with me!
In preparation for this baking party, I did a pretty deep internet search for recipes and most of them came back to the recipe from the blog Bravetart. I had been to the blog a few times before looking for ideas, but this is the first time I took time to explore it and read all of her instructions and notes. First of all, she is super funny! Her recipes are straightforward and easy to follow. She also includes a lot of links for photos and video examples that help you understand what she is describing. We mostly followed her instructions with of course some experimenting along the way. We also substituted vanilla bean paste for the vanilla bean and extract because the one vanilla bean I had was SOOOOOOO dry and everything vanilla is SOOOOOOO expensive right now. Check out this article to learn more about why prices have gone up so much recently.
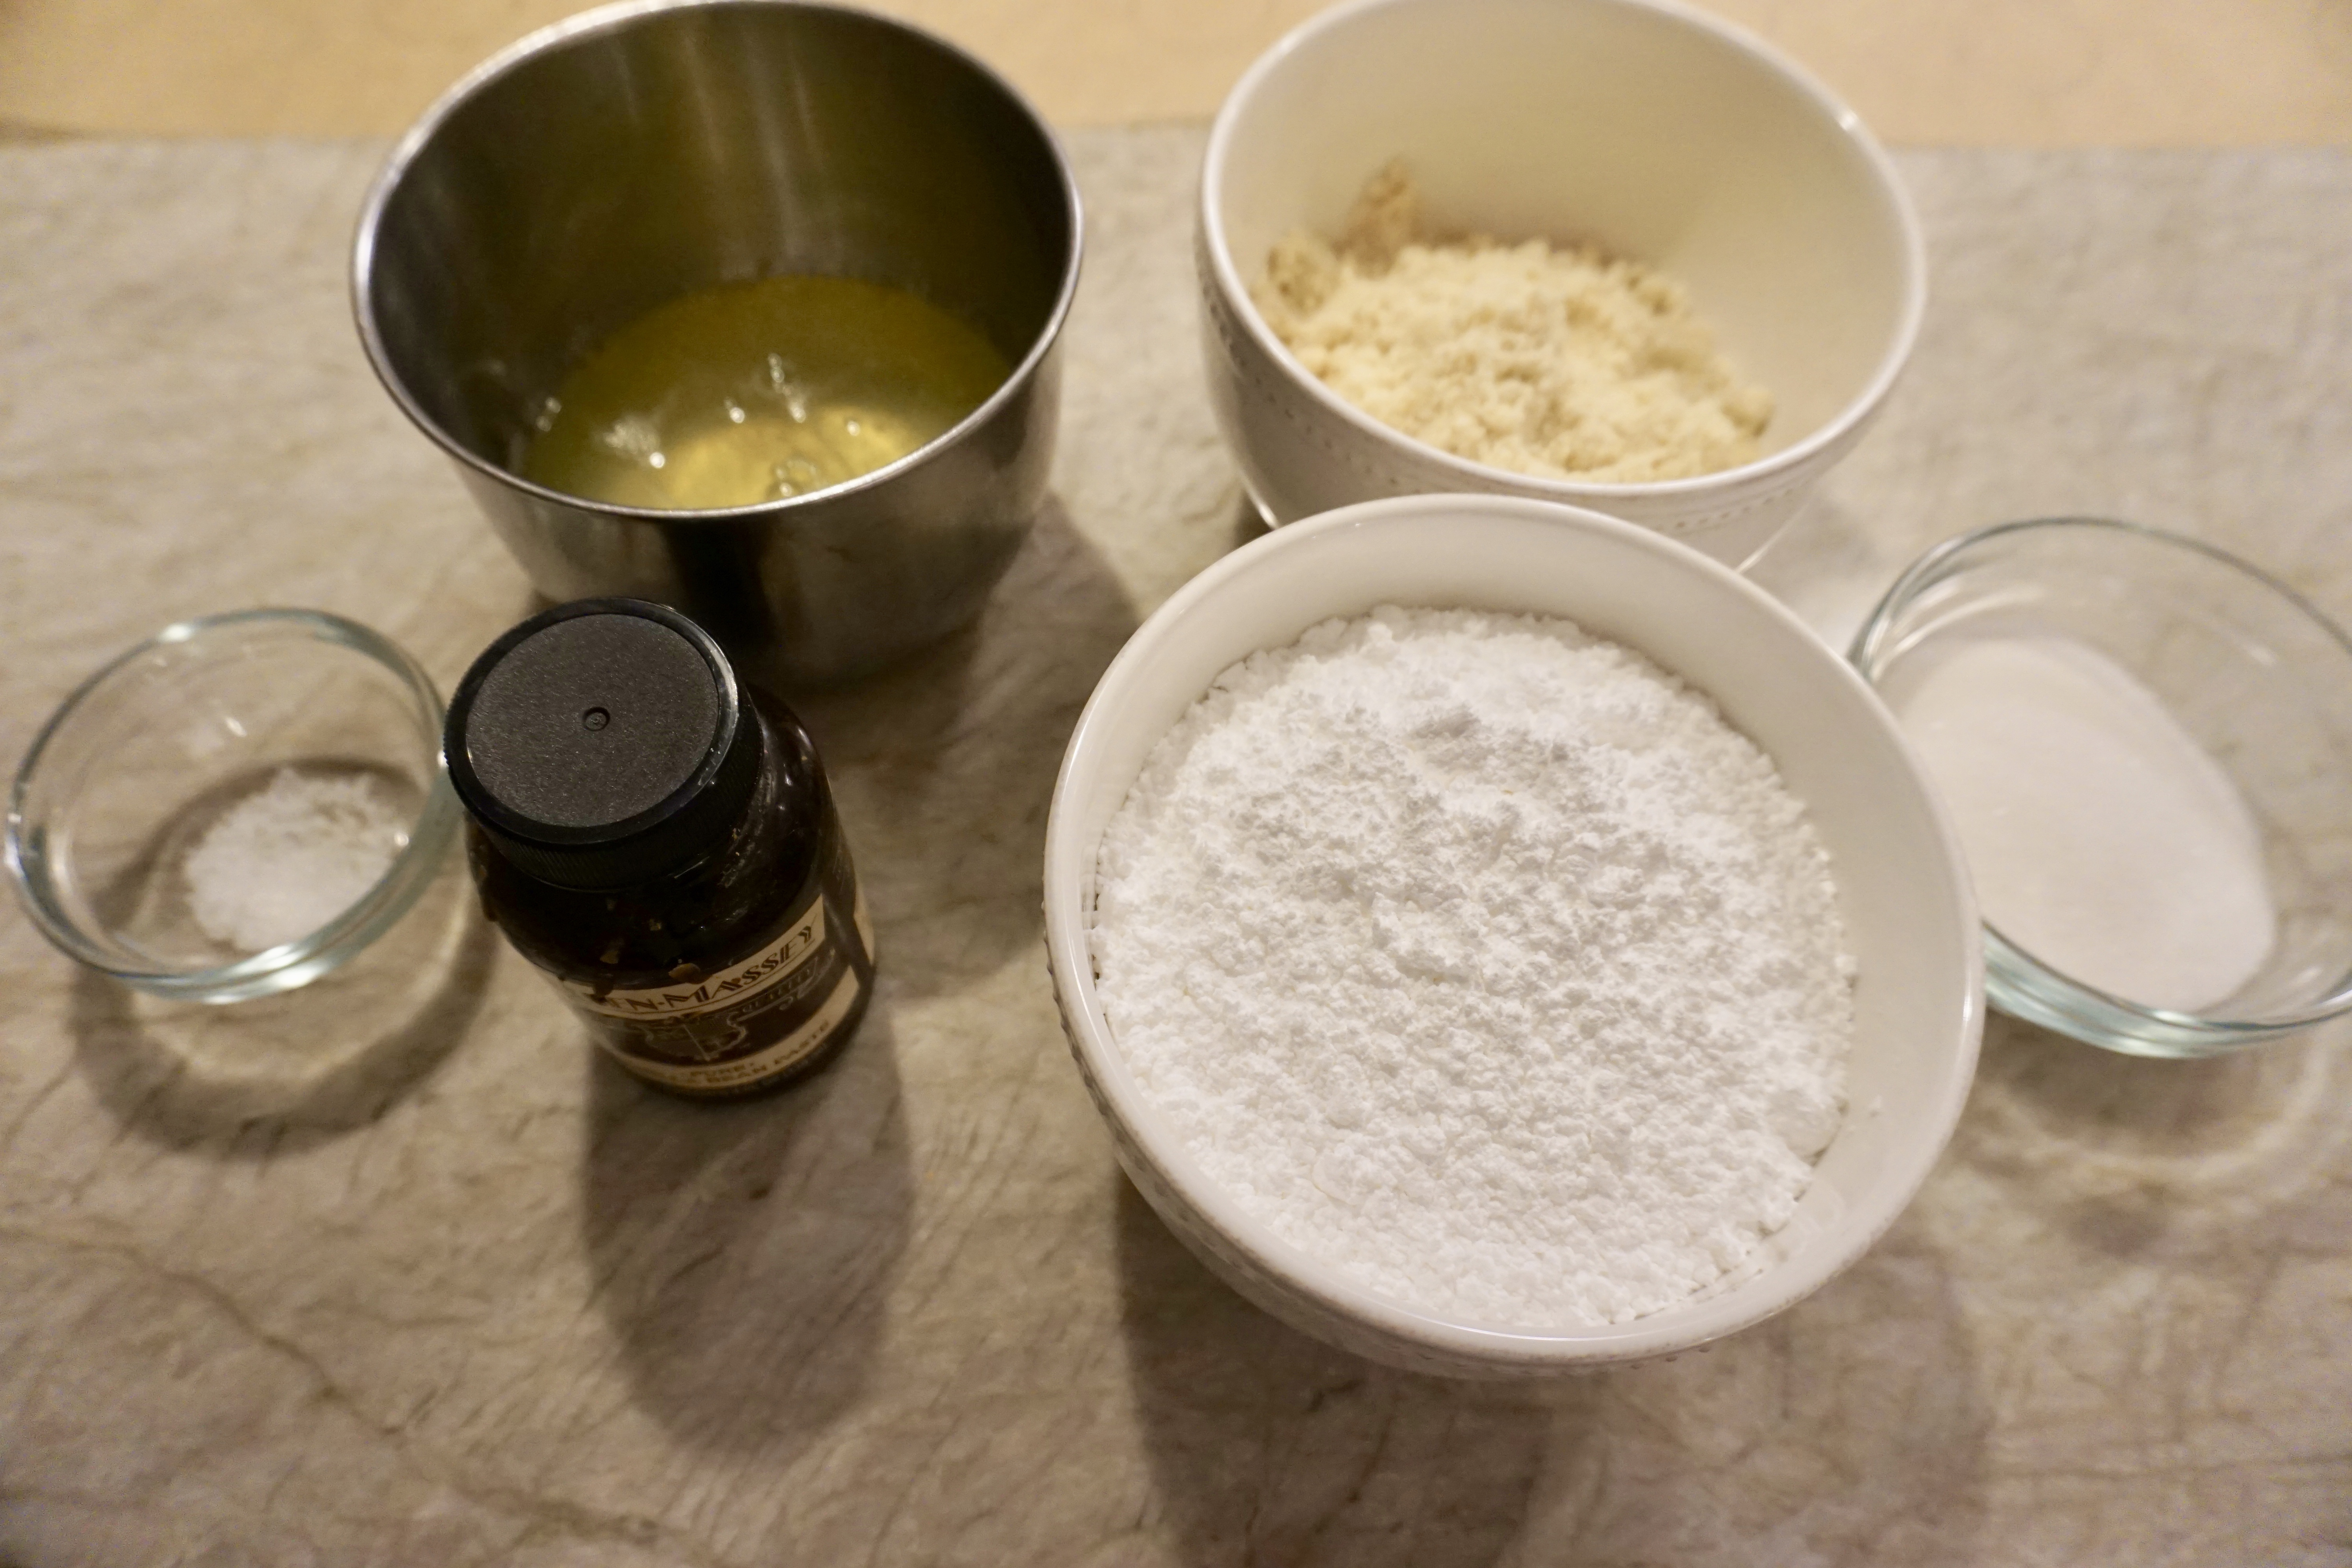
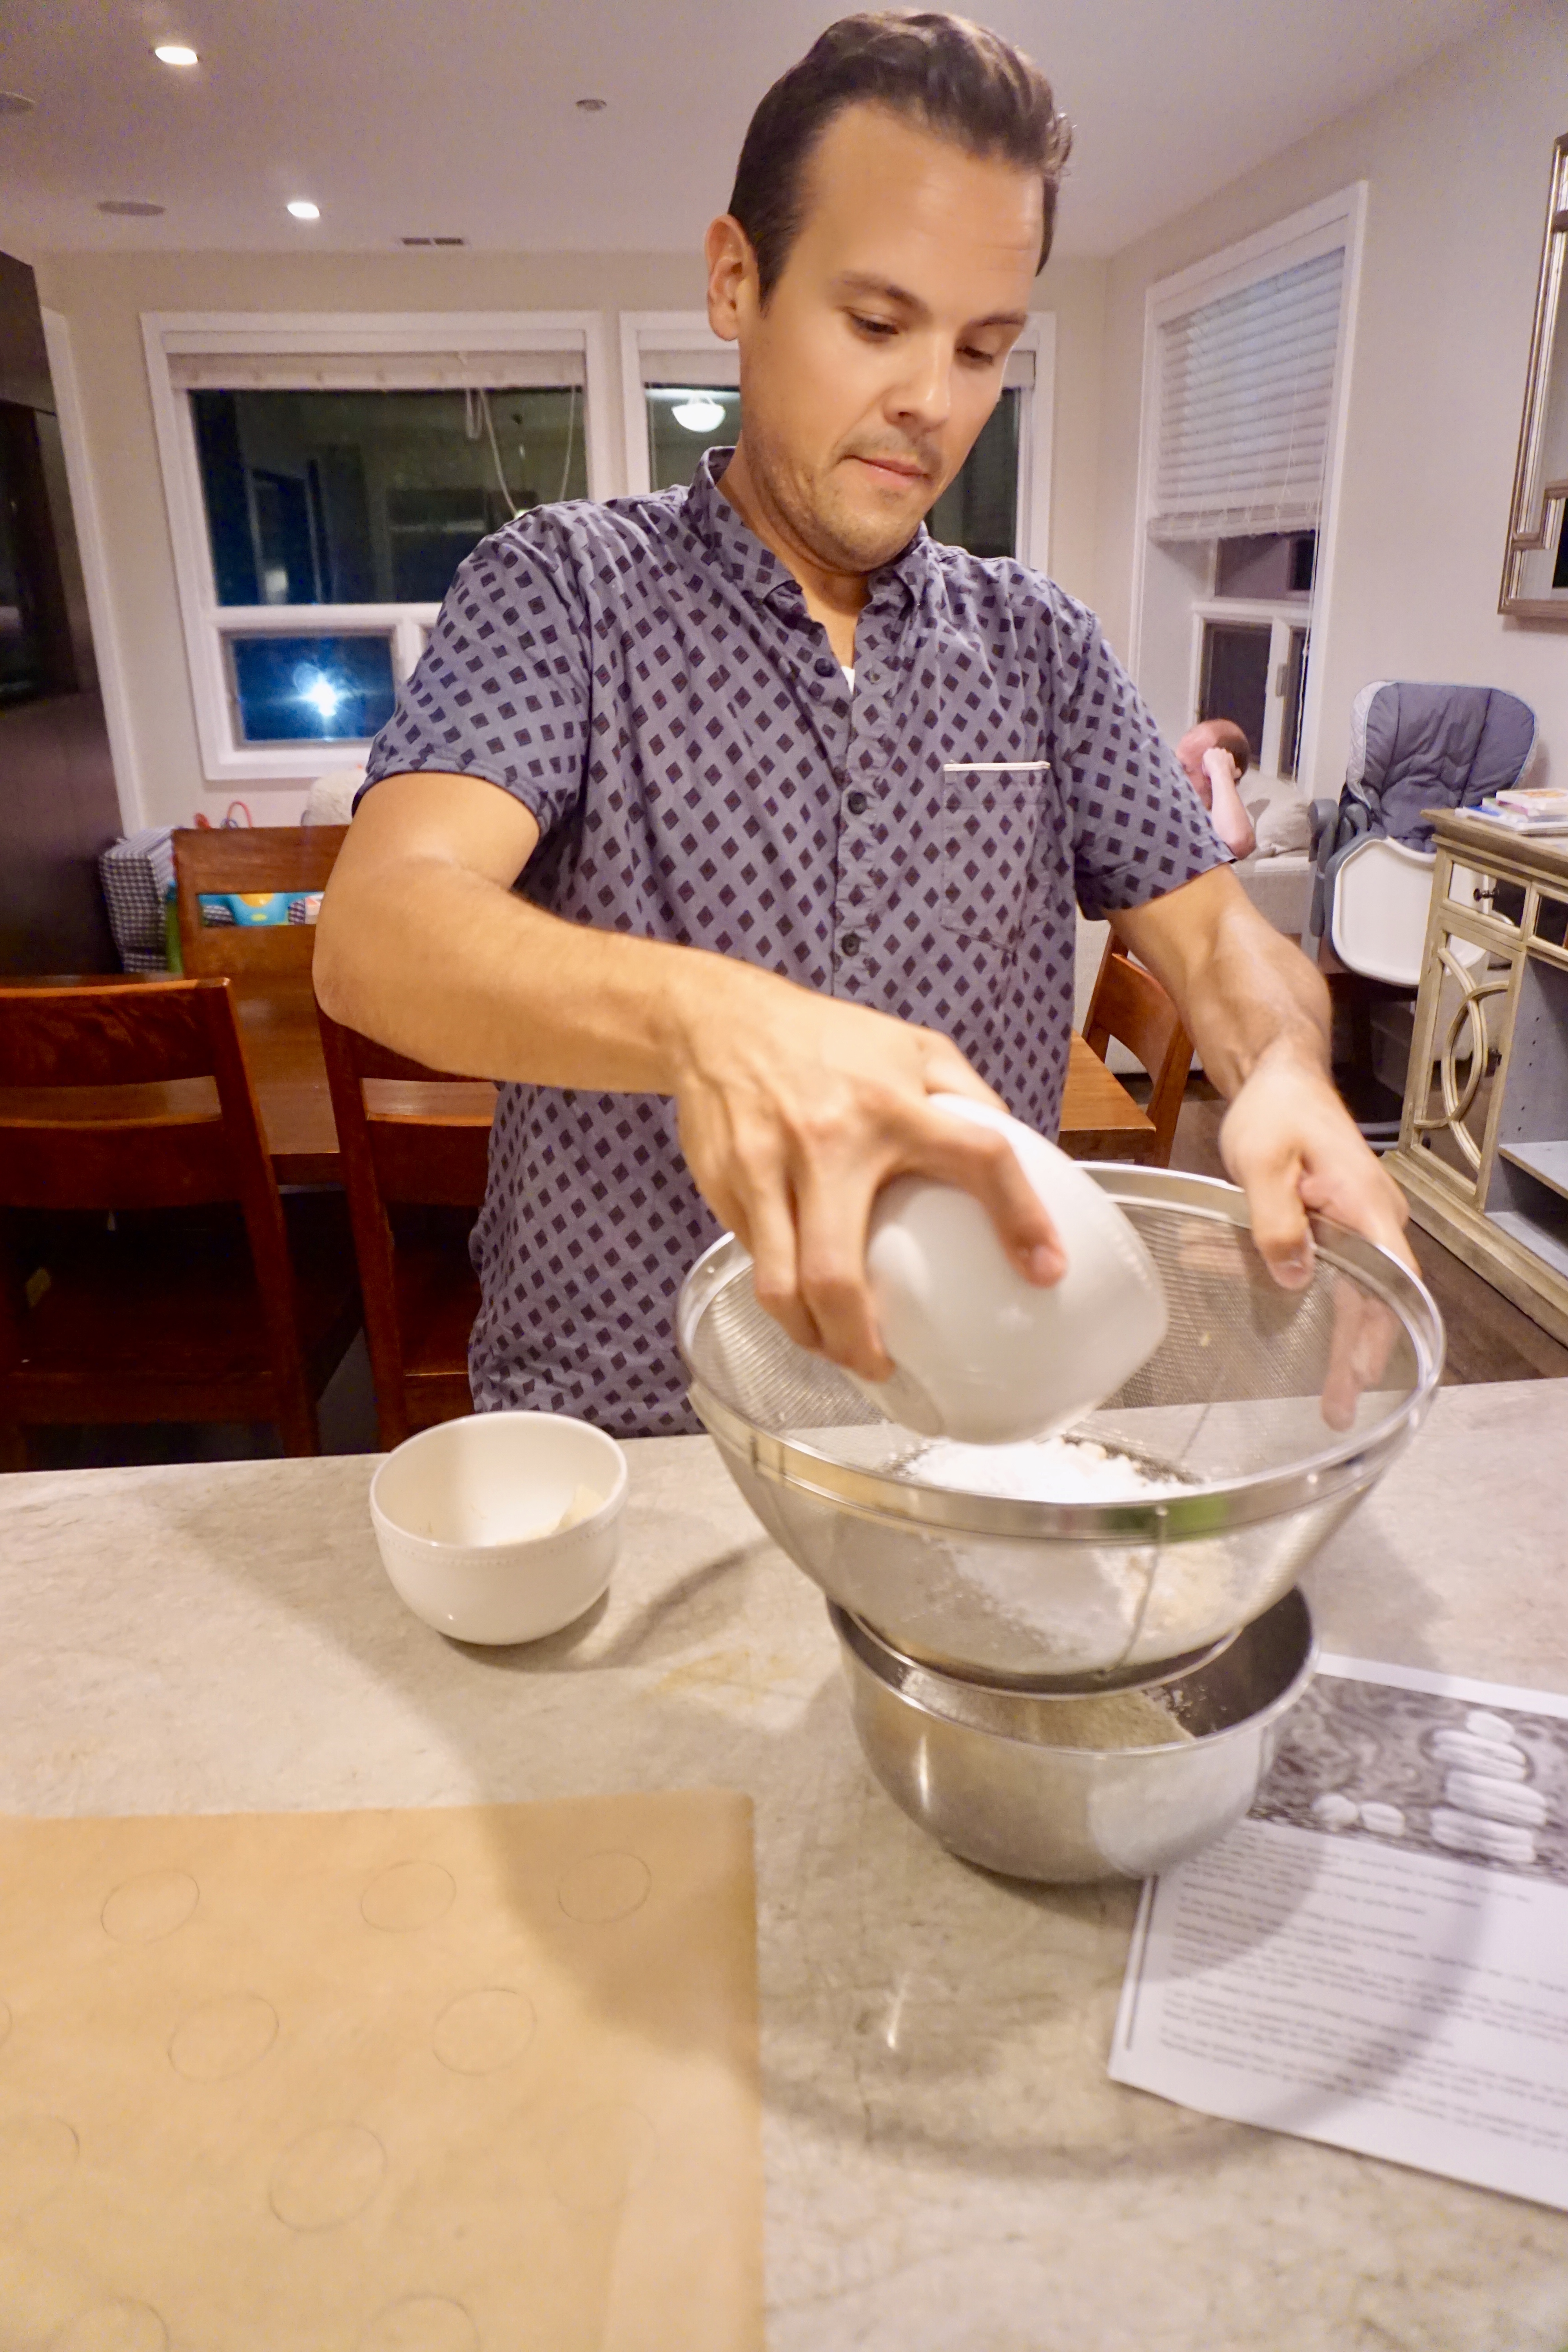

We began by using a digital scale to measure out all our ingredients – almond flour, powdered sugar, egg whites, granulated sugar, vanilla bean extract and kosher salt. We also turned the oven on to 300 F degrees to preheat. Next, David sifted the powdered sugar and almond flour together to make sure there were no big clumps. If there are any big clumps, he pushed them through the fine mesh sieve to break up the clumps. I also prepped a piping bag for each of us. I fitted it with a round #10 wilton tip. I twisted the bottom of the bag and shoved it into the tip. This stops anything from flowing out of it until you are ready to pipe. Then I stuck the tip side of the bag into the bottom of a glass and stretched the top over the glass to make it easy to fill.


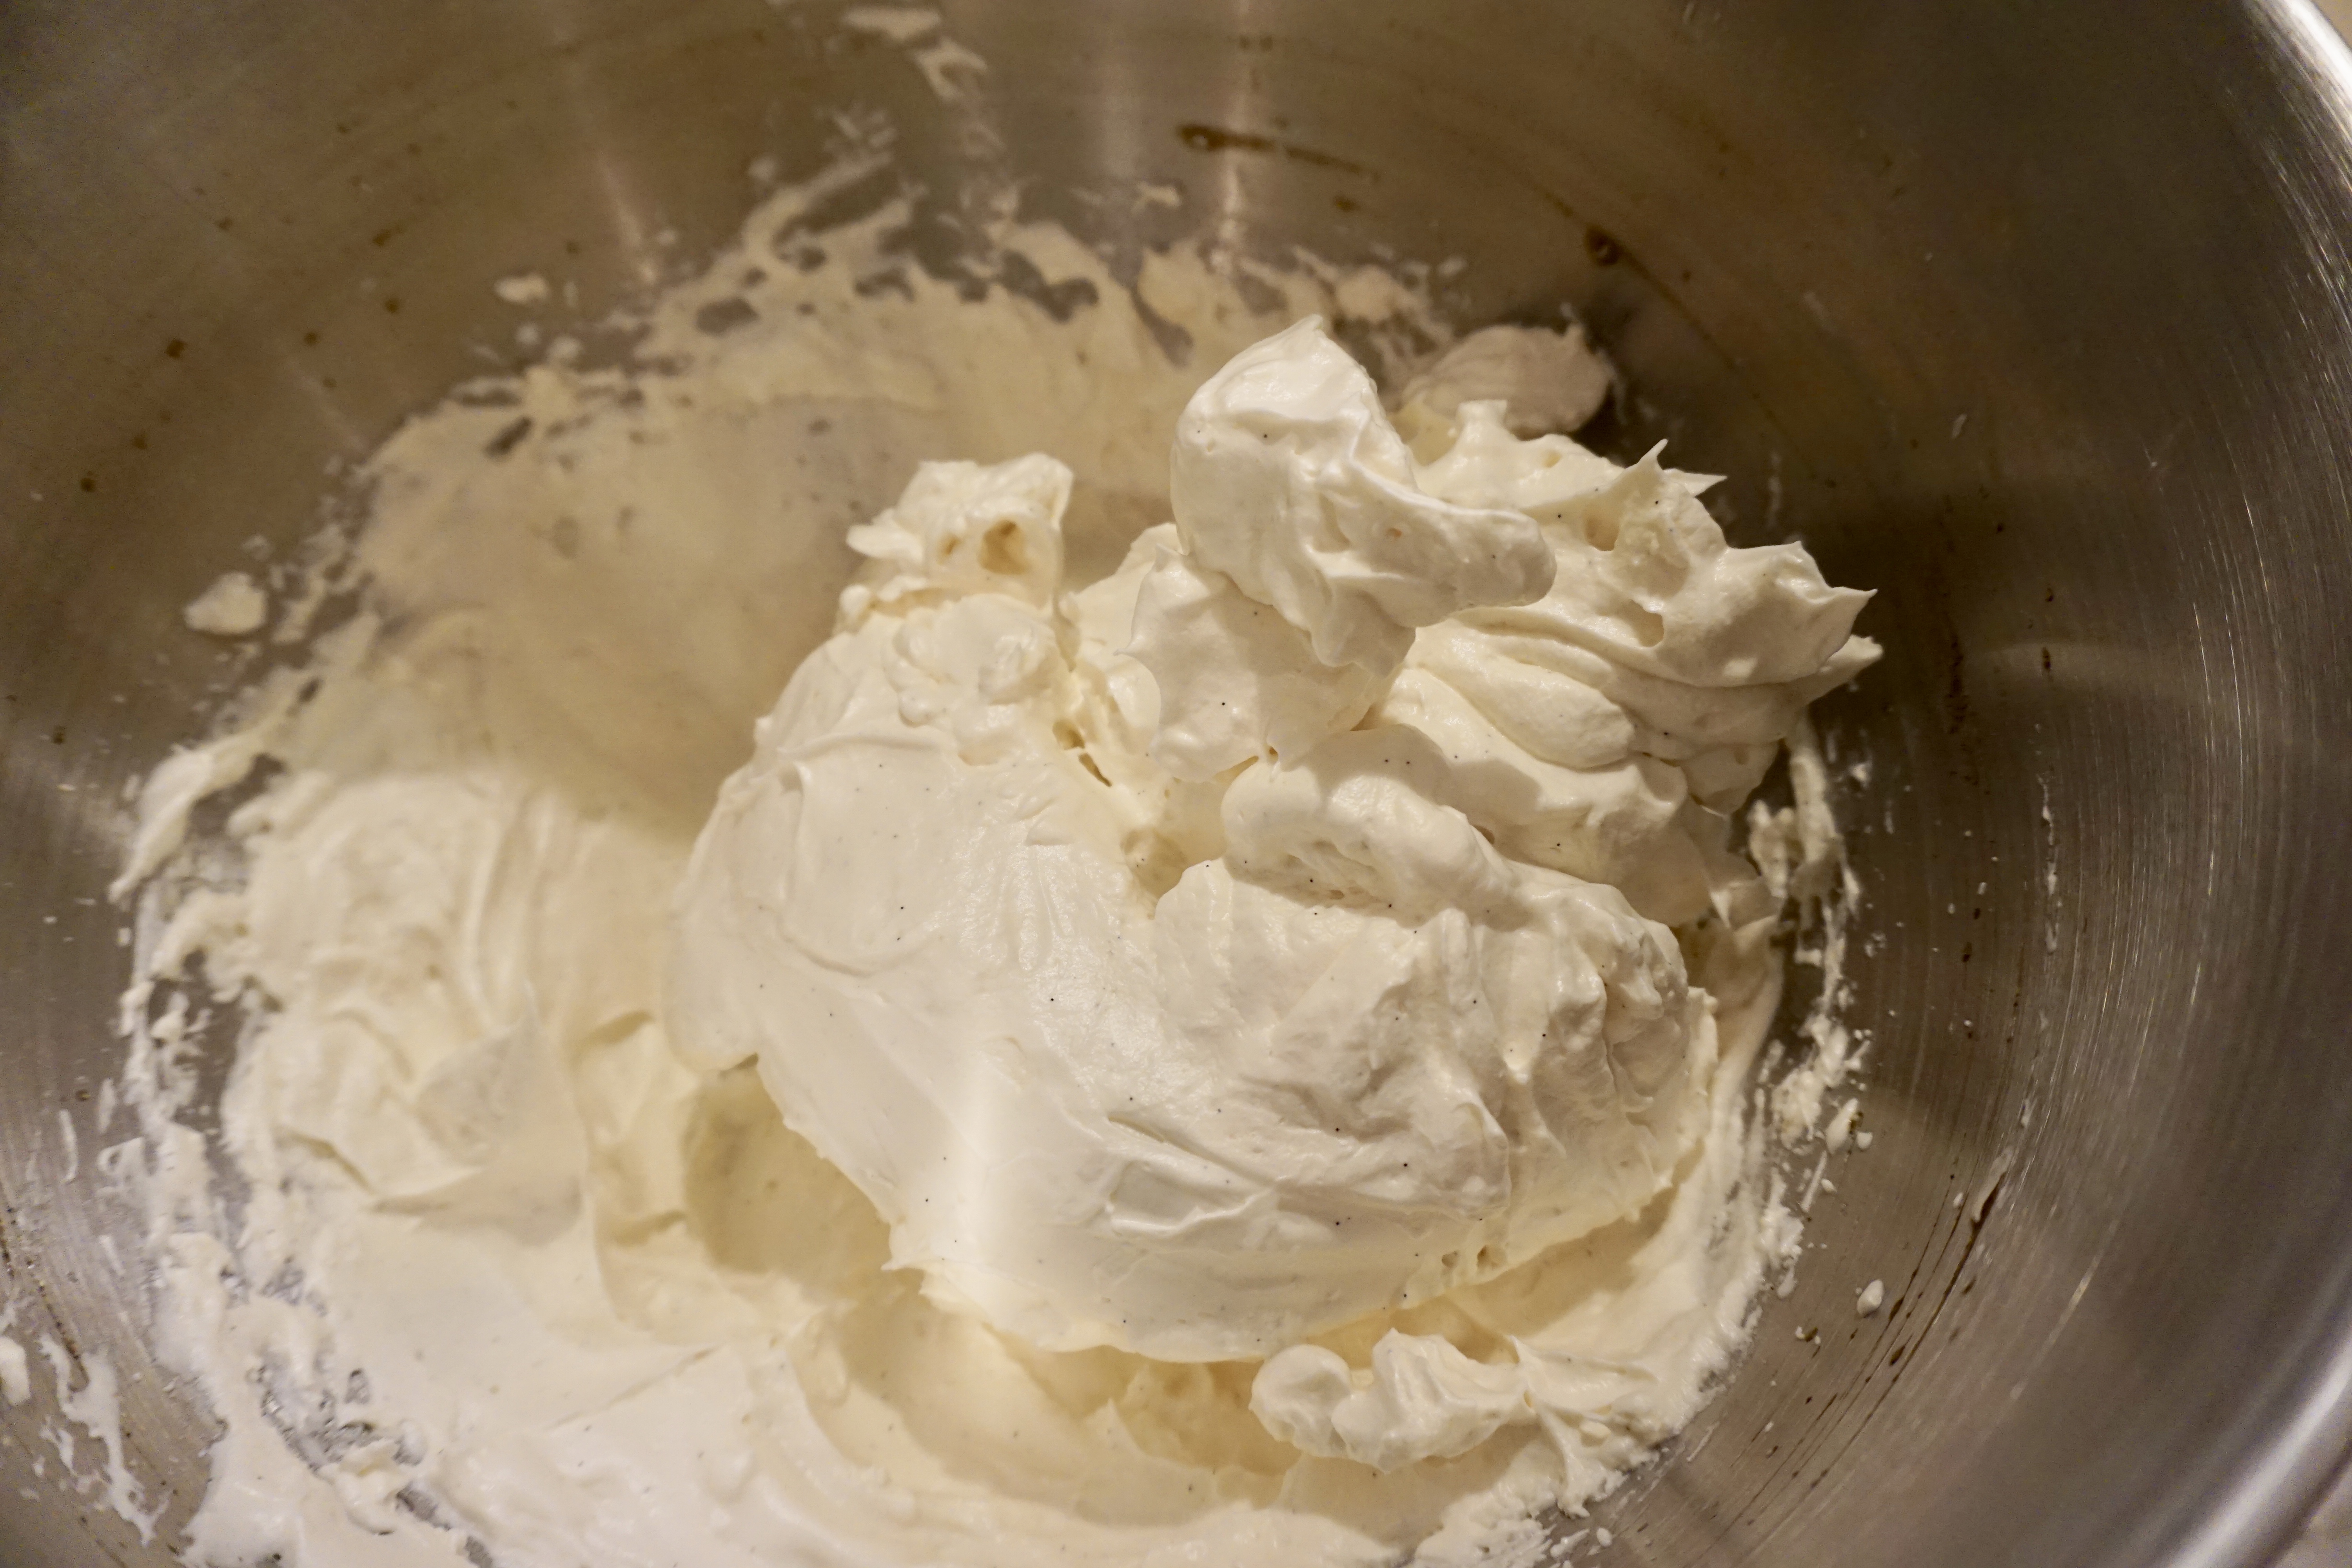

Next, I combined the egg whites, sugar and salt in the stand mixer with the whisk attachment on it. I followed the directions and put the machine on speed 4 for 3 minutes. Then I turned it speed 8 for 3 minutes. After that I mixed in the vanilla bean paste and 3 drops of ivory food coloring (She recommended not adding any color or flavor the first time but we decided to live on the edge and go for it!) Then we turned the mixer on for one more minute at speed 10 and checked to see if we had a big clump of meringue in our whisk…we of course did not….so I cranked it back up to 10 and checked it at the end of each minute and it ended up taking us an additional 3 minutes to get a big clump of meringue.


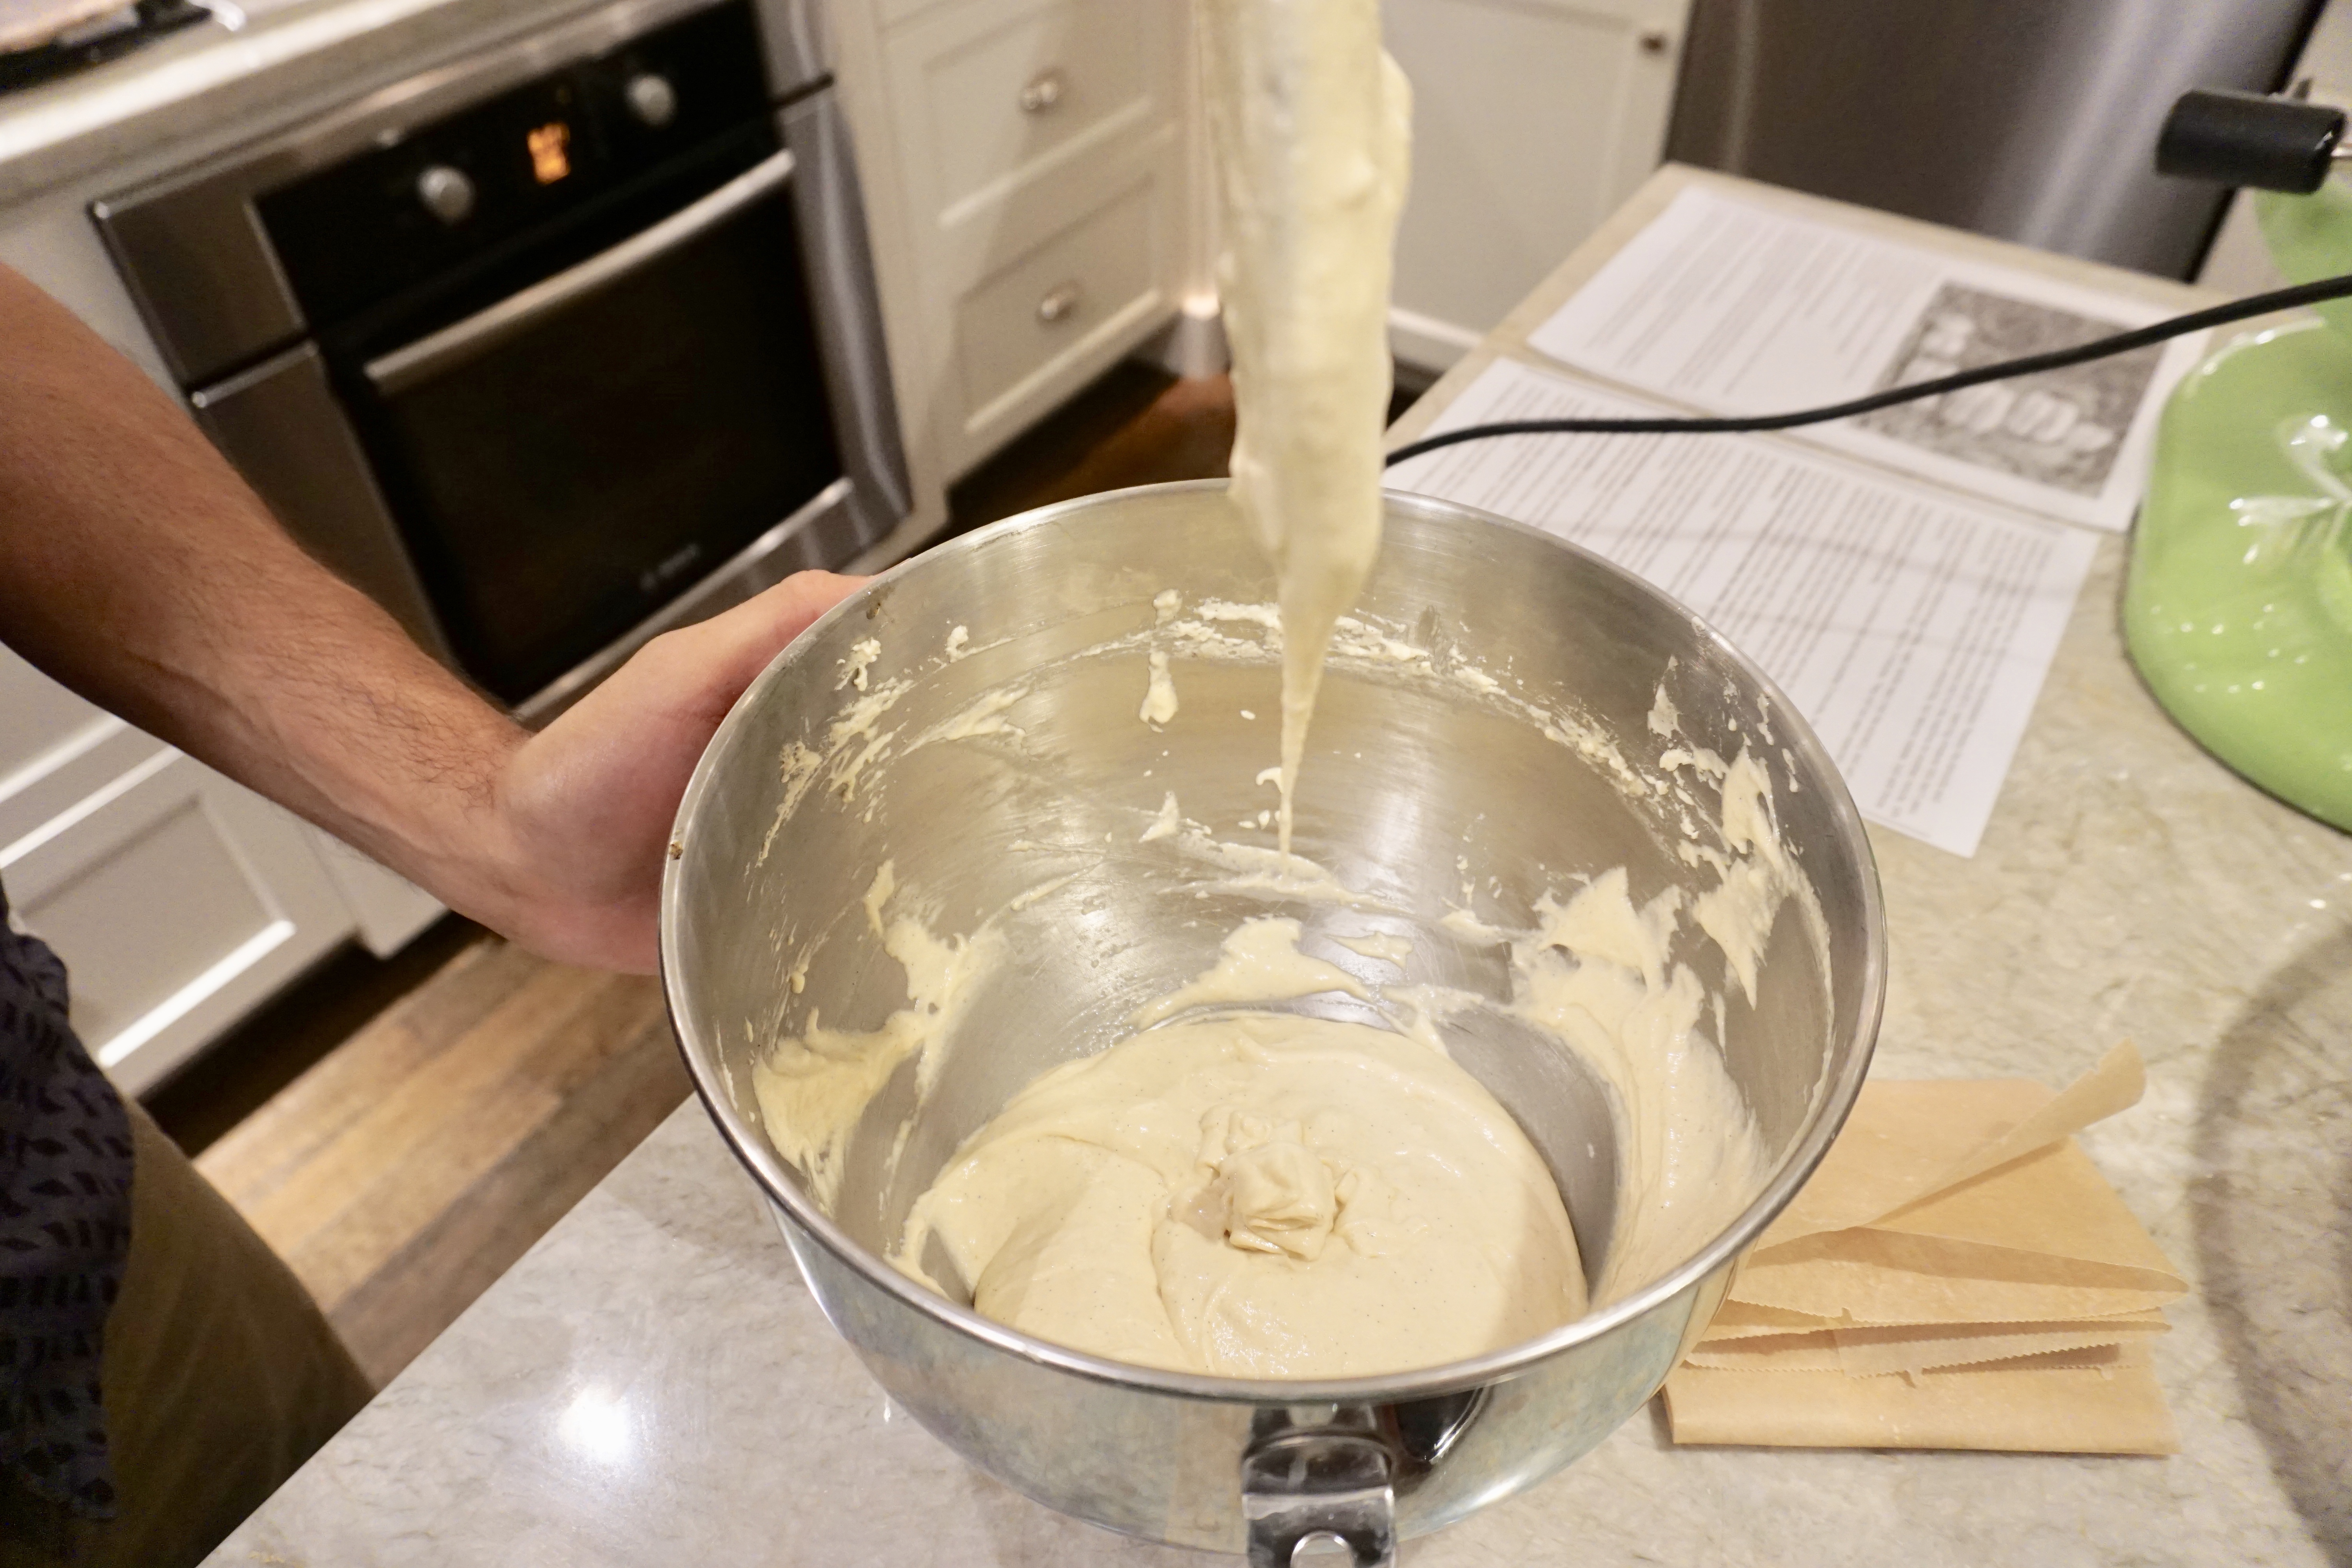
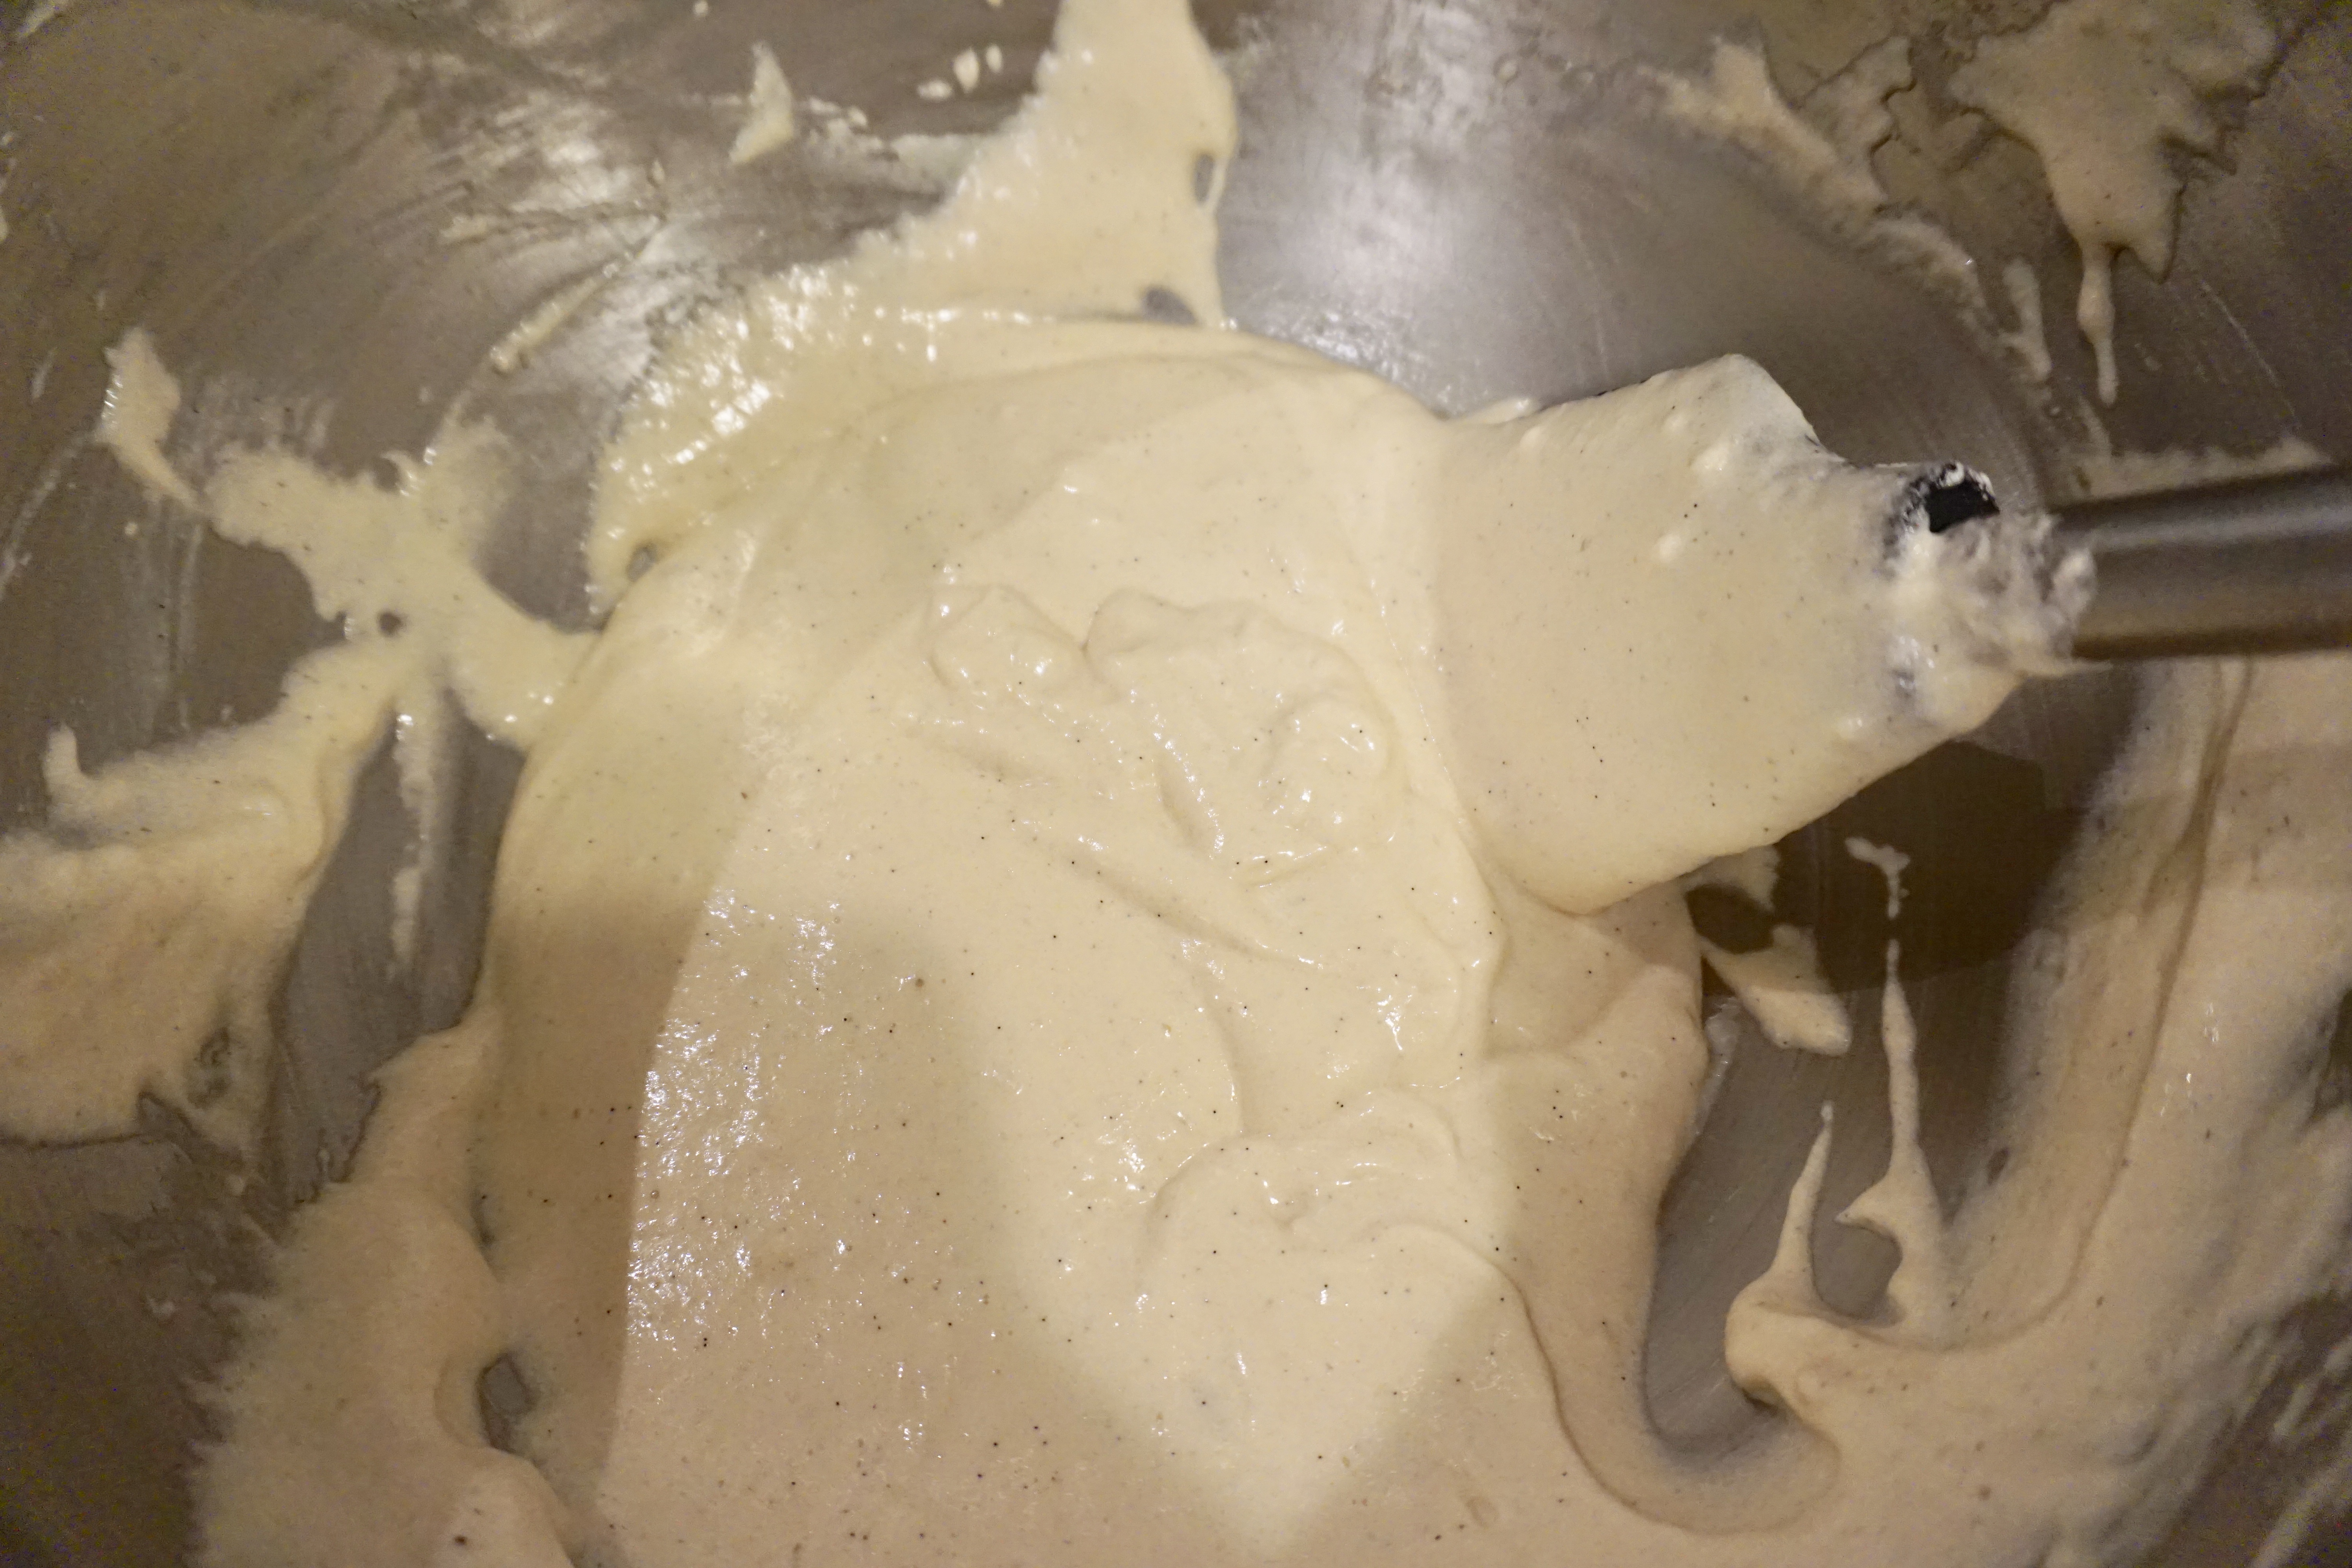
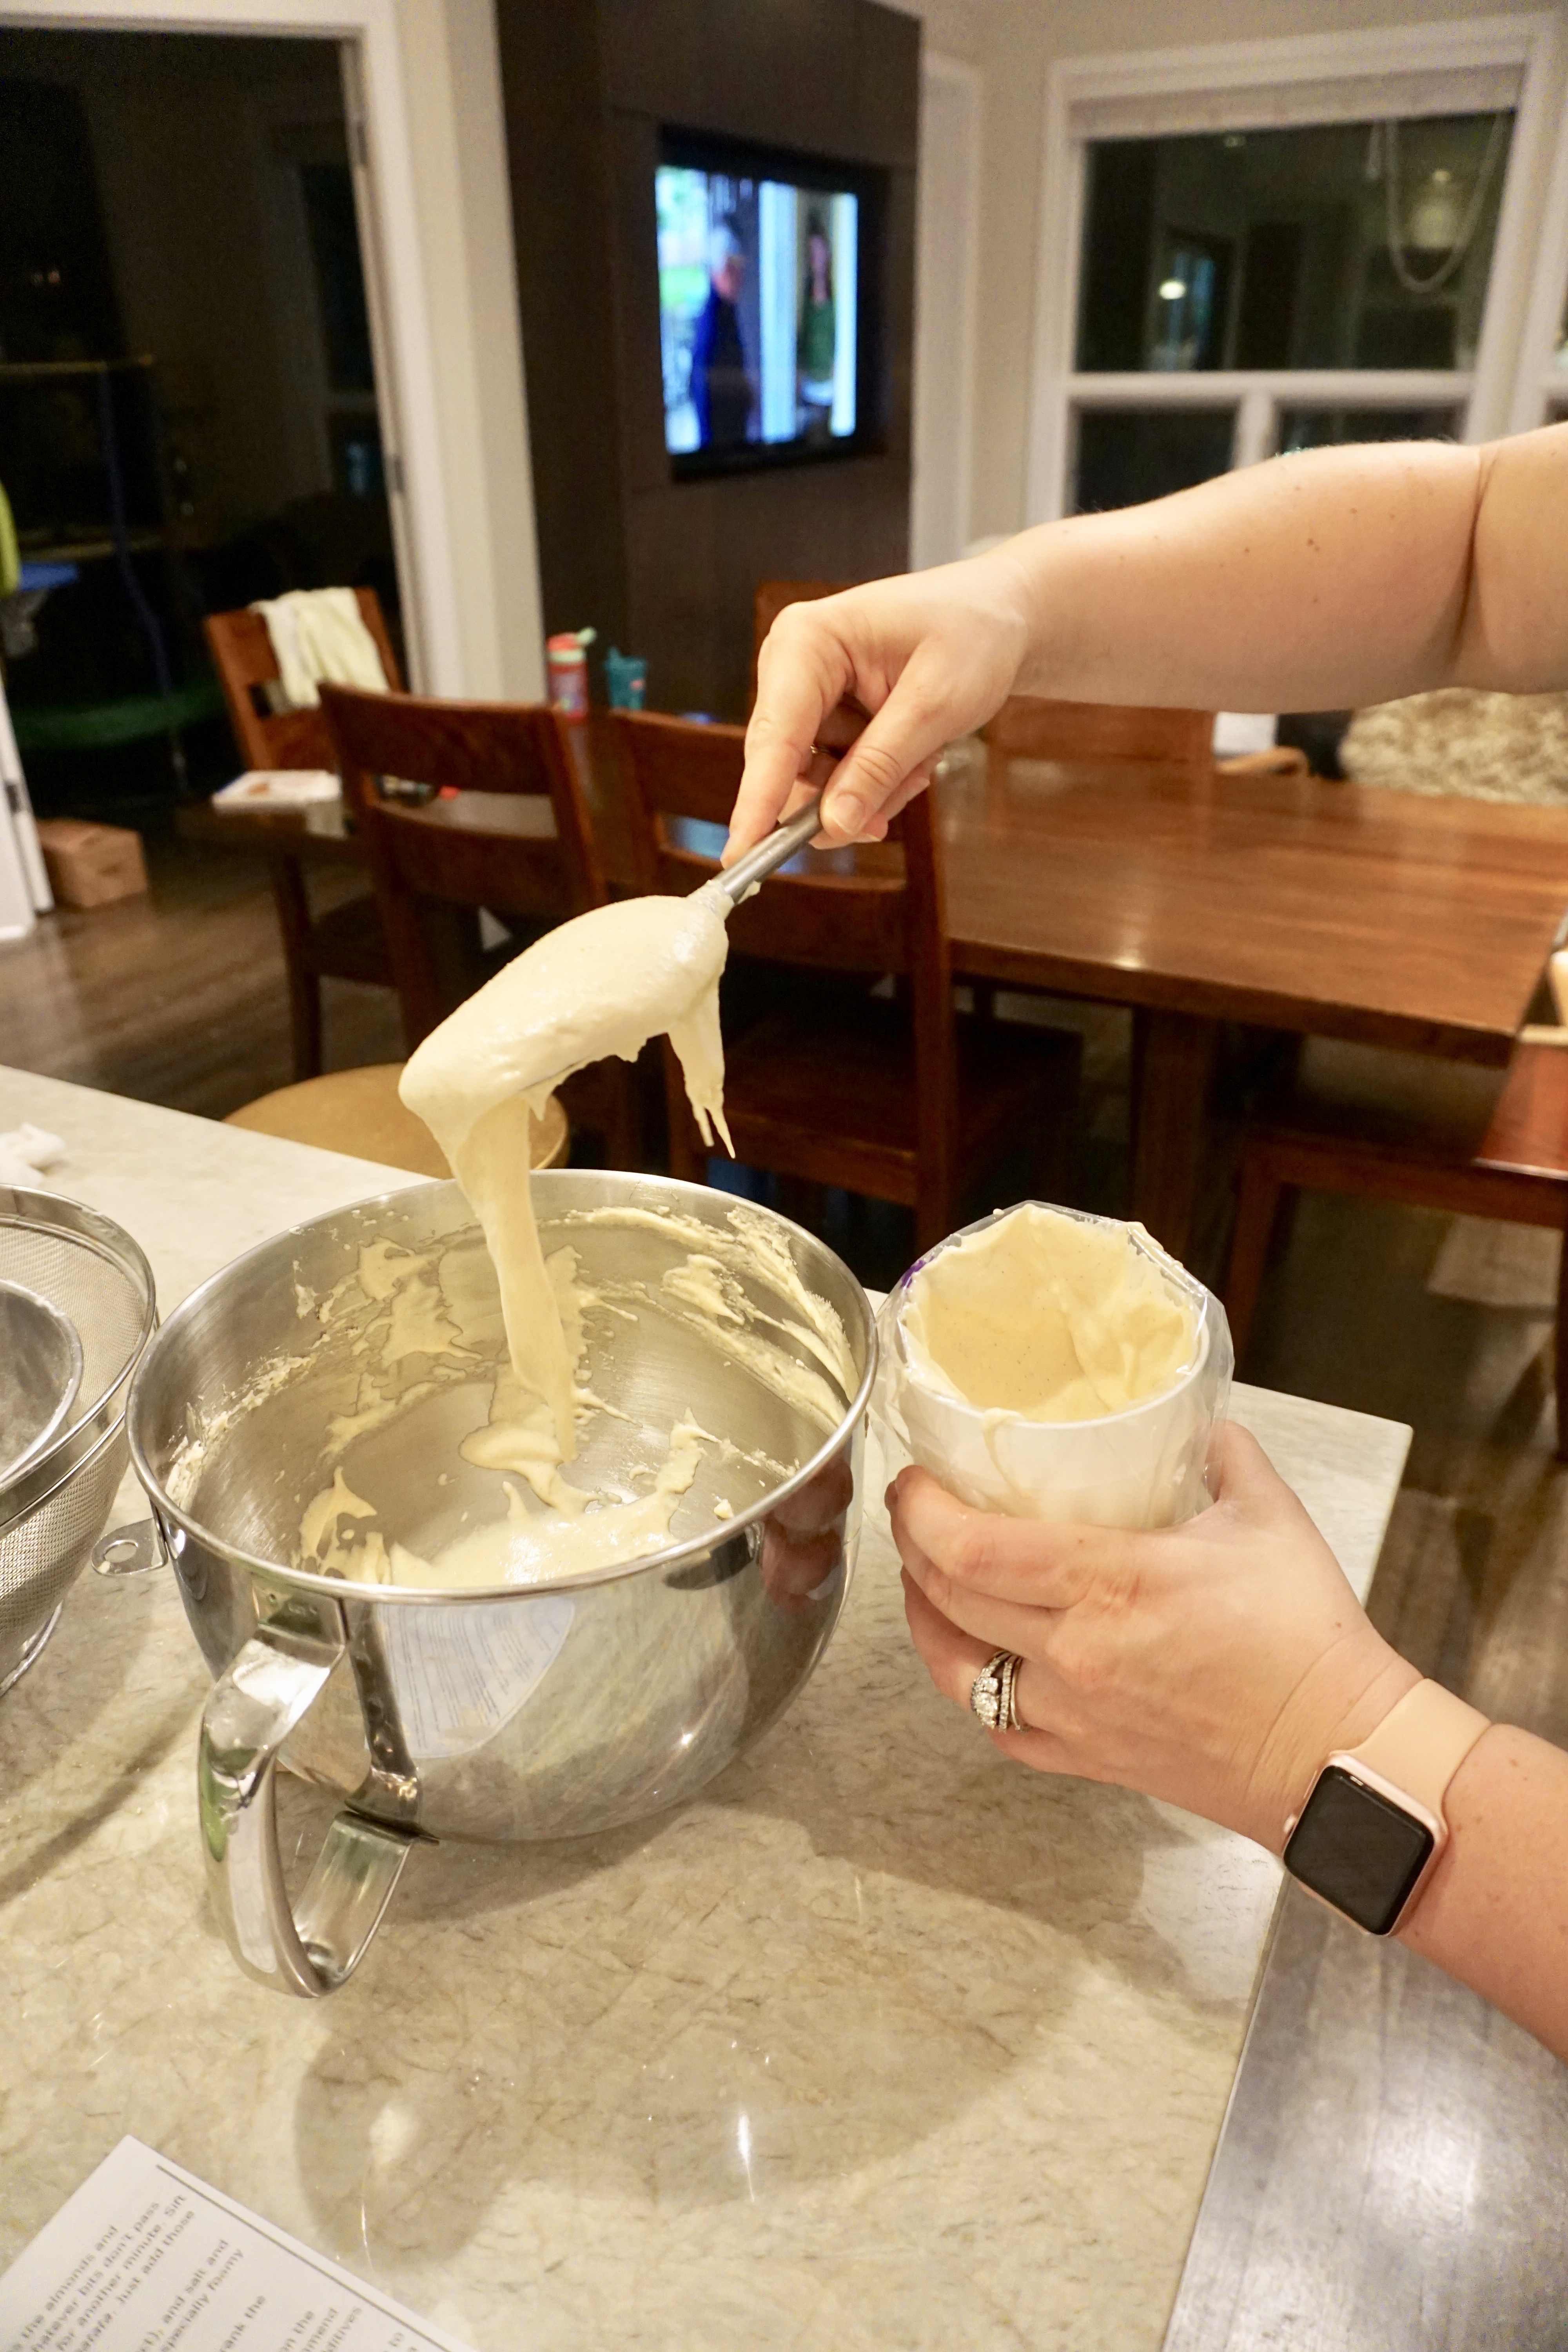
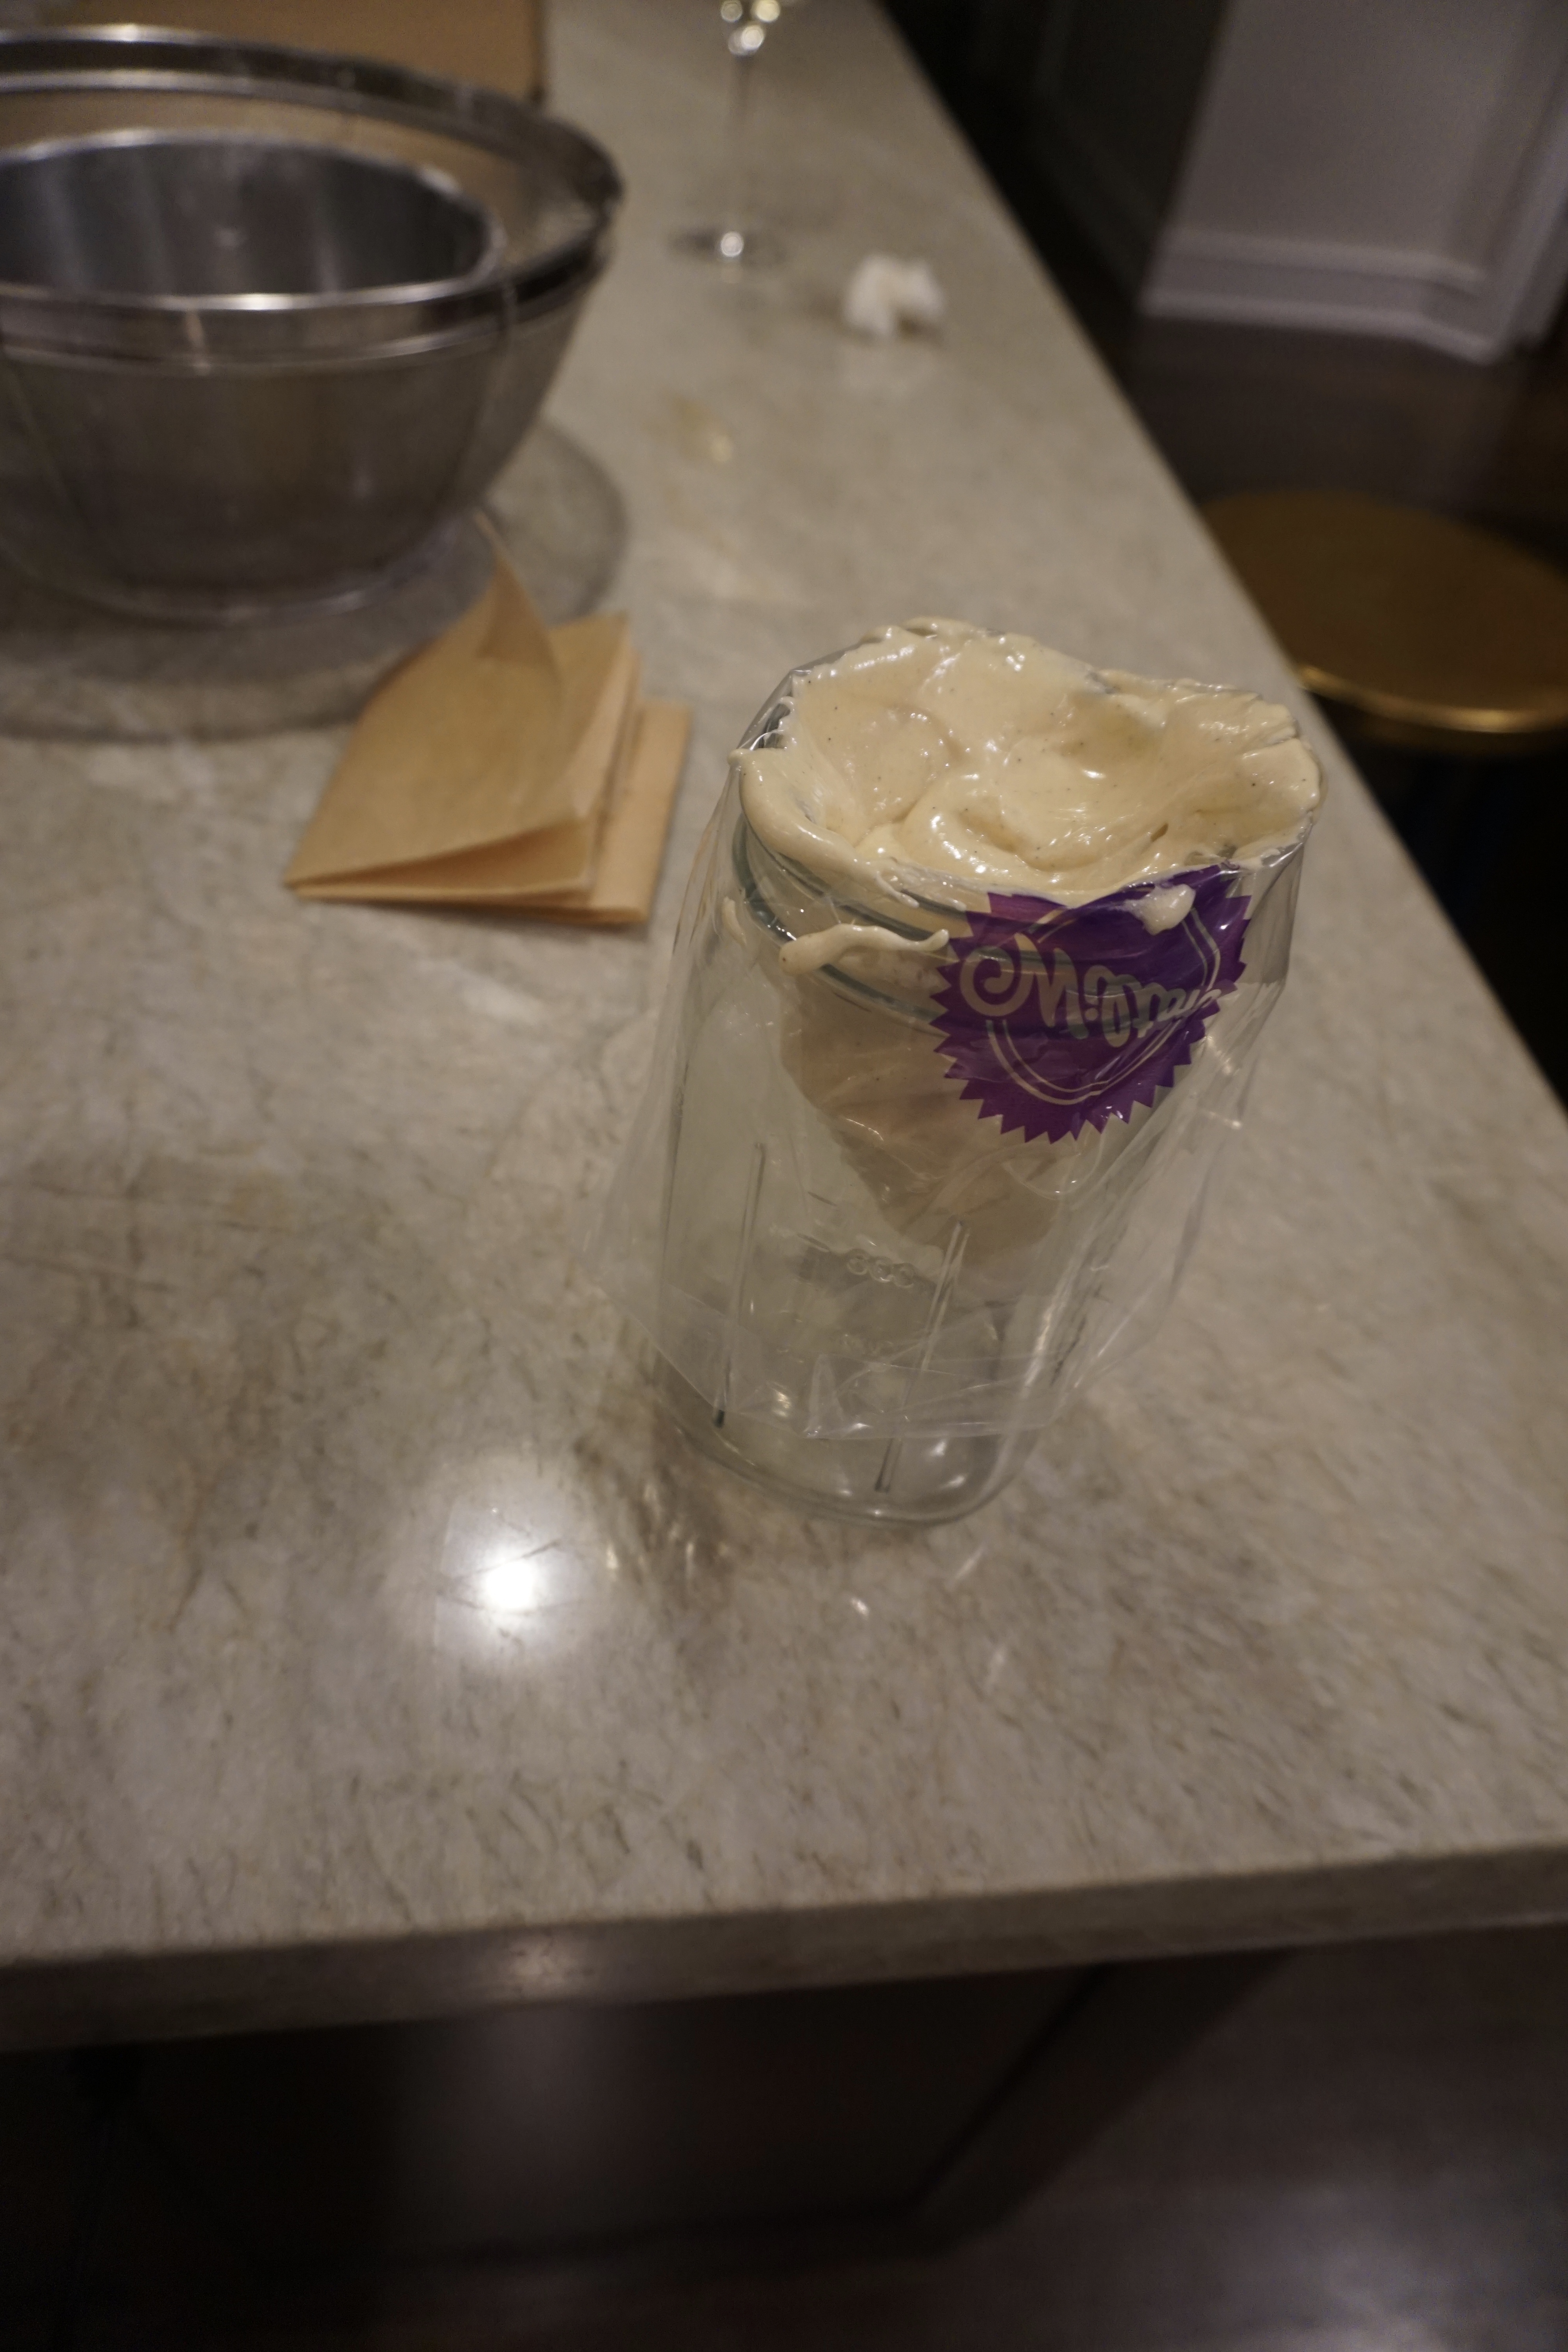
Then, David took over and dumped the powdered sugar and almond flour into the bowl and began folding the mixture together. He ran the spatula around the edge of the bowl and then dragged it though the middle of the mixture. We stopped to check it out after 25 strokes. Then he began to fold and drag a little more aggressively for the next 15 strokes. We checked to see if the mixture would flow off the spatula like lava but instead it kind of just flopped back into the bowl. We knew we needed another few strokes so David folded 5 more times and we checked it. It flowed better, but didn’t sink back into the mixture within 20 seconds. 3 more strokes and we had it! It flowed off the spatula like lava and the trail that went back in the bowl disappeared after 20 seconds (don’t worry I counted…) Knowing that the mixture was as “right” as I could expect it to be at that point, I scooped it into the prepared piping bags and got ready for piping the macarons.
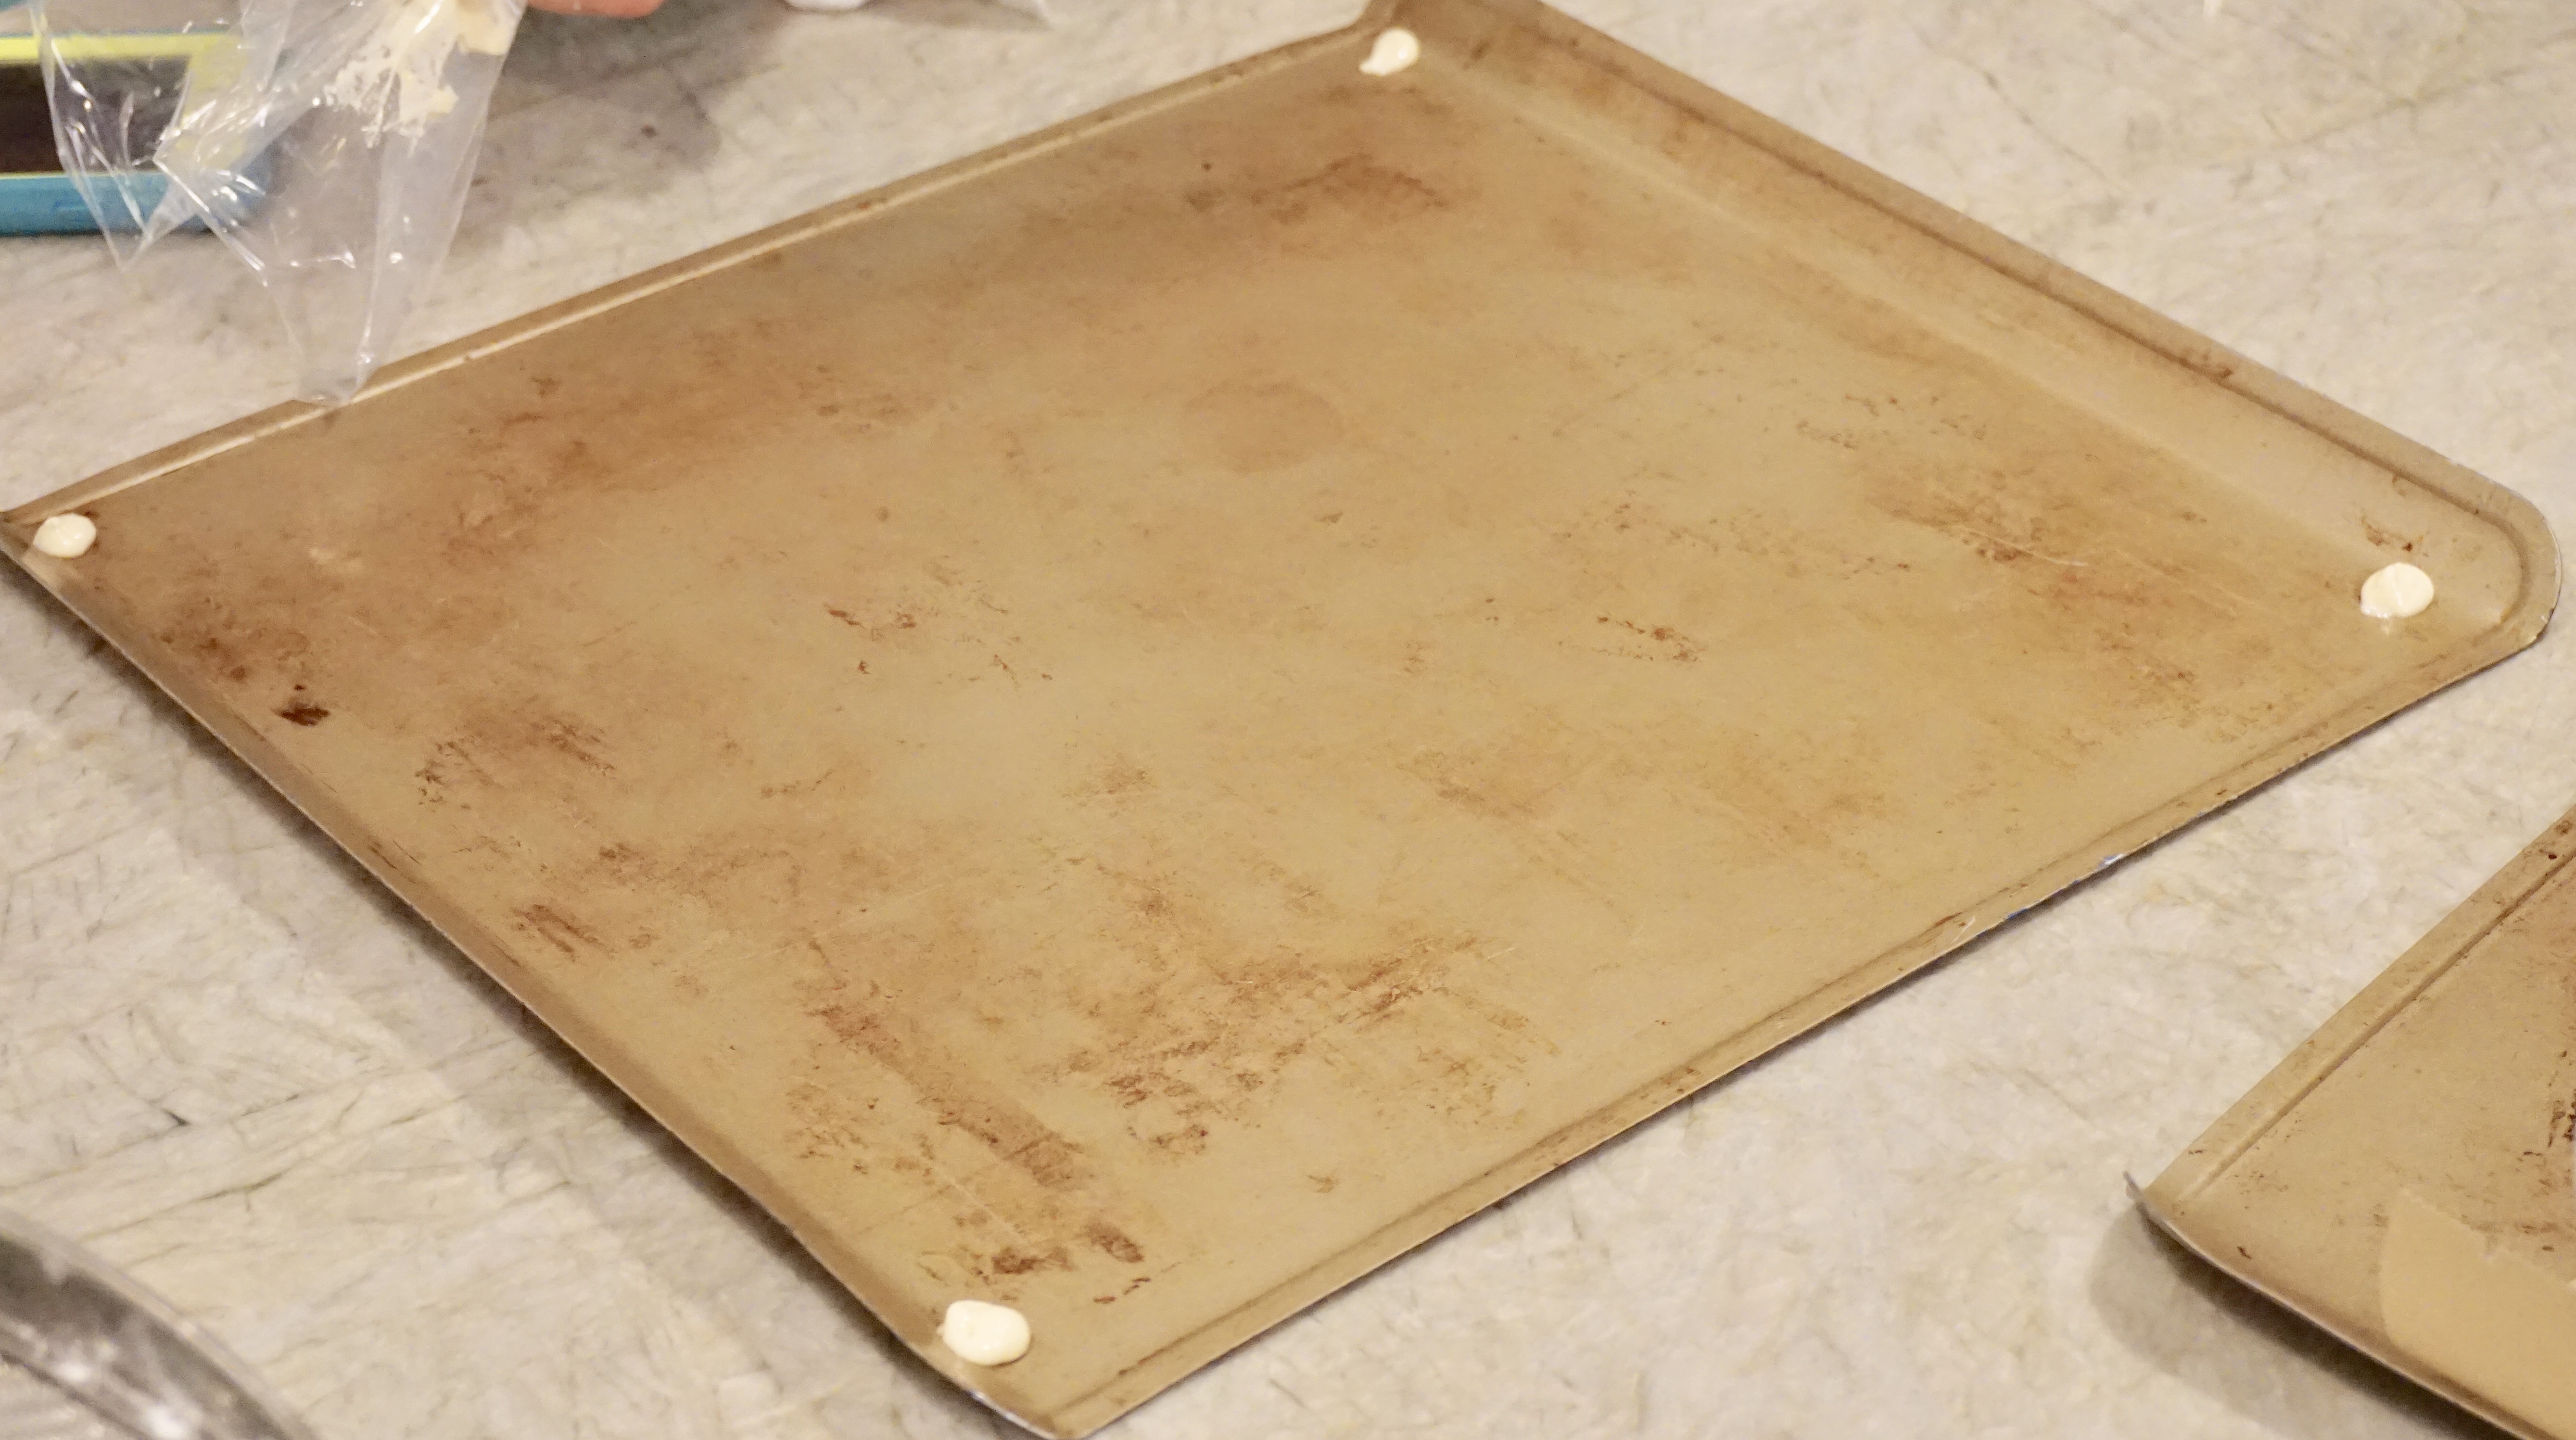
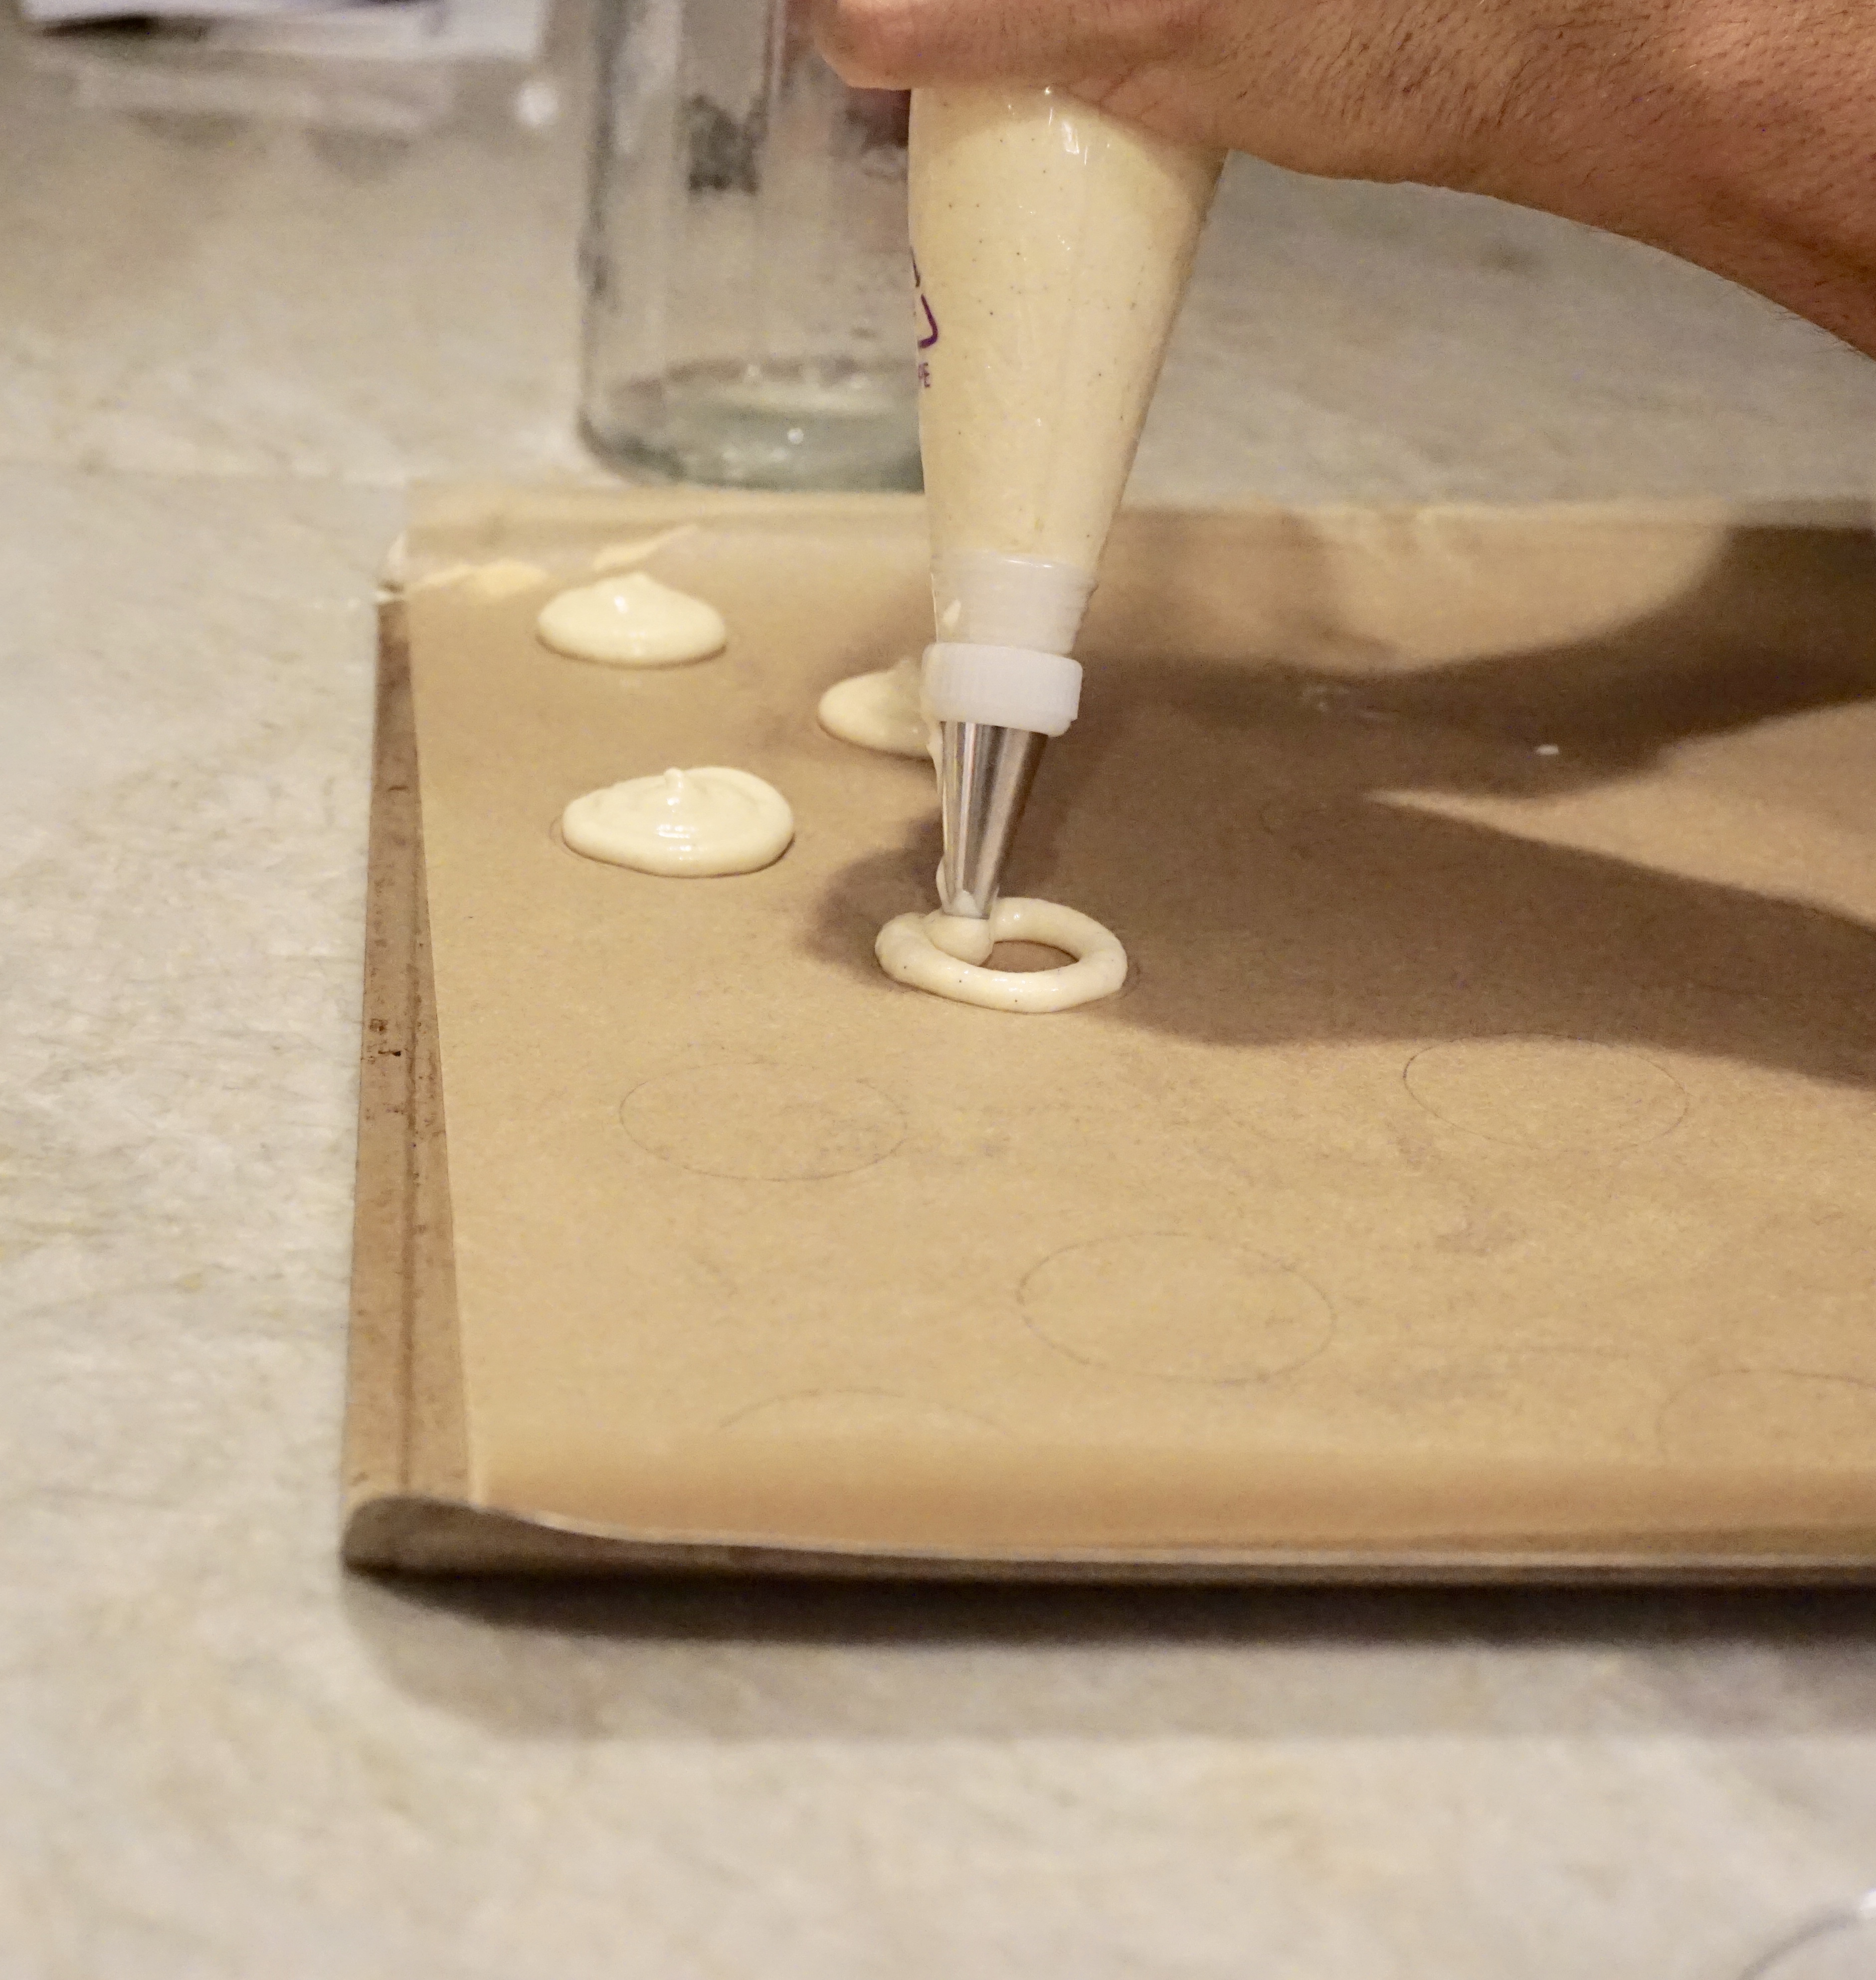


We put four quick dots of mixture in the corners of the pan before putting down the parchment paper. Earlier in the night, David traced 1 1/2 inch off-set circles on the parchment paper with pencil and then we flipped it over before sticking it to the tray. This gave us a nice guide for where to pipe the macarons. We tried different piping techniques. Piping from the side with the tip at a 45 degree angle to the tray, piping a swirl from the inside out, piping from the outside in…you name it- we tried it. After they were all piped we gave each side of the tray a good whack, by picking it up and banging it squarely on the counter. Then we turned the tray and did it again on each side. This helps work out any air bubbles which might cause the macarons to crack when they are baking. Here we strayed away from the recipe a little and let our macarons sit for about 25 minutes while the oven came to temperature. During this time we made Swiss meringue buttercream. I’m not going to go into details on making it here, but you can find the recipe in my vanilla+vanilla+sprinkles recipe.
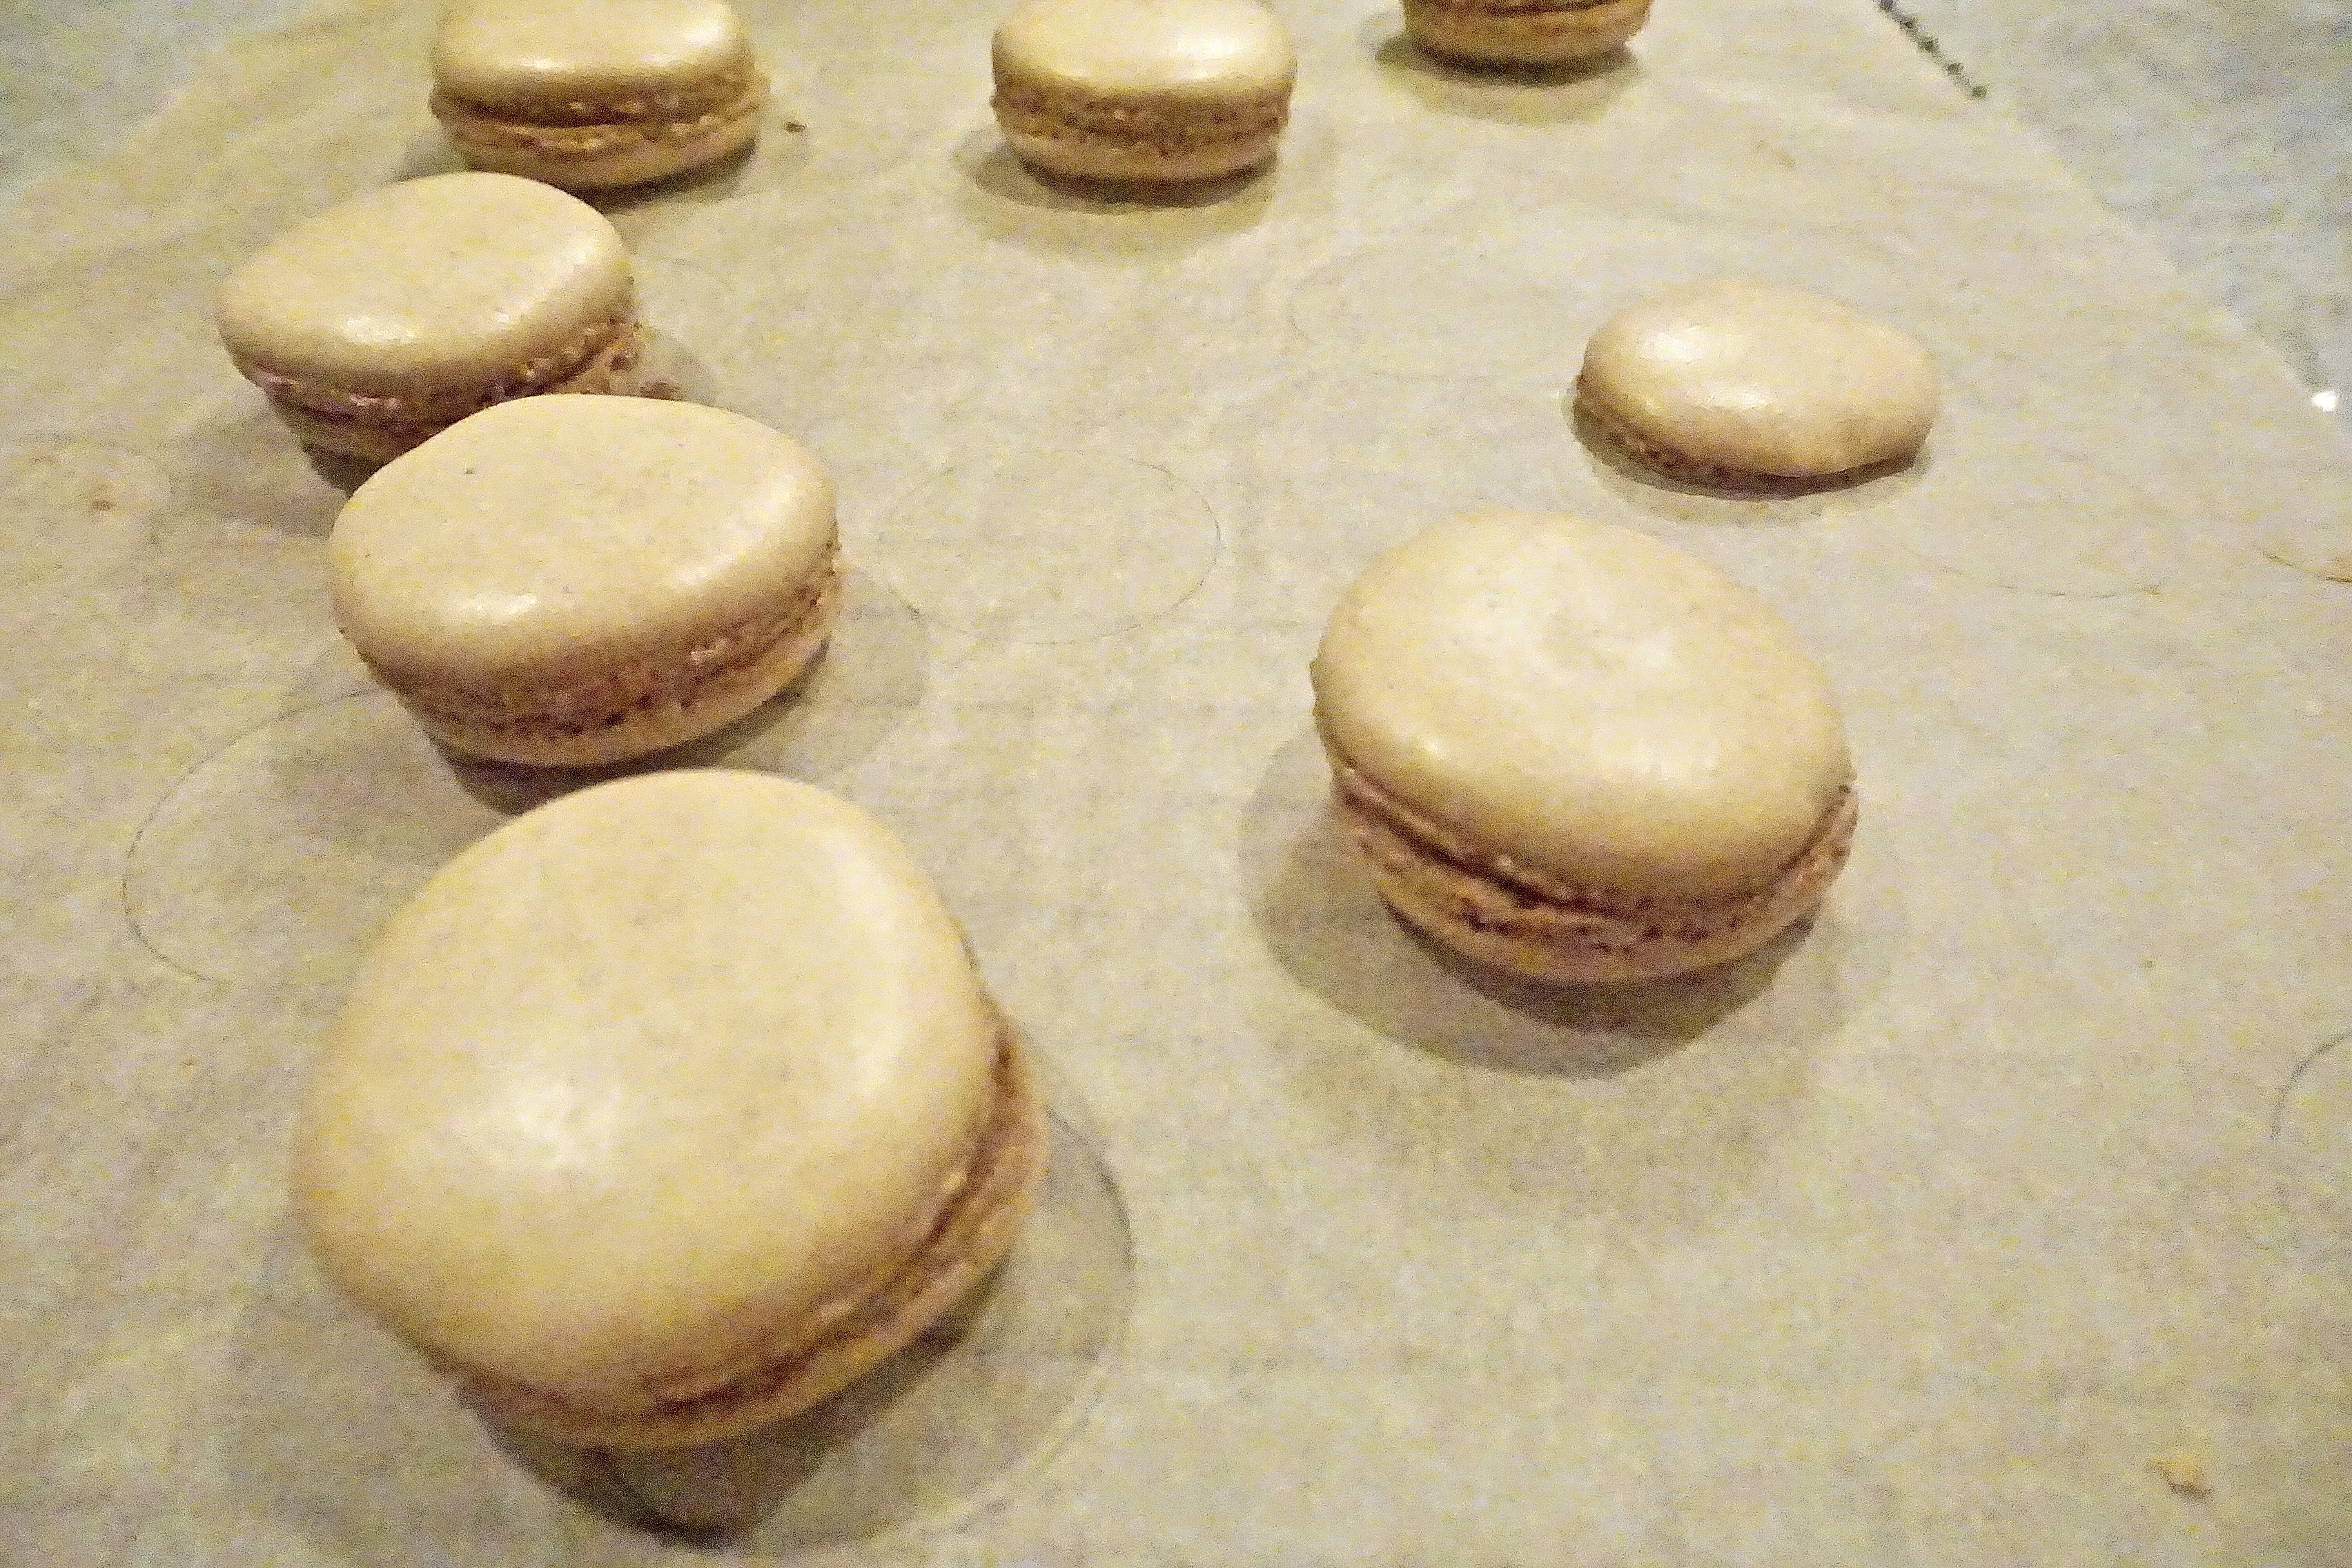
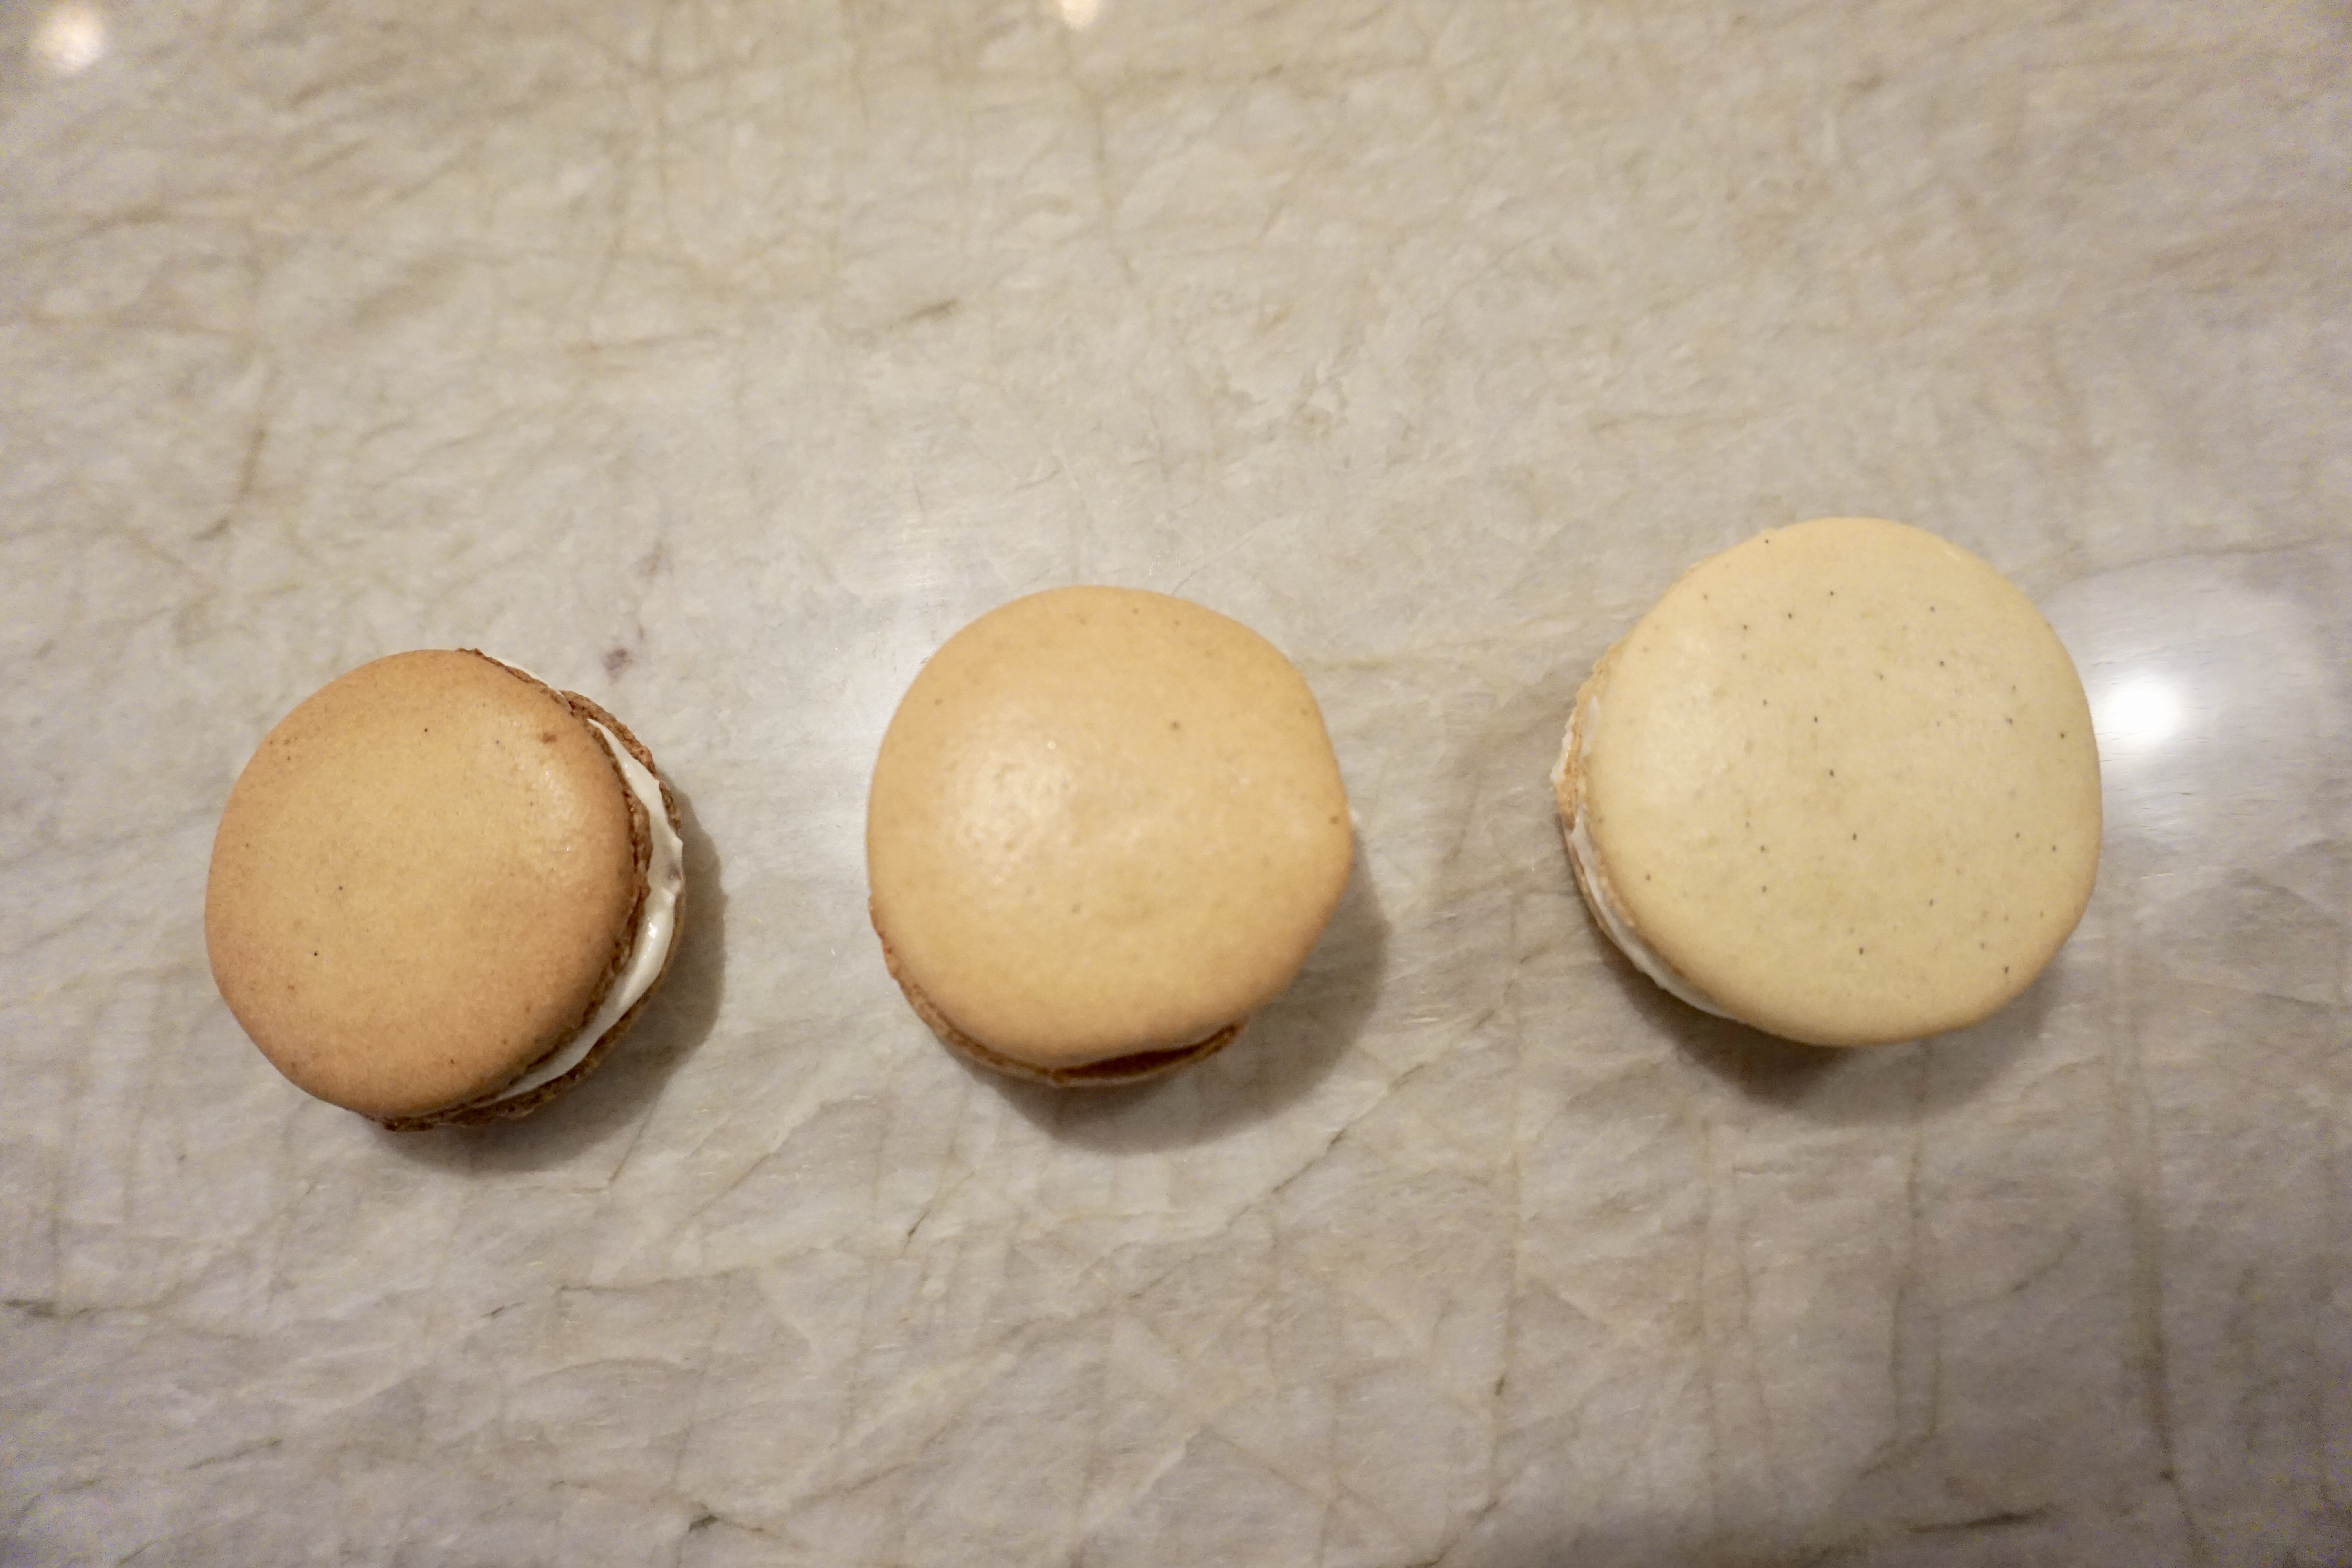
When we decided it was time to bake the macarons we did each tray separately and again tried out different techniques. **Fun fact** my oven usually runs low but is also super inconsistent with holding temperature.** So this is where I want to do more research when we make these next time. The first batch was put in for 9 minutes, then I opened the door and rotated the tray 180 degrees. I baked them again for 9 minutes and tried to take one off to check doneness- the top pulled right off!!! So I put them back in for 3 more minutes and tried again – same result. So I put them back in for 3 more minutes and noticed that they were starting to get kind of dark and pulled them out. After they cooled for about 3 minutes on the tray they pulled off the paper really easily. We took them off the tray and onto a cooling rack. They were a little toasty, but they ended up having the shiniest shells. After they cooled completely, I matched up shells that were about the same shape and then filled with with buttercream.


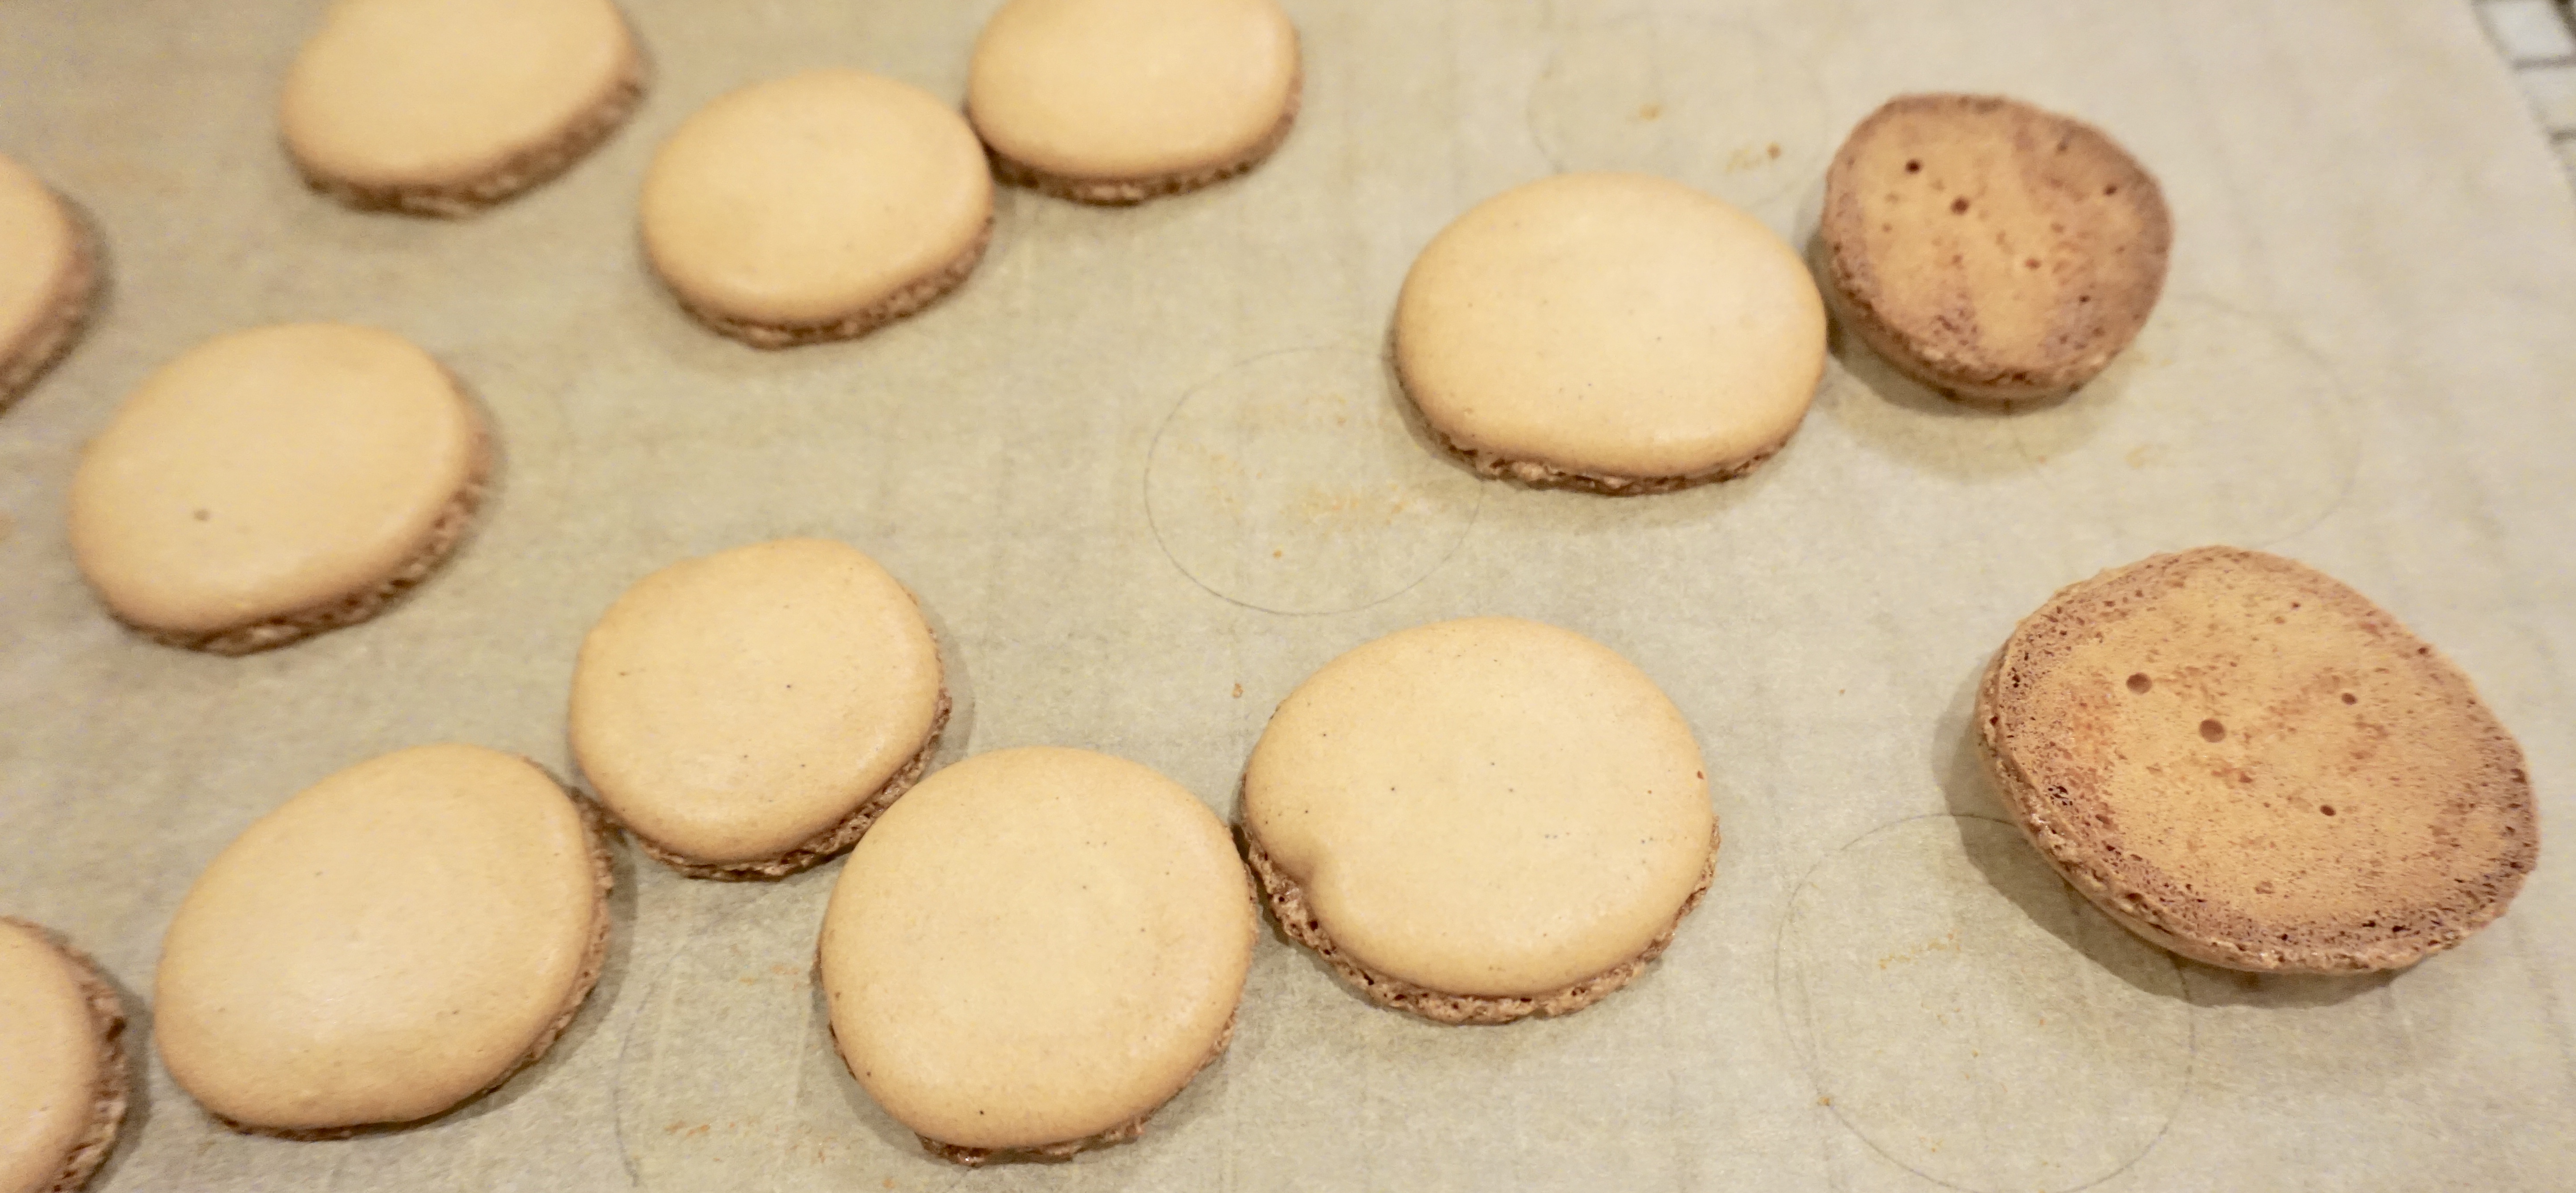
Before I put the next back in, I noticed that the oven was down to almost 250 F degrees. So I cranked it up and waited for it to come back to 300 before putting the next batch in. For this batch we decided not to open the door to rotate them and let them just cook for 18 minutes. Well during that 18 minutes, of course my oven decided to climb up higher than 300, so I lowered it, but this batch sadly came out a little toastier that any of us wanted. I noticed that this batch also seemed smaller than the others. You can see how brown the bottom of the shells got on the pan…oops!

For the third round, we decided to just set the oven to 300 F degrees, not open the door, but also only cook them for 15 minutes. This tray was full of our extra mixture. It had a mix of sizes and had sat the longest now on the counter resting. After they were cooled down they peeled off the paper with no problems, they were the lightest in color but also the least shiny of all the batches.
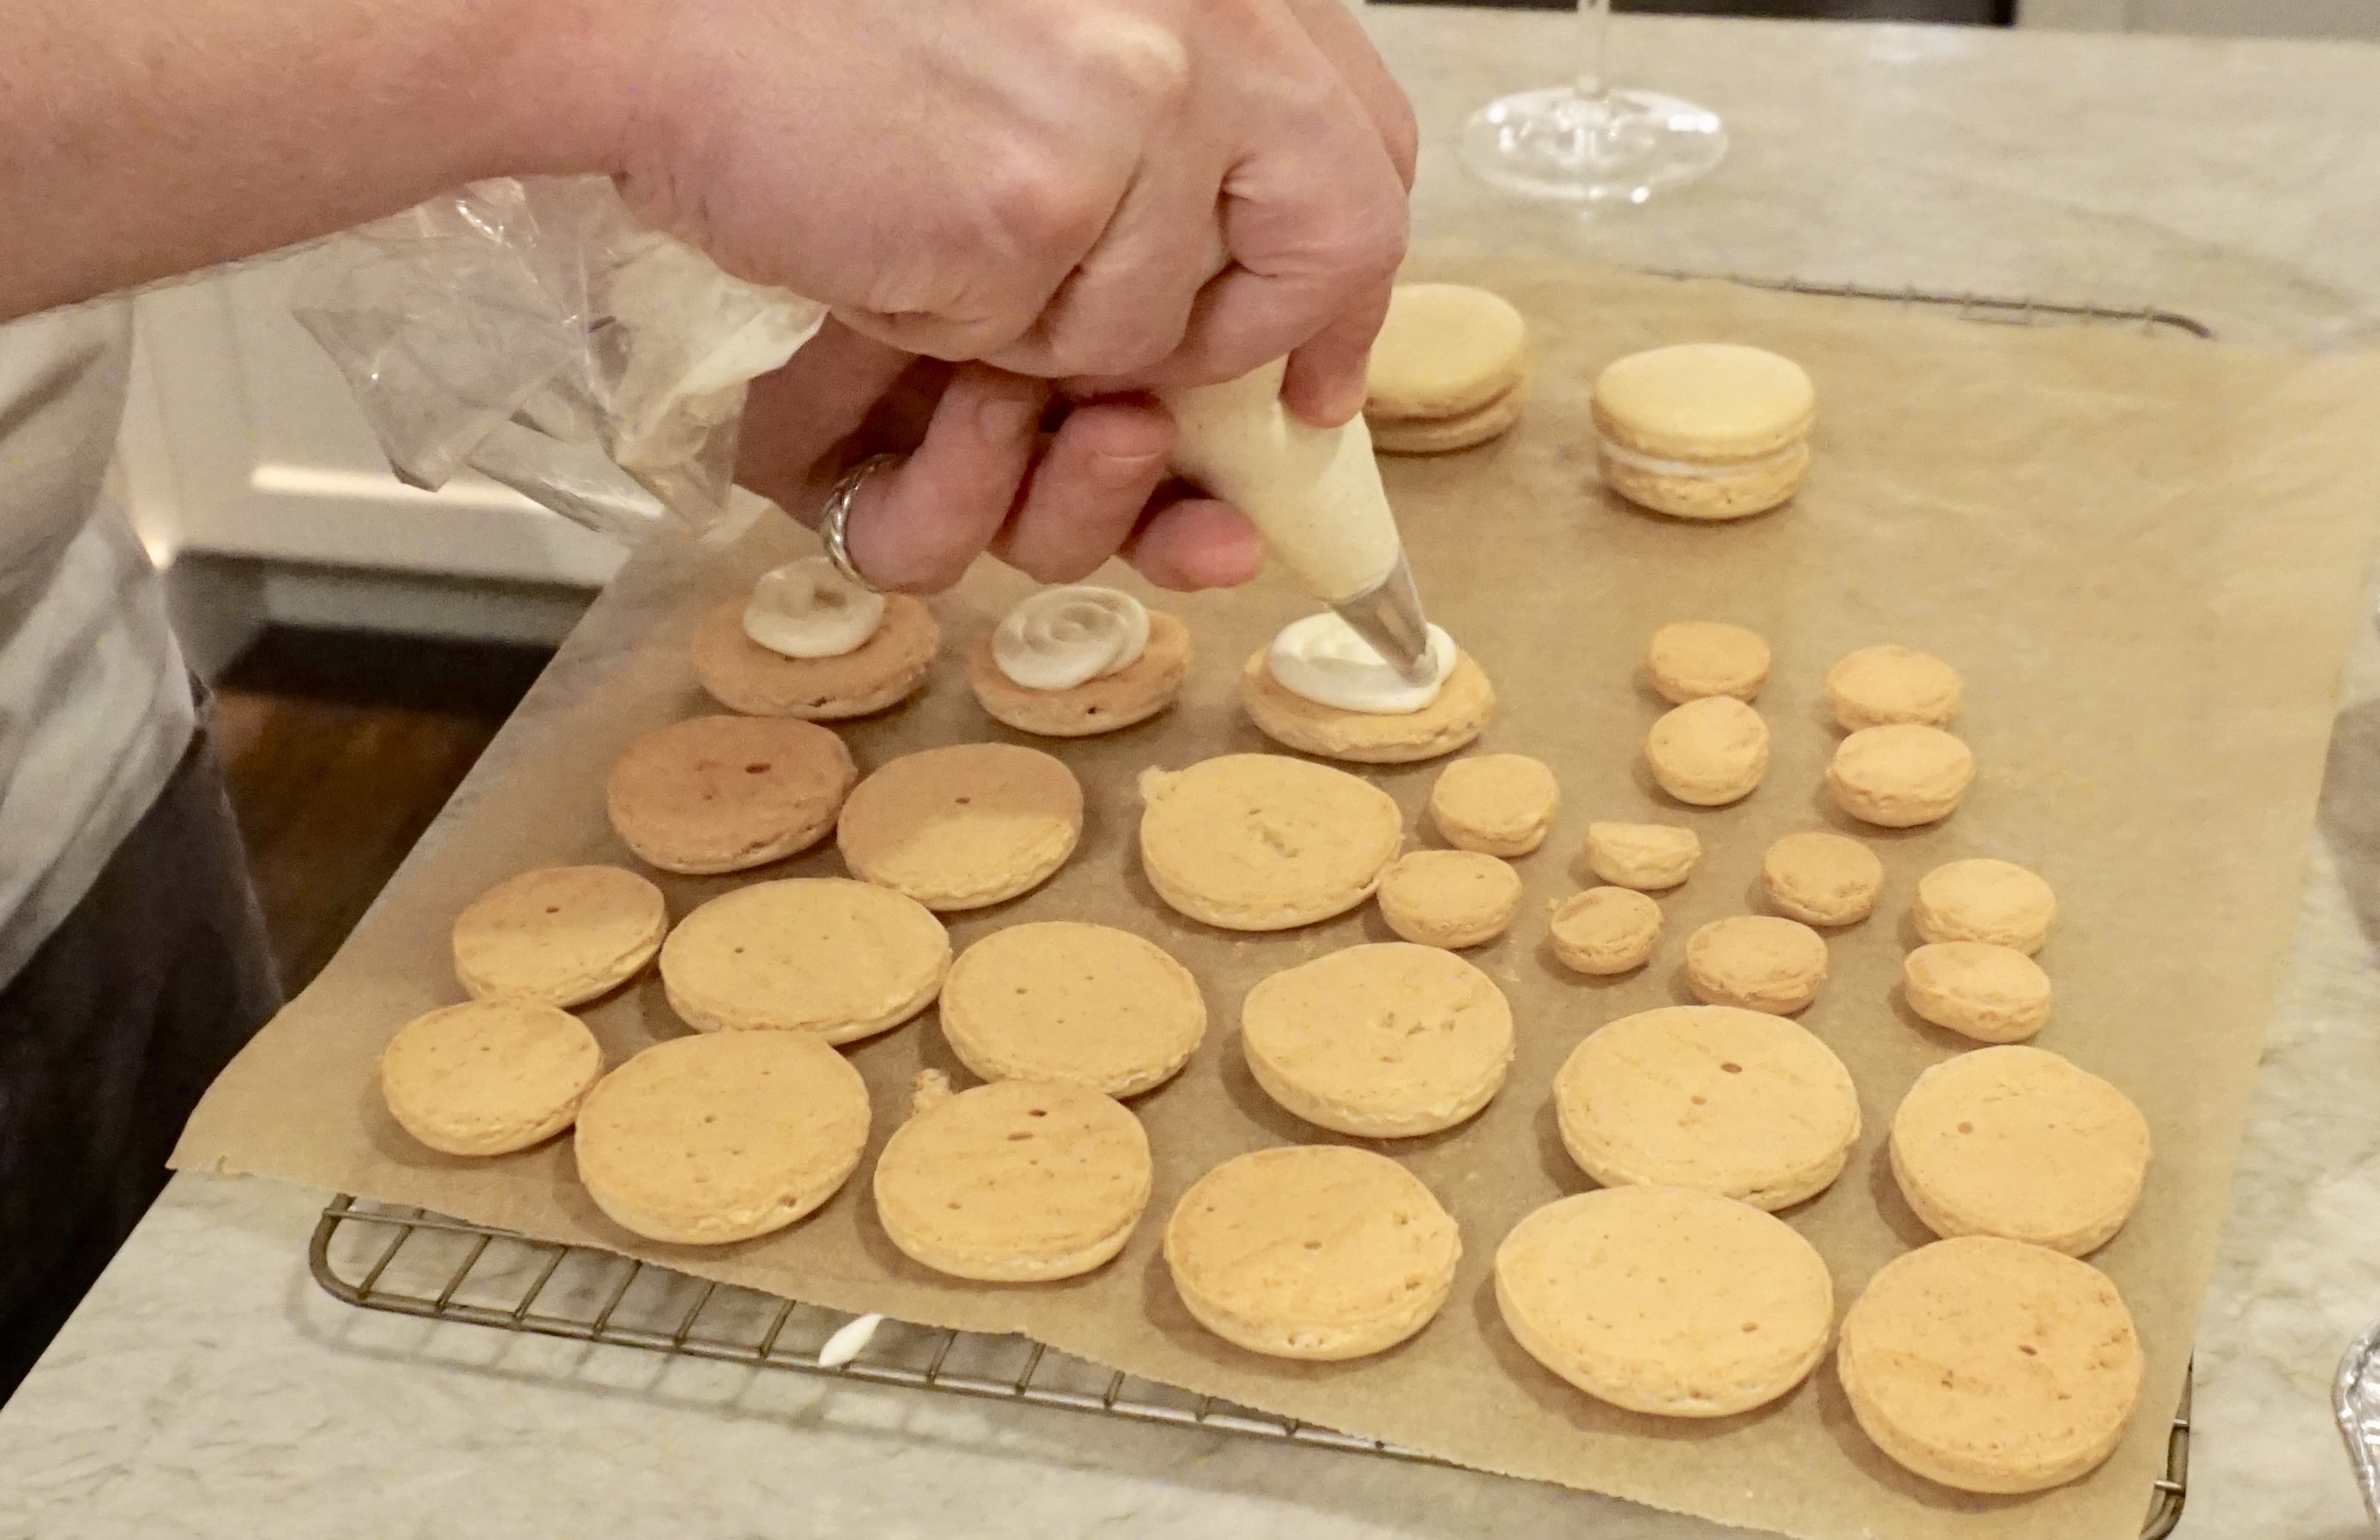
After all the shells cooled, Kevin and David matched up their shells and filled them with buttercream. We tasted several of them just to make sure they were tasty. Don’t worry they were all yummy. Some just a little crunchier than the others… Also, the macarons are supposed to be eaten chilled. It is recommended to put them in the refrigerator overnight before enjoying them. We sampled a couple to make sure they were tasty and then put the rest away. I sent them to work with Kevin, but forgot to save one to see if they improved for myself. The reports from work were all positive, so hopefully it is true.

Final Thoughts:
- So guess what- the kids can make macarons and so can I!
- I will be making them again and continue to work on the baking time step of this recipe
- ALL three batches had the cute little macaron feet (this alone feels like a victory)
- I want to experiment with different flavors and fillings – these were yummy but a little boring
- I can’t wait to bake them again with some friends who have already asked for another baking party!
- It is soooo worth checking out the original recipe at Bravetart
- Support the Opera and other amazing artists like David Portillo

Recipe
- 4 ounces (115g) almond flour
- 8 ounces (230g) powdered sugar
- 5 ounces egg whites (144g)
- 2 1/2 ounce (72g) sugar
- 2 tsp vanilla bean paste
- 3 drops of ivory food gel
- 1/2 tsp (2g) kosher salt
- 1/2 recipe of Swiss meringue buttercream vanilla+vanilla+sprinkles recipe.
Instructions
- Use a digital scale to measure out ingredients
- Pre-heat oven to 300 F degrees and prepare piping bags (fit with round tips, twist the bottom of the bag into the tip and put the bag in a tall glass with the top folded over the sides)
- Trace 1 1/2 inch offset circles on parchment paper
- Sift the almond flour and powdered sugar together to make sure there are no big clumps (if you need to take some out, be sure to replace the amounts)
- In your stand mixer with the whisk attachment – pour in the egg whites, sugar and salt
- Whip at level 4 for 3 minutes, then level 8 for 3 minutes
- Add in the vanilla bean paste and the food gel
- Whip at 10 for 1 minute and check to see if it is super stiff with a clump of meringue in the middle. If it is not, continue to whip at 1 minute increments until it is at the correct consistency
- Dump in the powdered sugar and almond flour mixture
- Fold the two together for 25 strokes (around the edge and through the middle)
- Then 15 slightly more aggressive strokes to keep deflating the egg whites
- Check to see if the mixture is a “lava” consistency (It flows off the spatula and the mixture that drops spreads back into the rest within 20 seconds)
- If it is not quite there – mix and check at 3-5 stroke intervals
- Add half the mixture to the piping bag (when empty refill and pipe again)
- Pipe small dots in the corner of your baking trays and flip the parchment paper so that the ink or pencil lines of the circles touches the tray
- Pipe the mixture into the circles. It should spread a little and all piping lines should flow into the mixture and disappear
- Whack each side of the tray onto the counter 2-3 times
- Let the macarons rest for a few minutes (15-20) or until they seem to develop a small shell
- Bake for 8 minutes, open the oven rotate the pan 180 degrees and bake for another 8 minutes (this is what I will be doing the next time I bake them)
- Pull your shells out and allow to cool for 2-3 minutes on the tray
- Move the parchment paper with the shells to a cooling rack and allow to cool completely
- Peel the shells off the paper and match up to other ones around the same shape and size
- Pipe buttercream between the shells and stack together
- Enjoy one now for the fruits of your labor and then put the rest in the refrigerator to rest and chill (they are apparently best the next day)

Those turned out great! What a fun baking party with David P.!
LikeLike
It was so much fun baking with David P! I hope to have more guest bakers- let me know if you want to bake with me over the holidays!
LikeLike