
This was the question that my father-in-law posed to me the morning we sat down to a fresh tray of homemade croissants. As I broke into one of them with a crackle of flaky outer laters and then sank my teeth into the delicious chewy interior and knew that, yes…it was totally worth it!
A little over a year ago my husband and I decided to take on croissant making as a fun weekend project. They turned out delicious but, as all good weekend projects go, they were a learning experience. As we were talking about what we wanted to have as our “Chicago Christmas” breakfast we decided that croissants would fit the bill perfectly. (We travel for the holidays to see our families in St. Louis so we celebrate as a family before we hit the road.) We wanted something that everyone would enjoy and would feel like a special treat for a special day.
Making croissants is not incredibly hard, it just requires patience and being able to make the timing of everything work for you. The recipe that we used is from America’s Test Kitchen. I have the cookbook and refer to it often when I am at home but I also used the post by Home Cooking in Montana while I was traveling. We have done this recipe over several days but also have done all the work in one day and just woke up early the next morning to put out the shaped and filled croissants to rise and bake. For this post the pictures come from several attempts because I forgot to take pictures of one step and had to make them again wile we were staying at my in-laws house while in St. Louis for the holidays.
*One quick note* – The most helpful tool you will need for this recipe is a nice long ruler or yard stick to make sure all your measurements are correct.
Since the recipe has so many steps, I’m going to just jump right in with the dough:


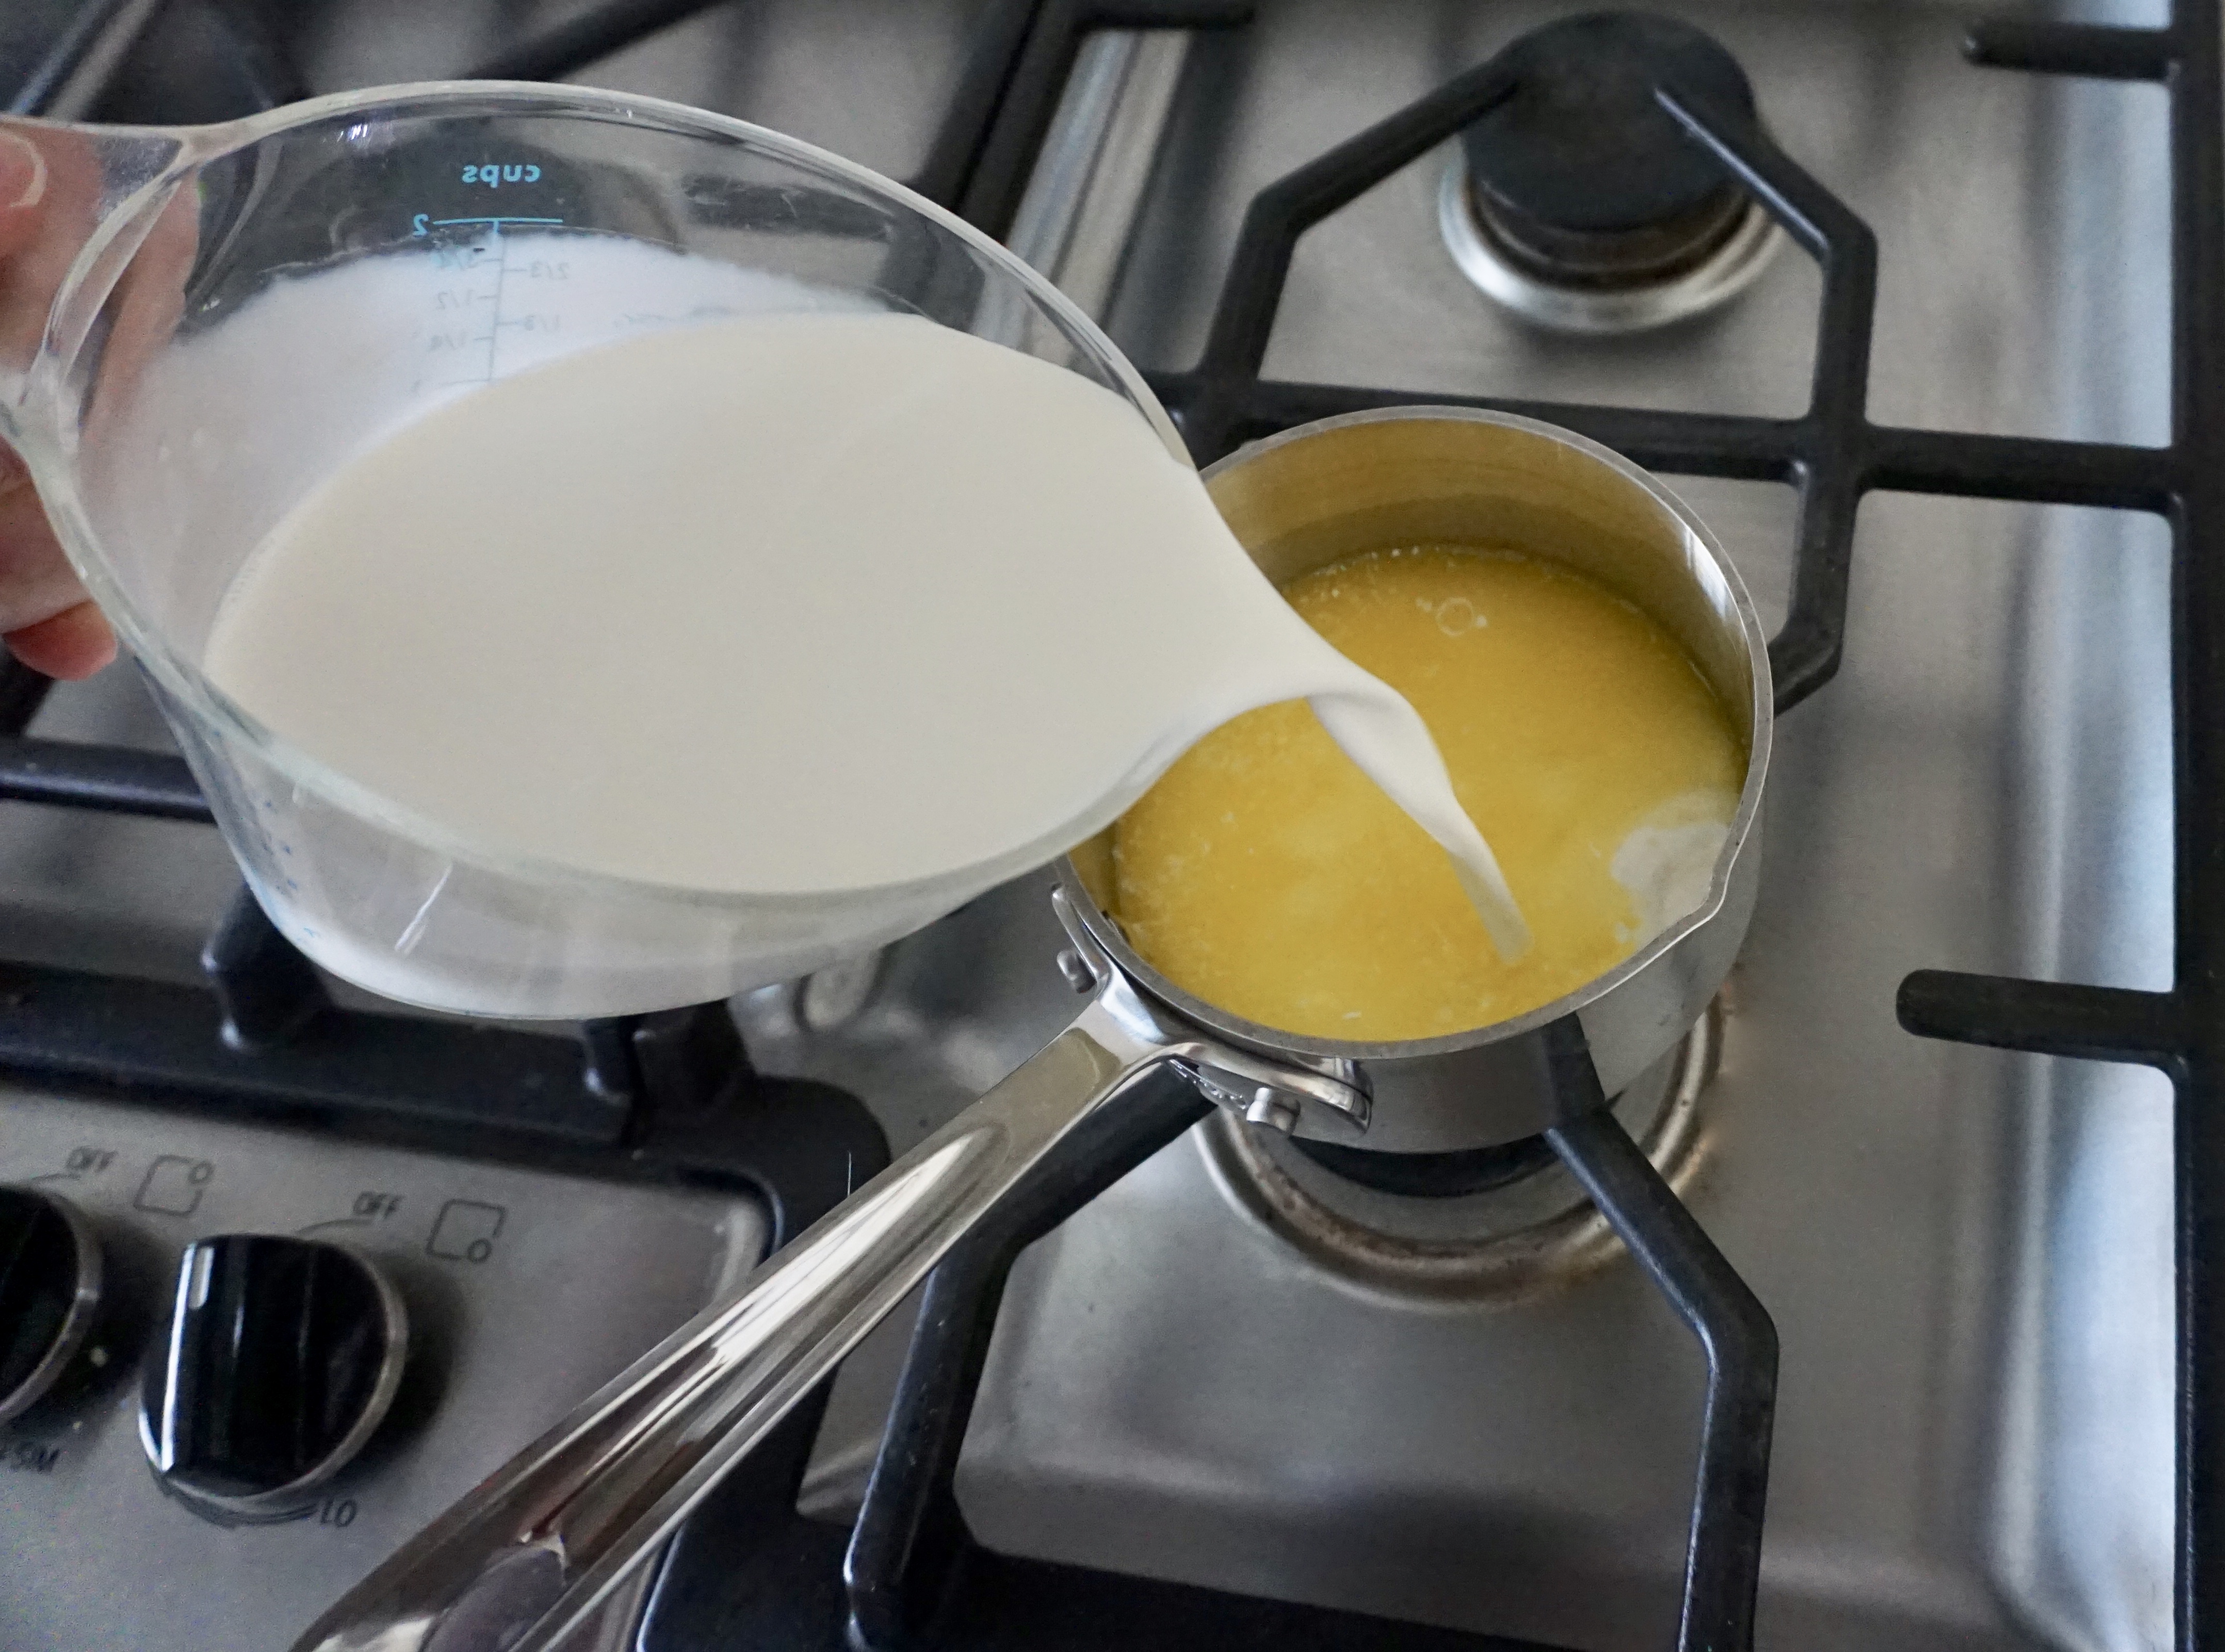


The dough starts by melting 3 tablespoons of unsalted butter over low heat. While the butter is melting, I pour the dry ingredients – 4 1/4 cup of flour, 1/4 cup sugar and 2 teaspoons kosher salt – in the bowl of my stand mixer fitted with the dough hook. Once the butter was melted, I then poured in 1 3/4 cup of whole milk. This should drop the temperature down to under 90 F degrees. Next, I sprinkled 4 teaspoons of rapid-rise yeast into the milk and butter mixture and let it sit for a few minutes to make sure the yeast would bloom. After I saw that the yeast was expanding in the liquid I added it to the stand mixer and ran it on low until the ingredients all came together to form a smooth dough. This took about 2 minutes. Then I turned the mixer up to medium-low and let it run for one more minute. Afterwards, I removed the dough hook from the machine and removed the dough. I covered it with plastic wrap and let it rise for 30 minutes in the warmest part of my kitchen, which is always by my stove (which is rarely turned off).
While the dough was resting, I moved on to the butter block:


The giant block of butter that allows croissants to develop their flaky layers is a major part of the croissant making process and one of my favorite steps! You get to beat a huge mound of butter with a rolling pin and then magically roll it into a perfect 8-by-8-inch square.
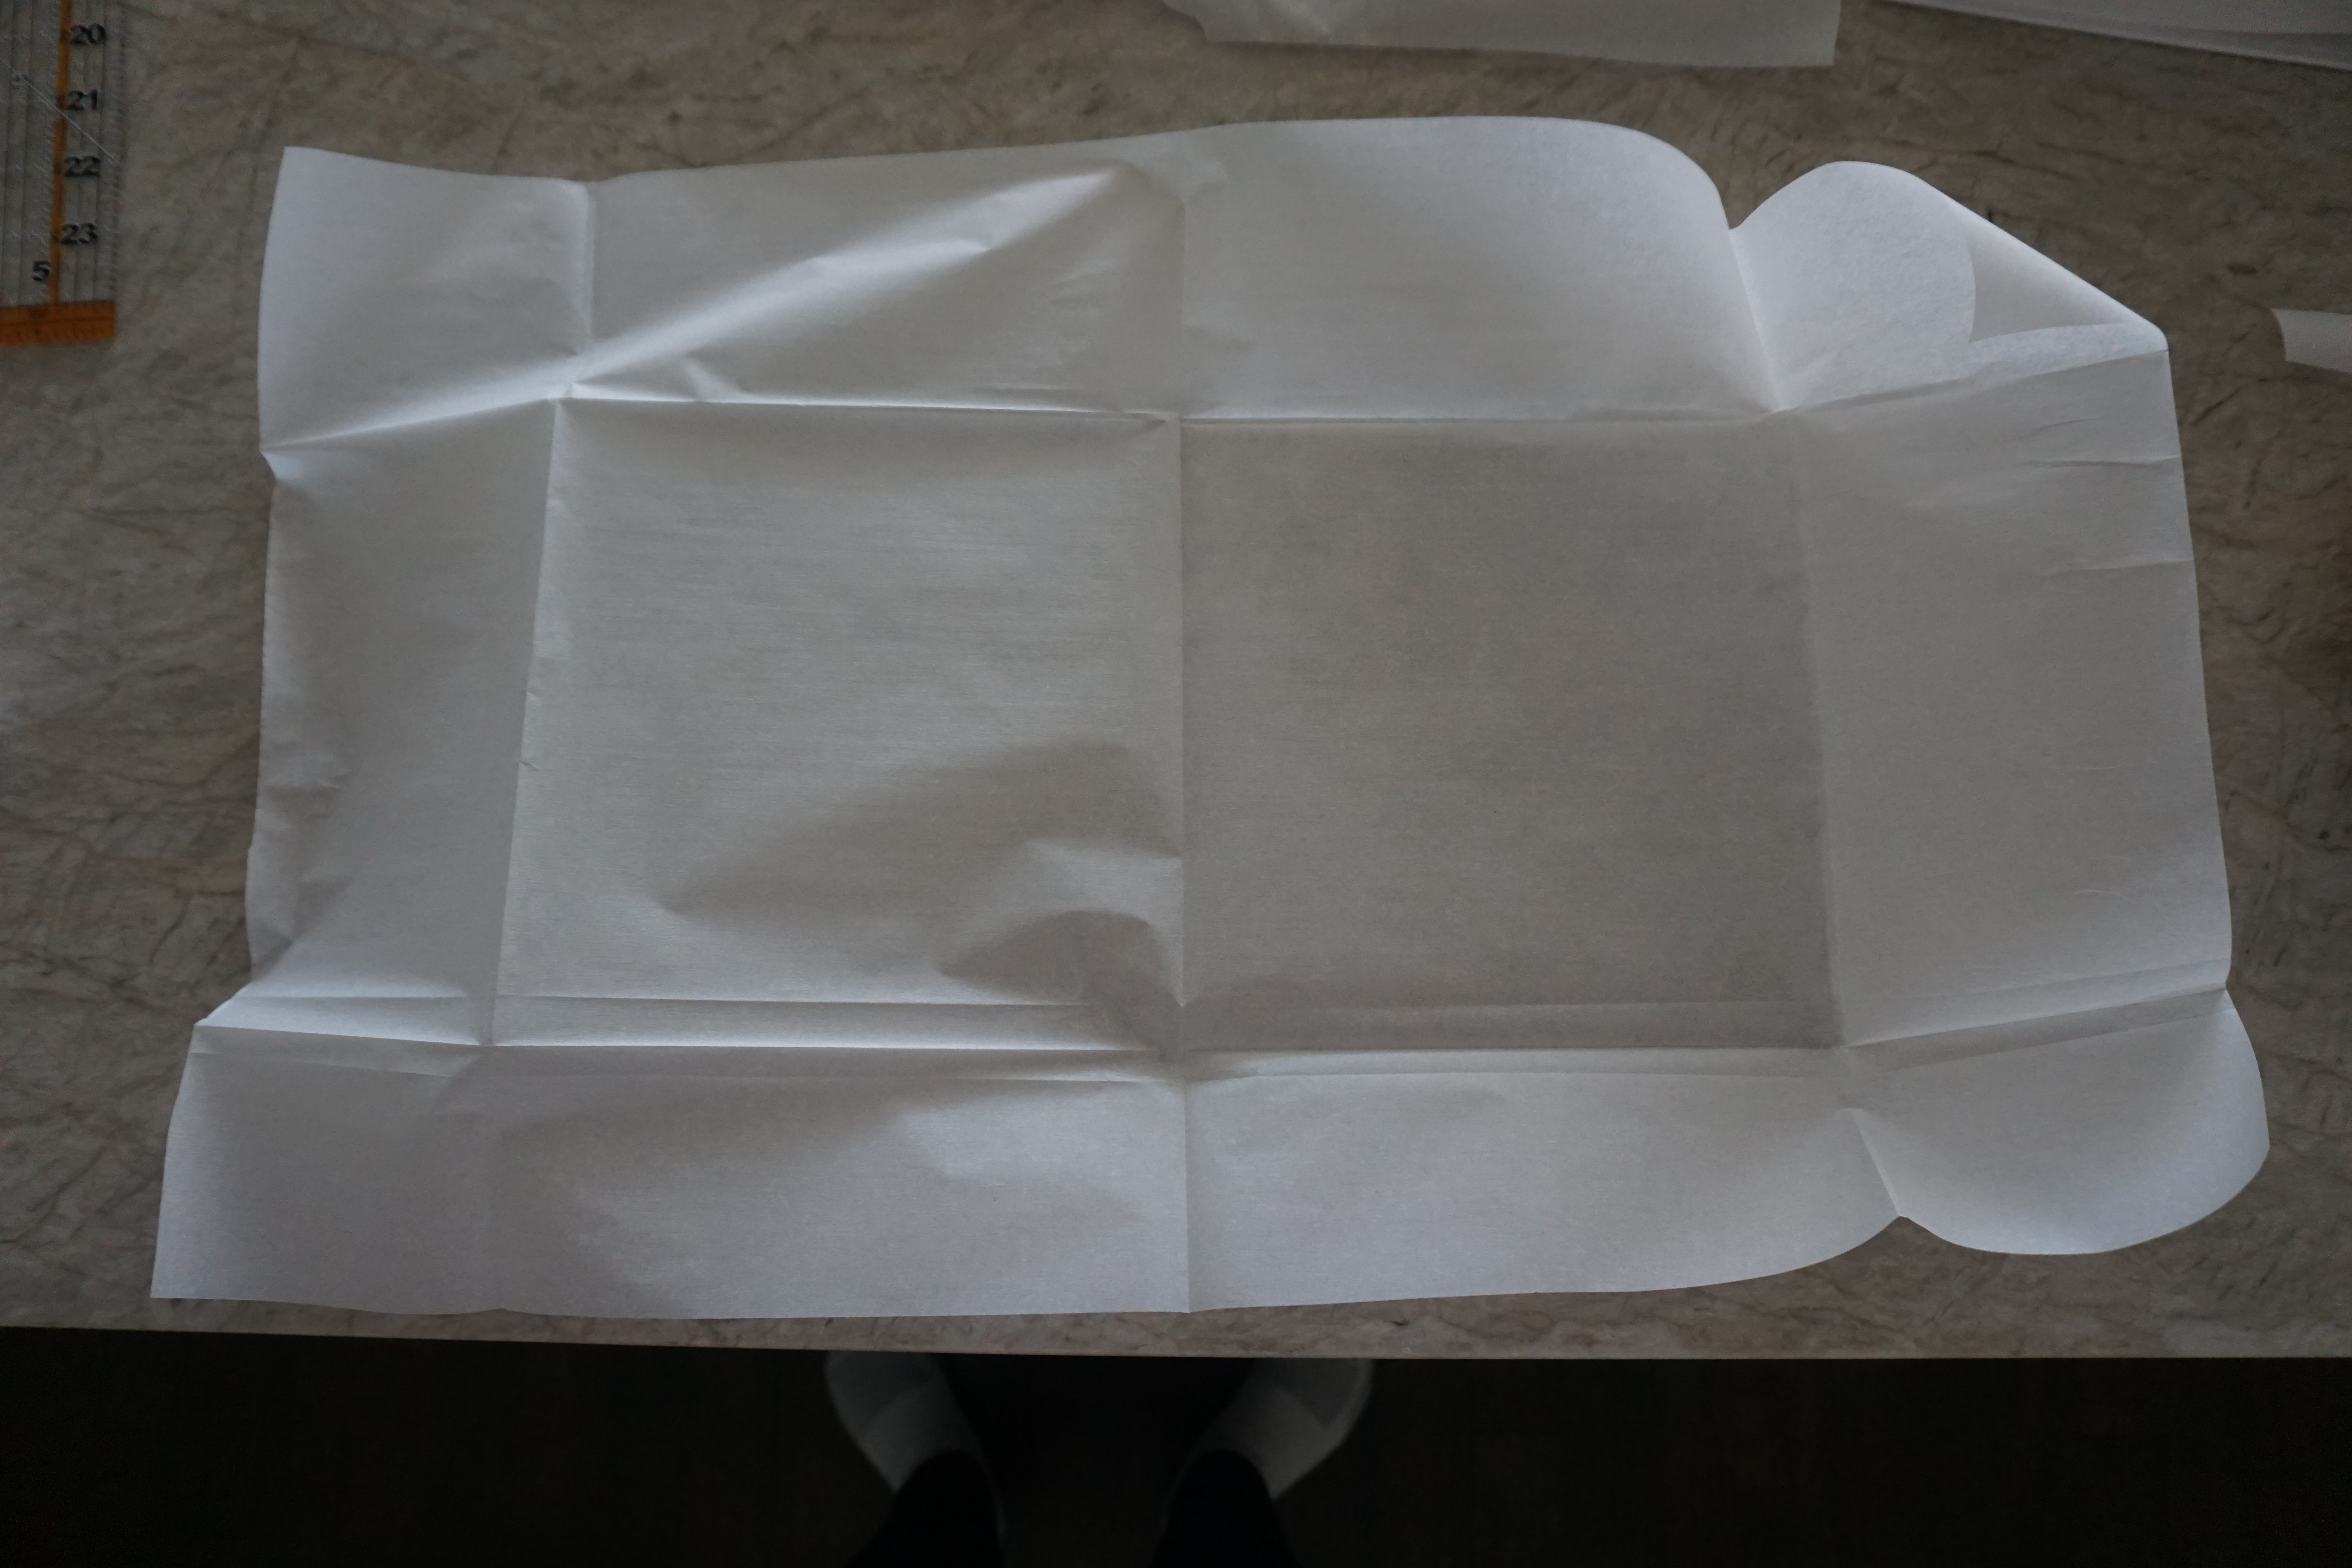
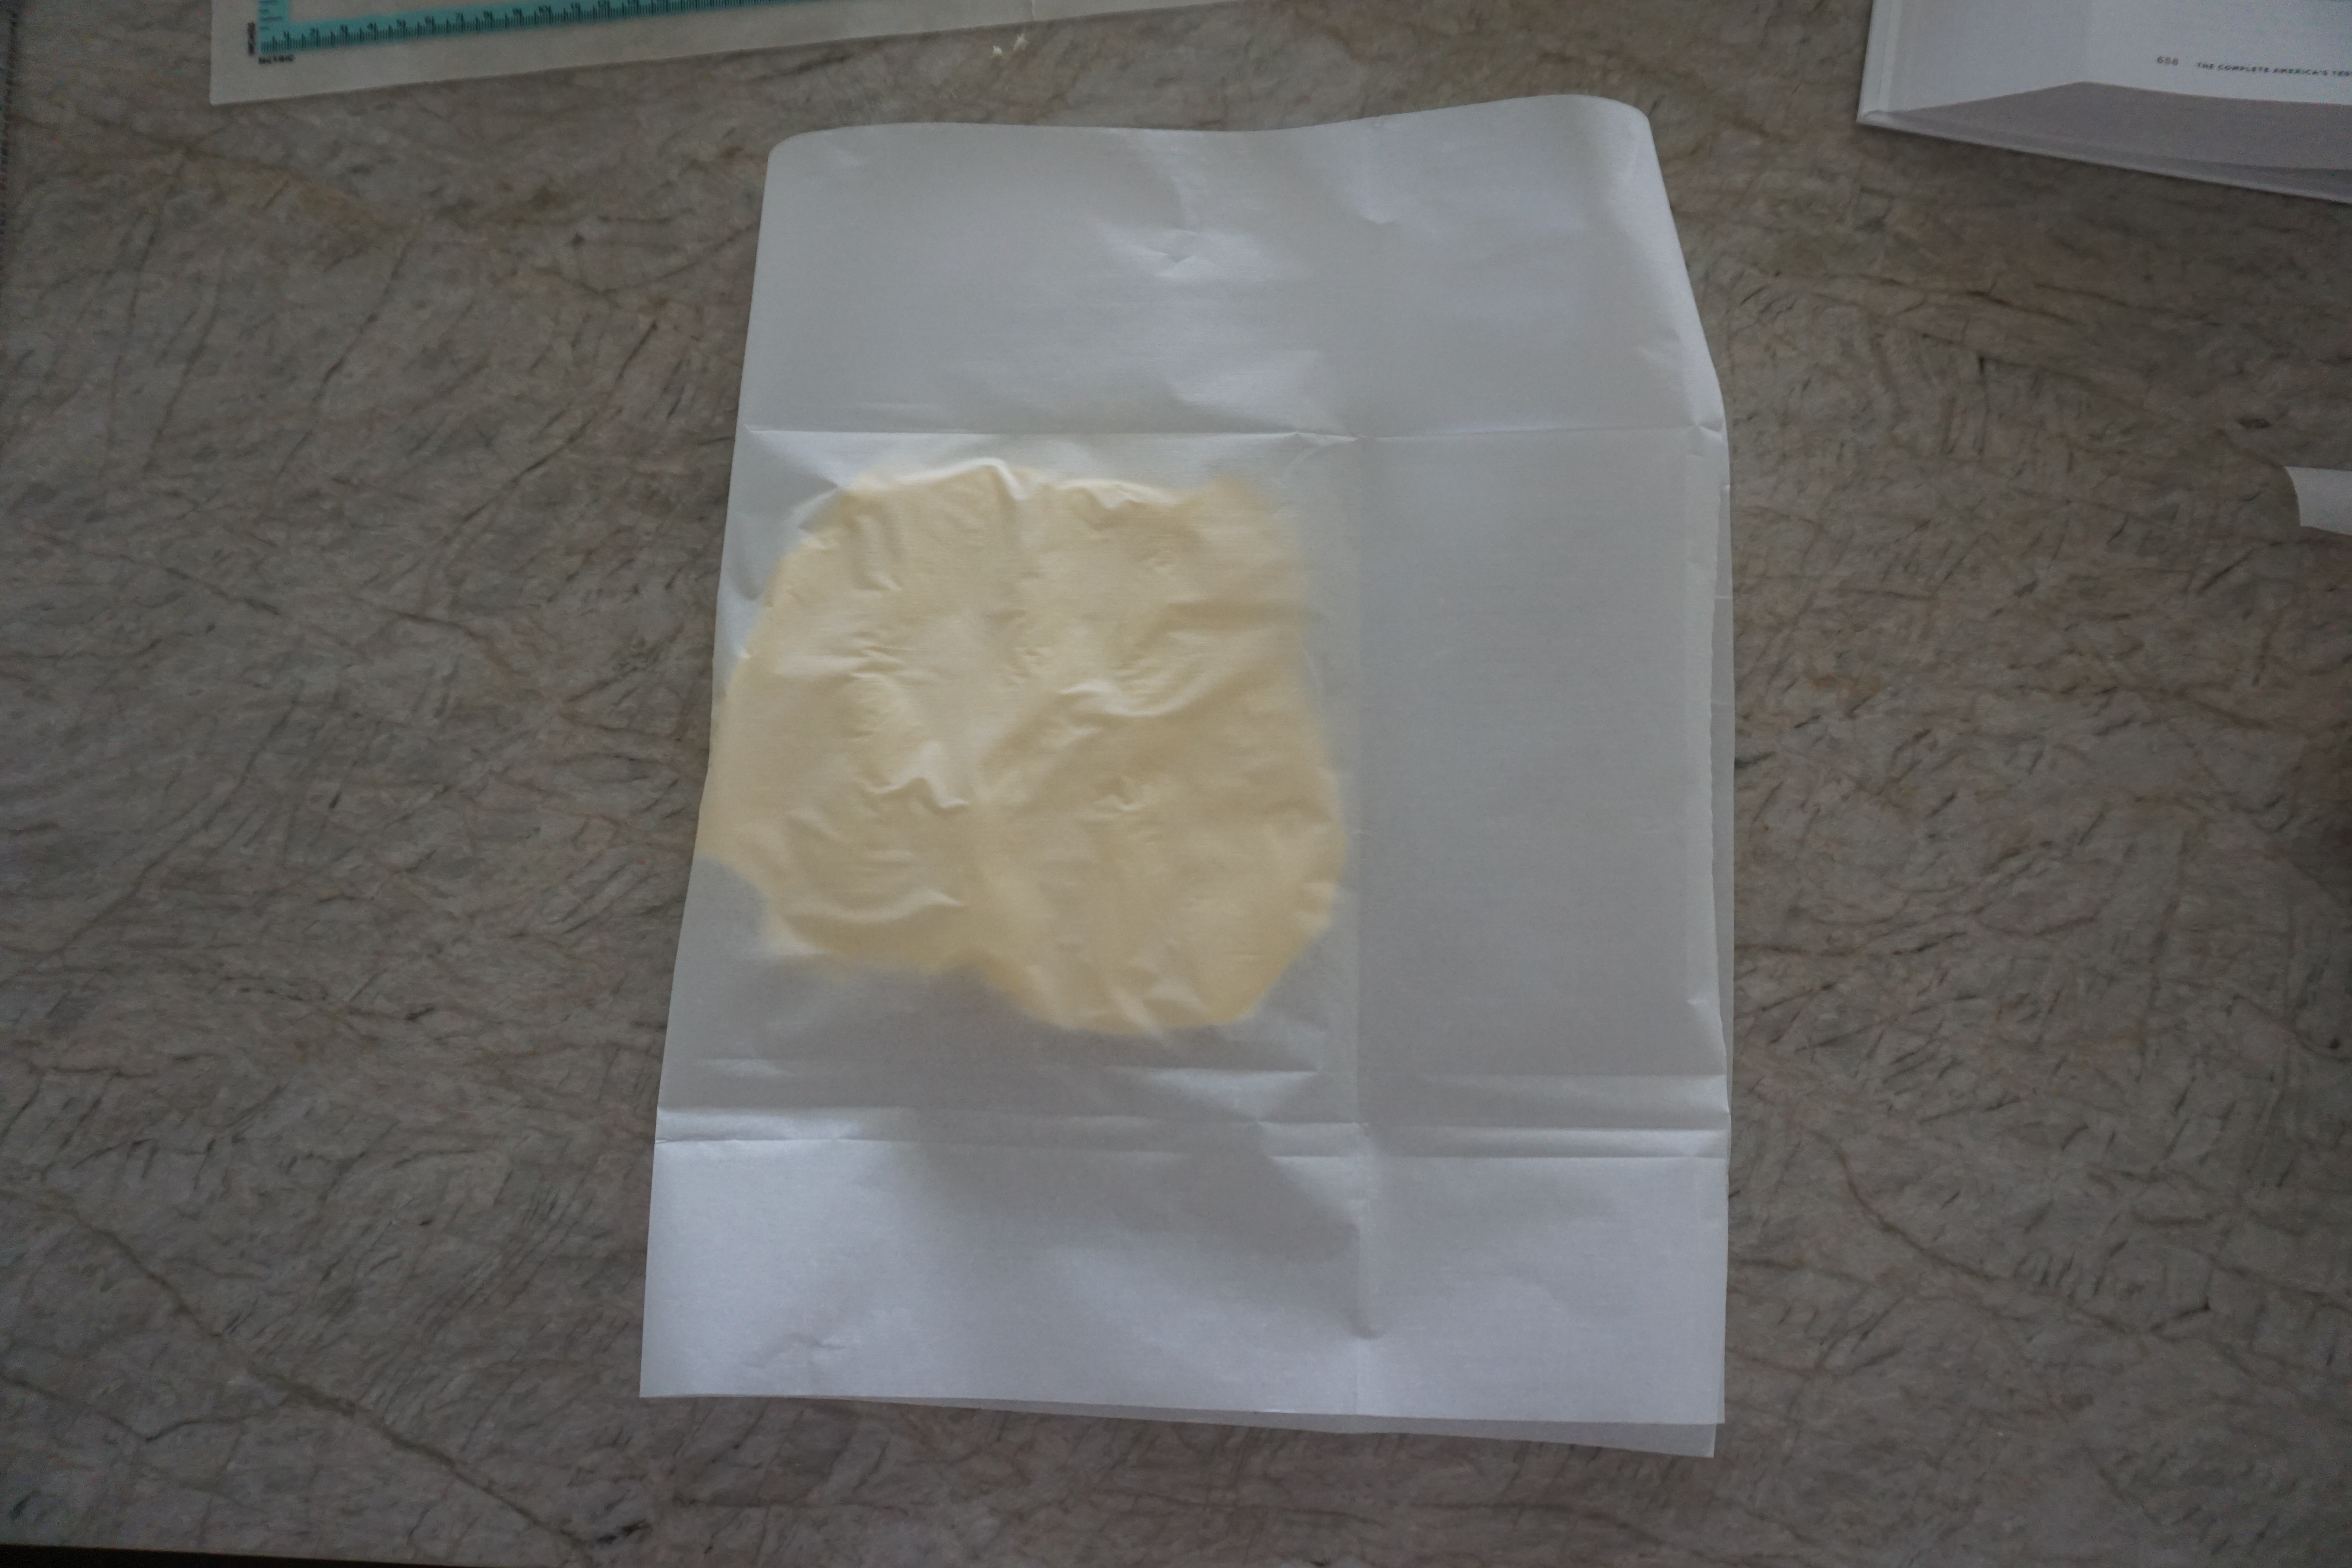
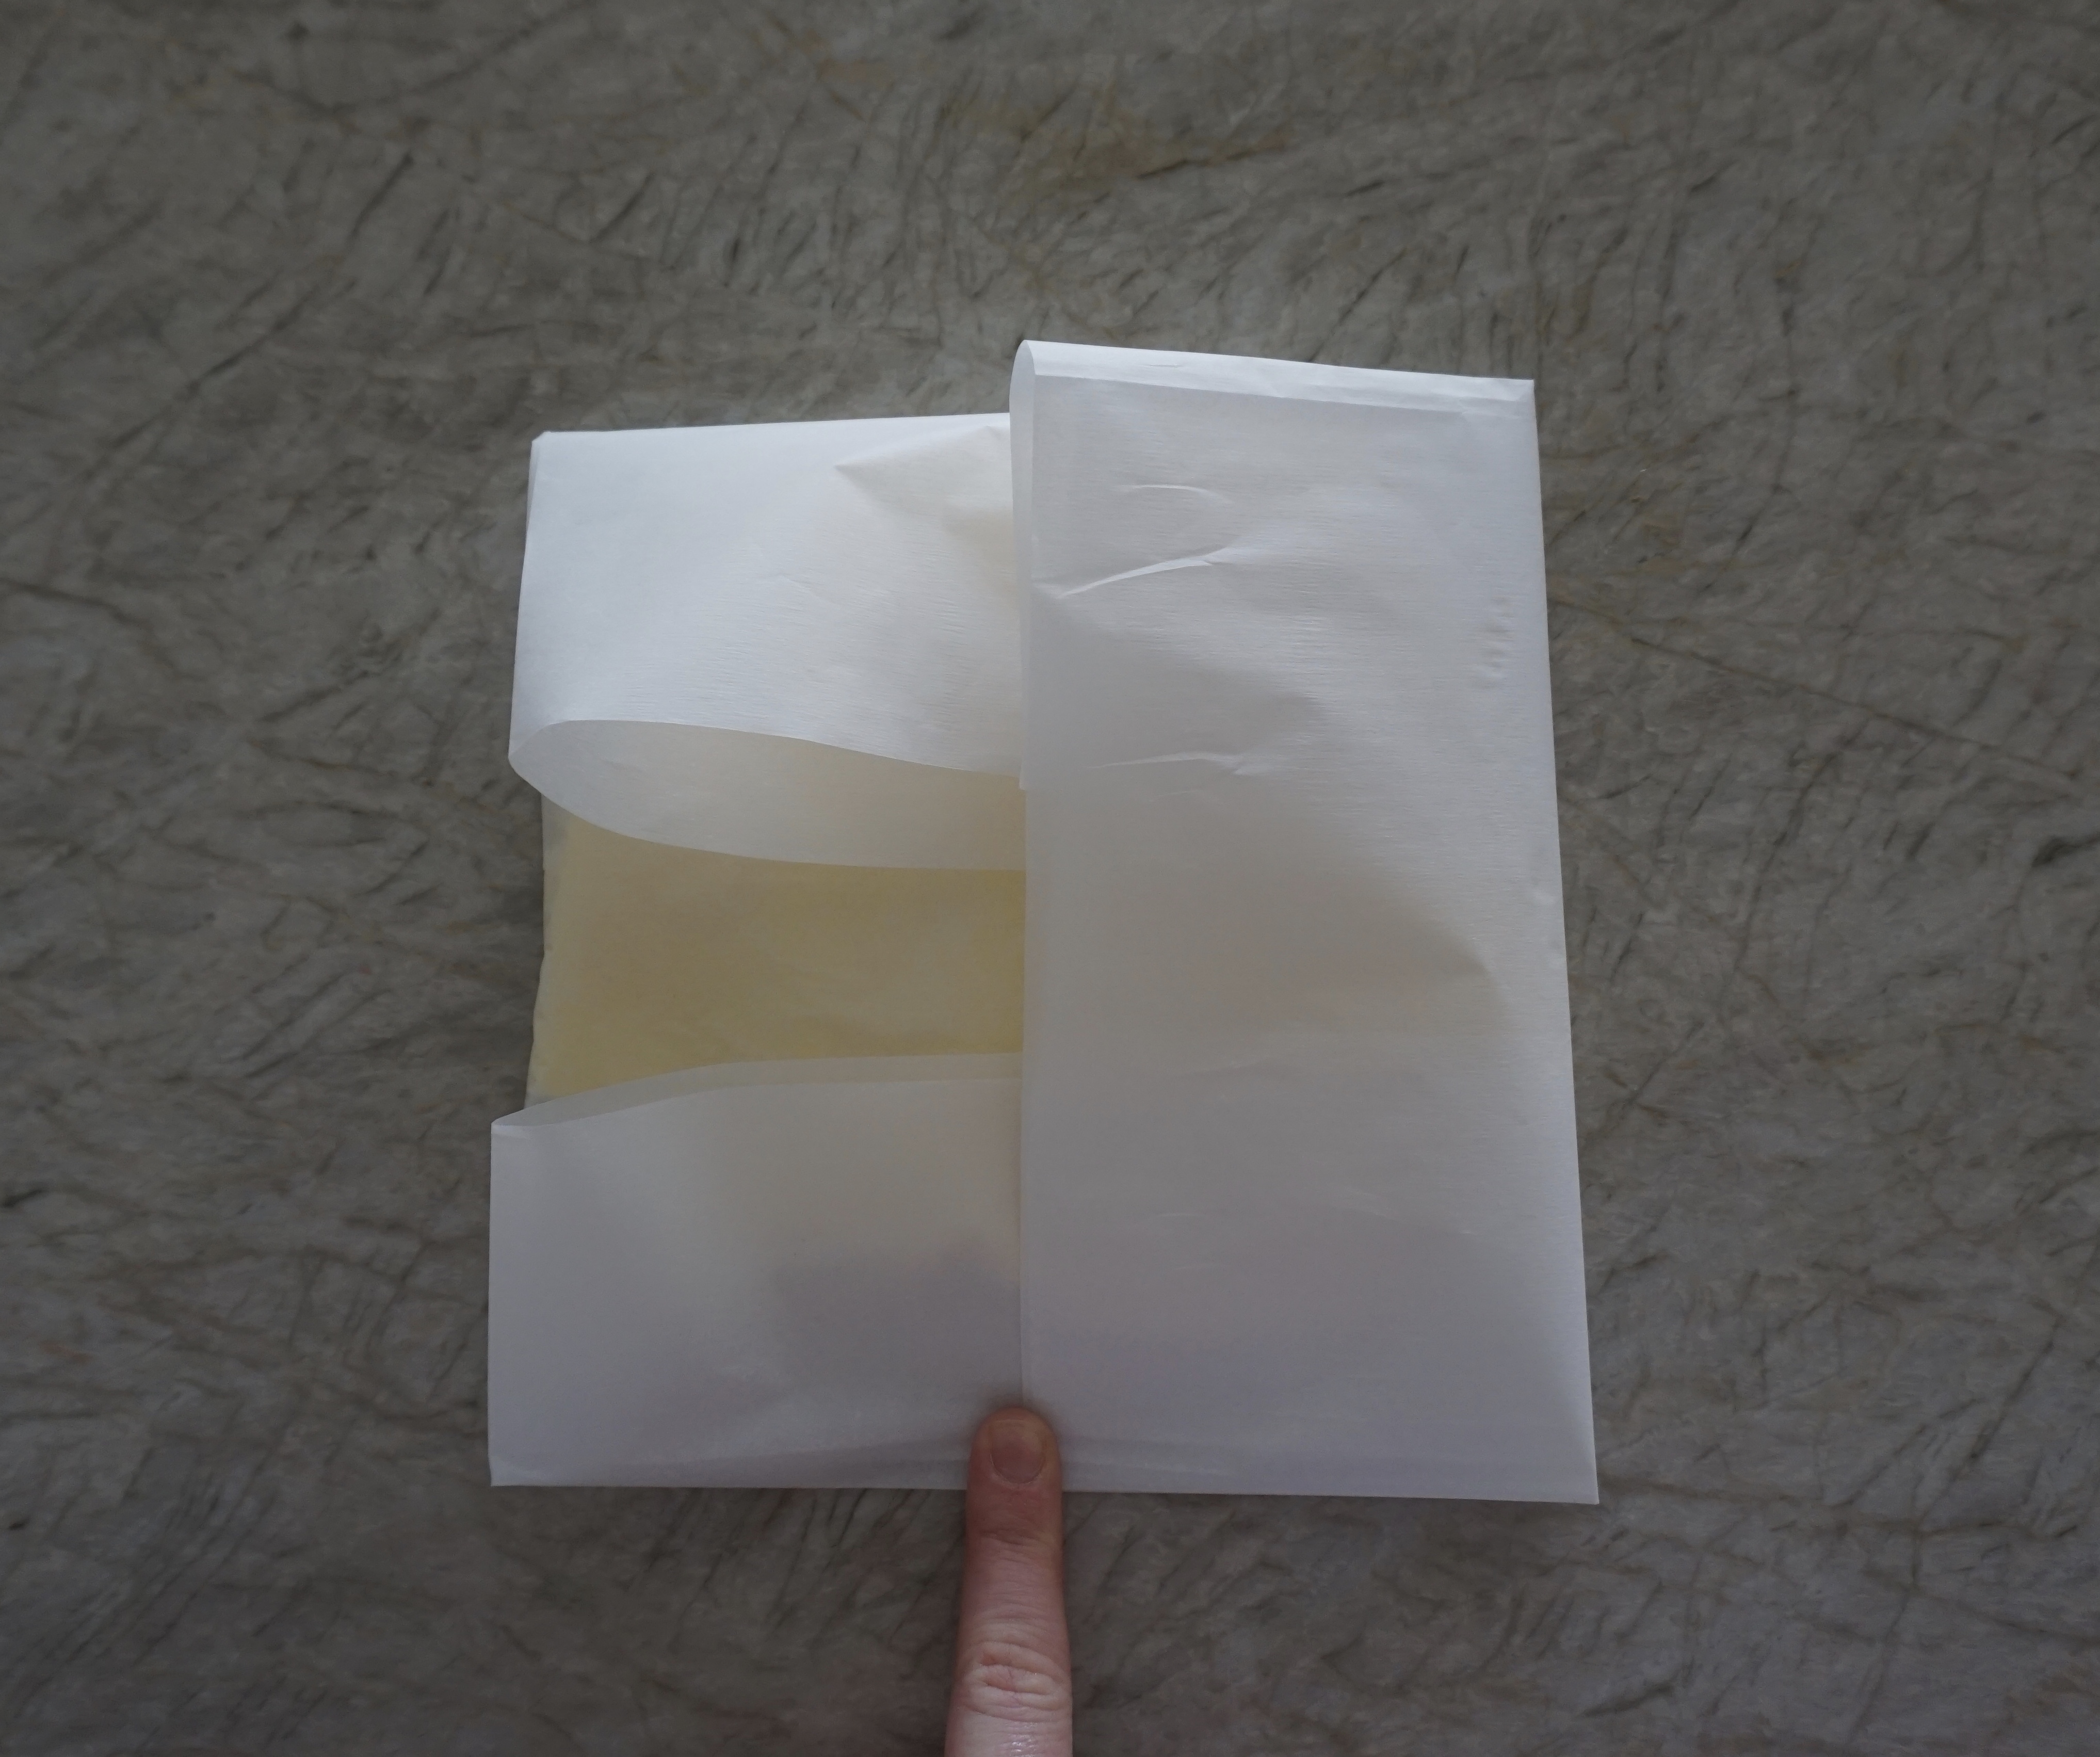
To make the parchment packet that holds the butter, I took a 24-inch cut of parchment paper and folded it in half to form a 12-inch rectangle. Then I folded over the 3 open sides to form an 8-inch enclosed square. I used my ruler quite a few times to check my measurements.
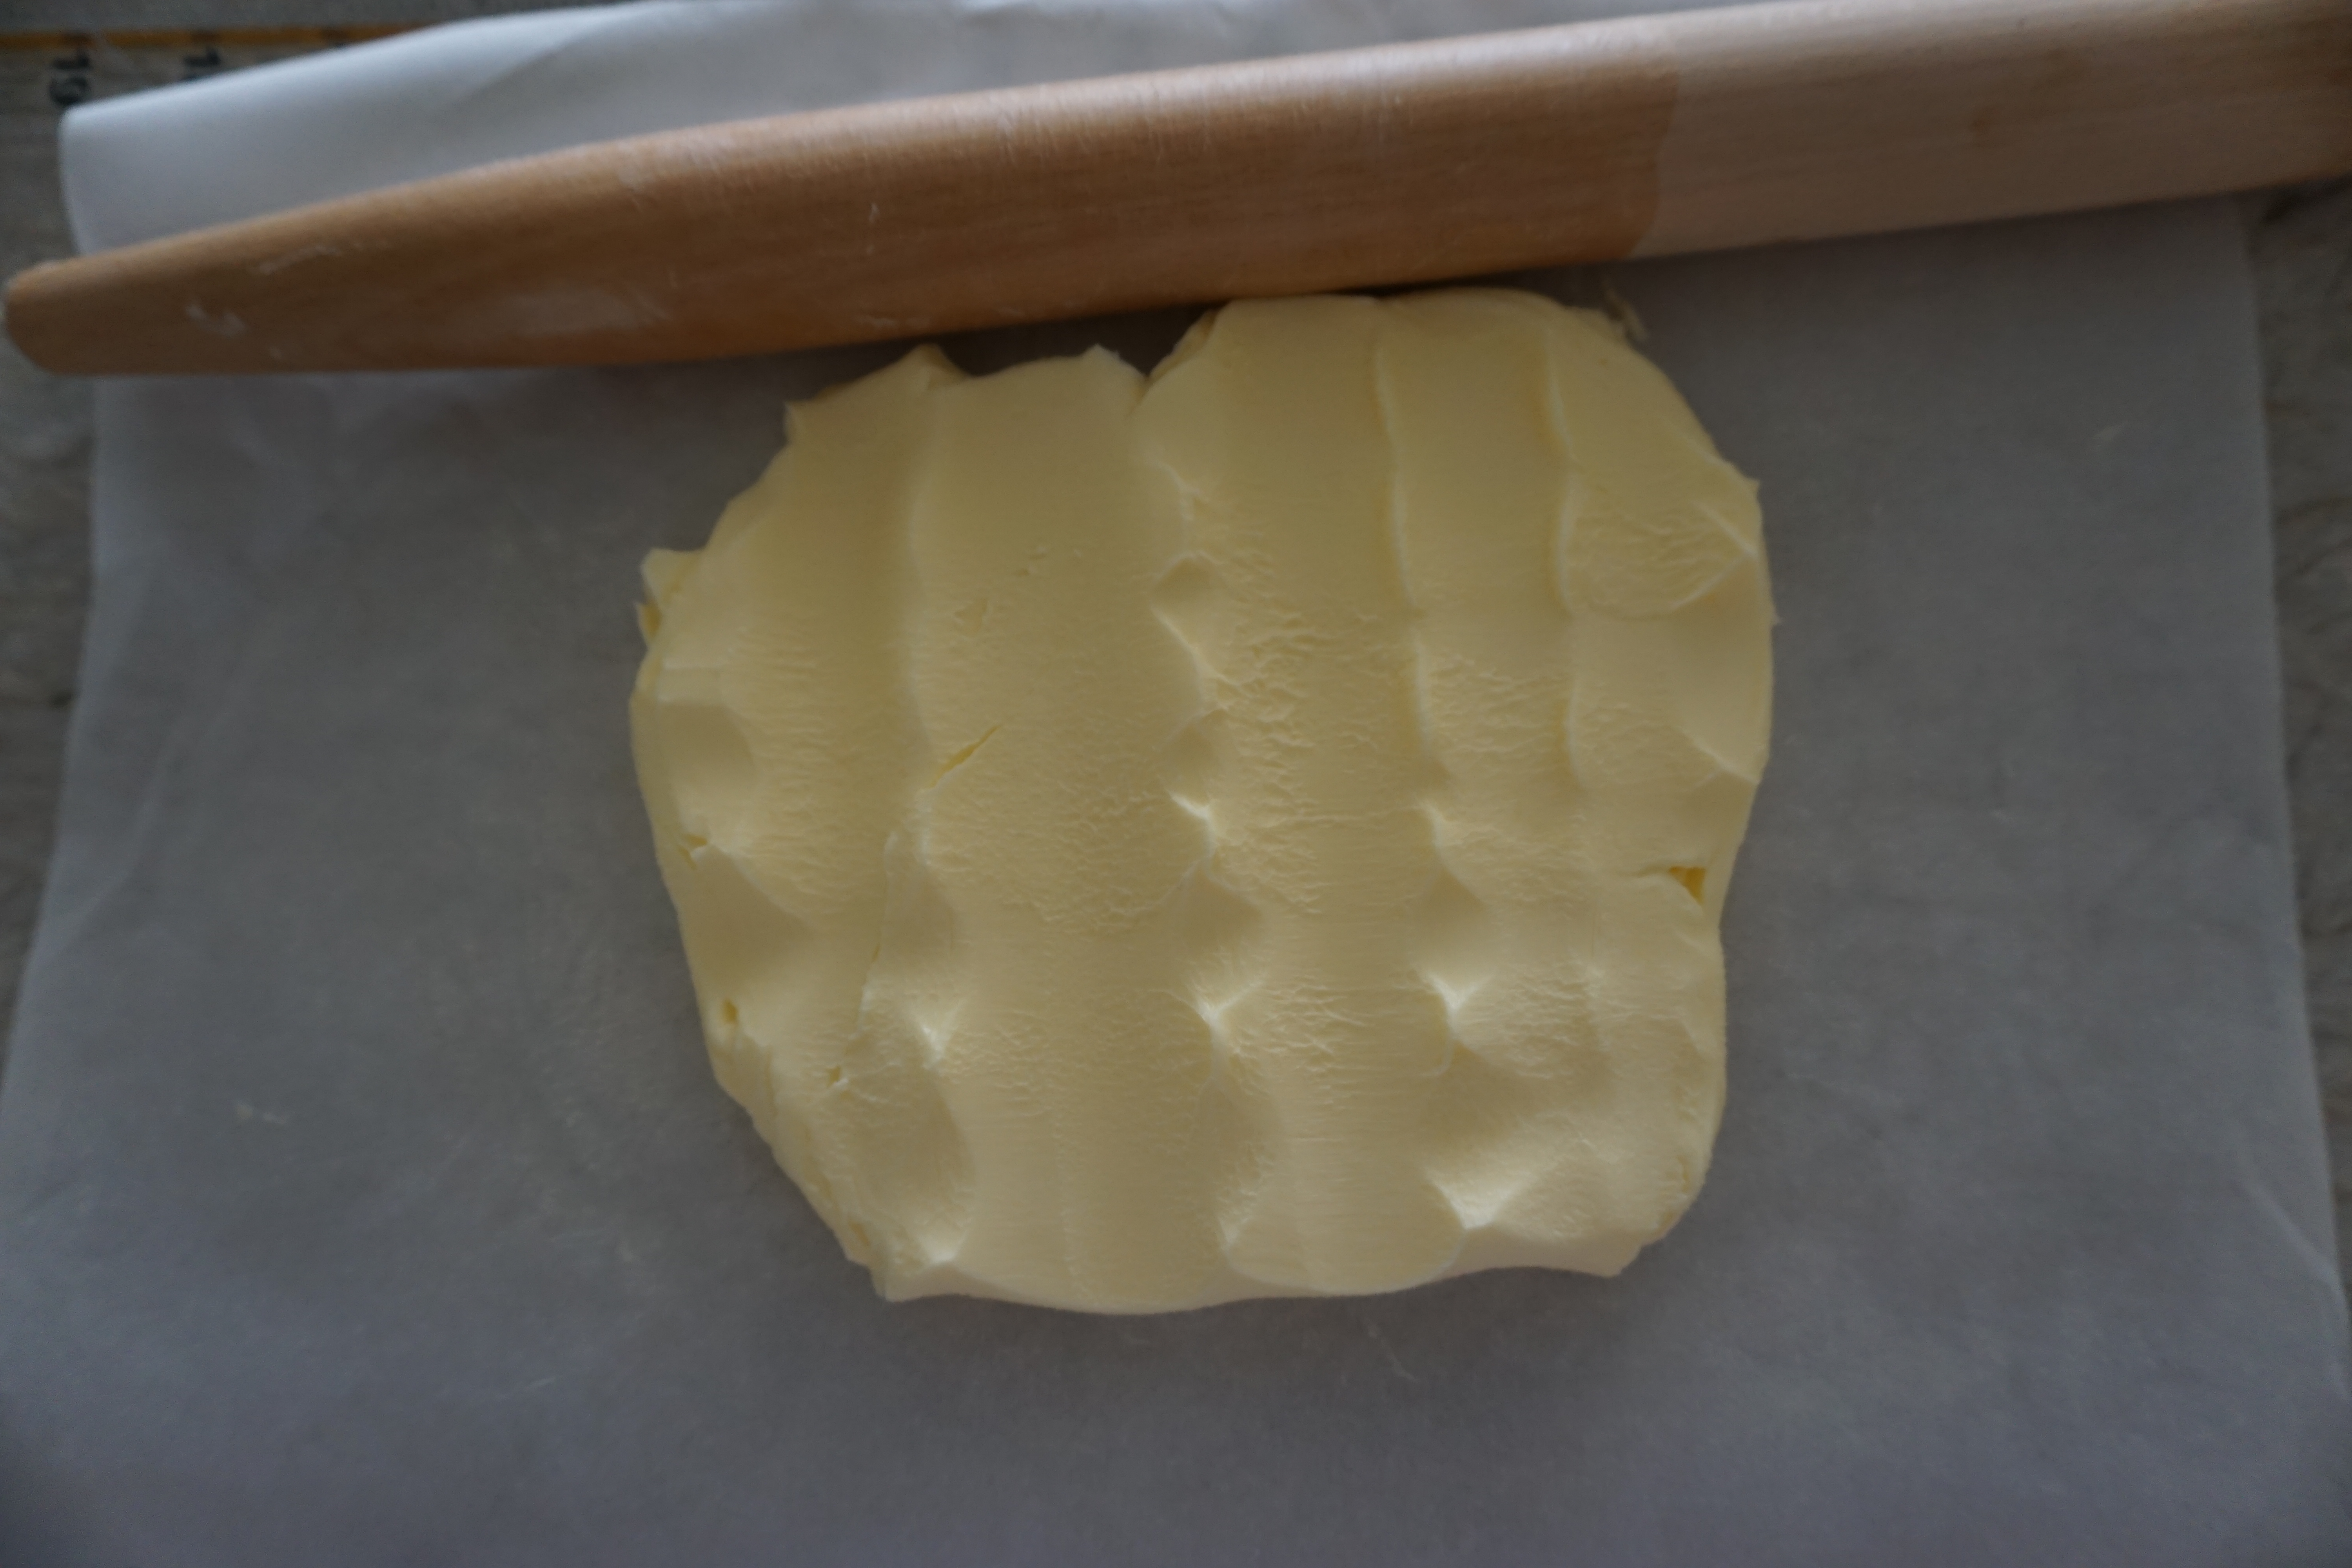
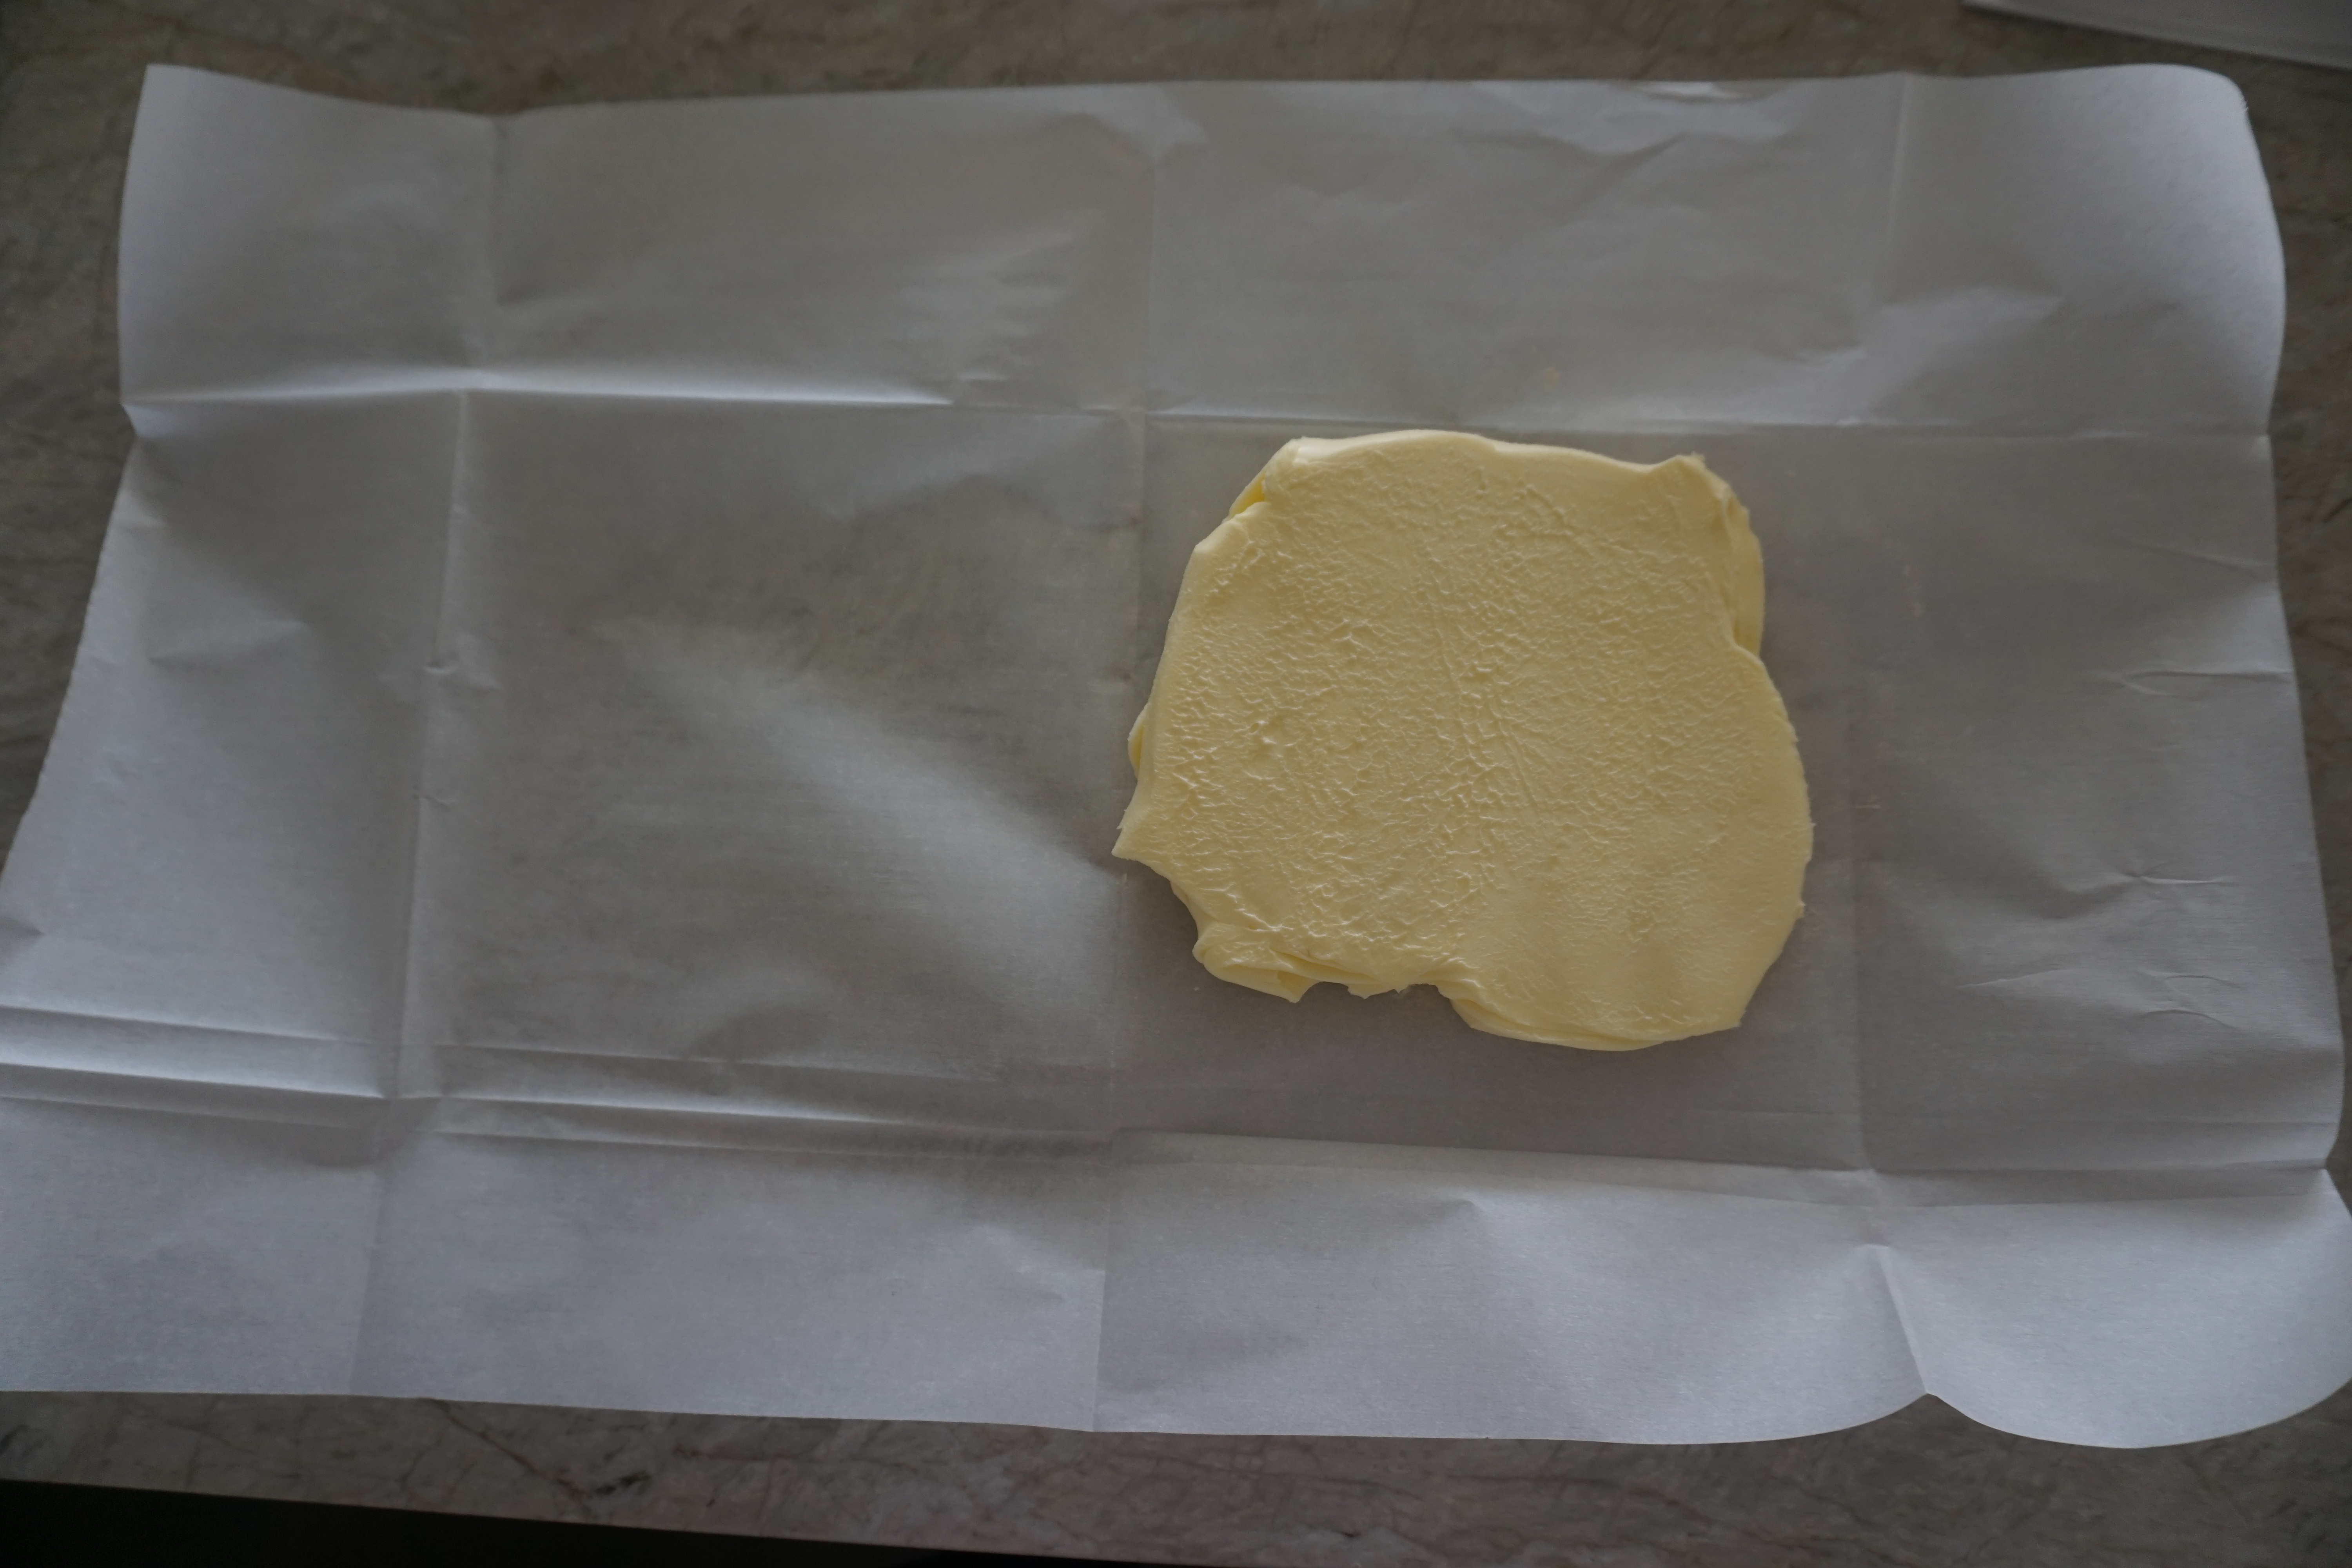
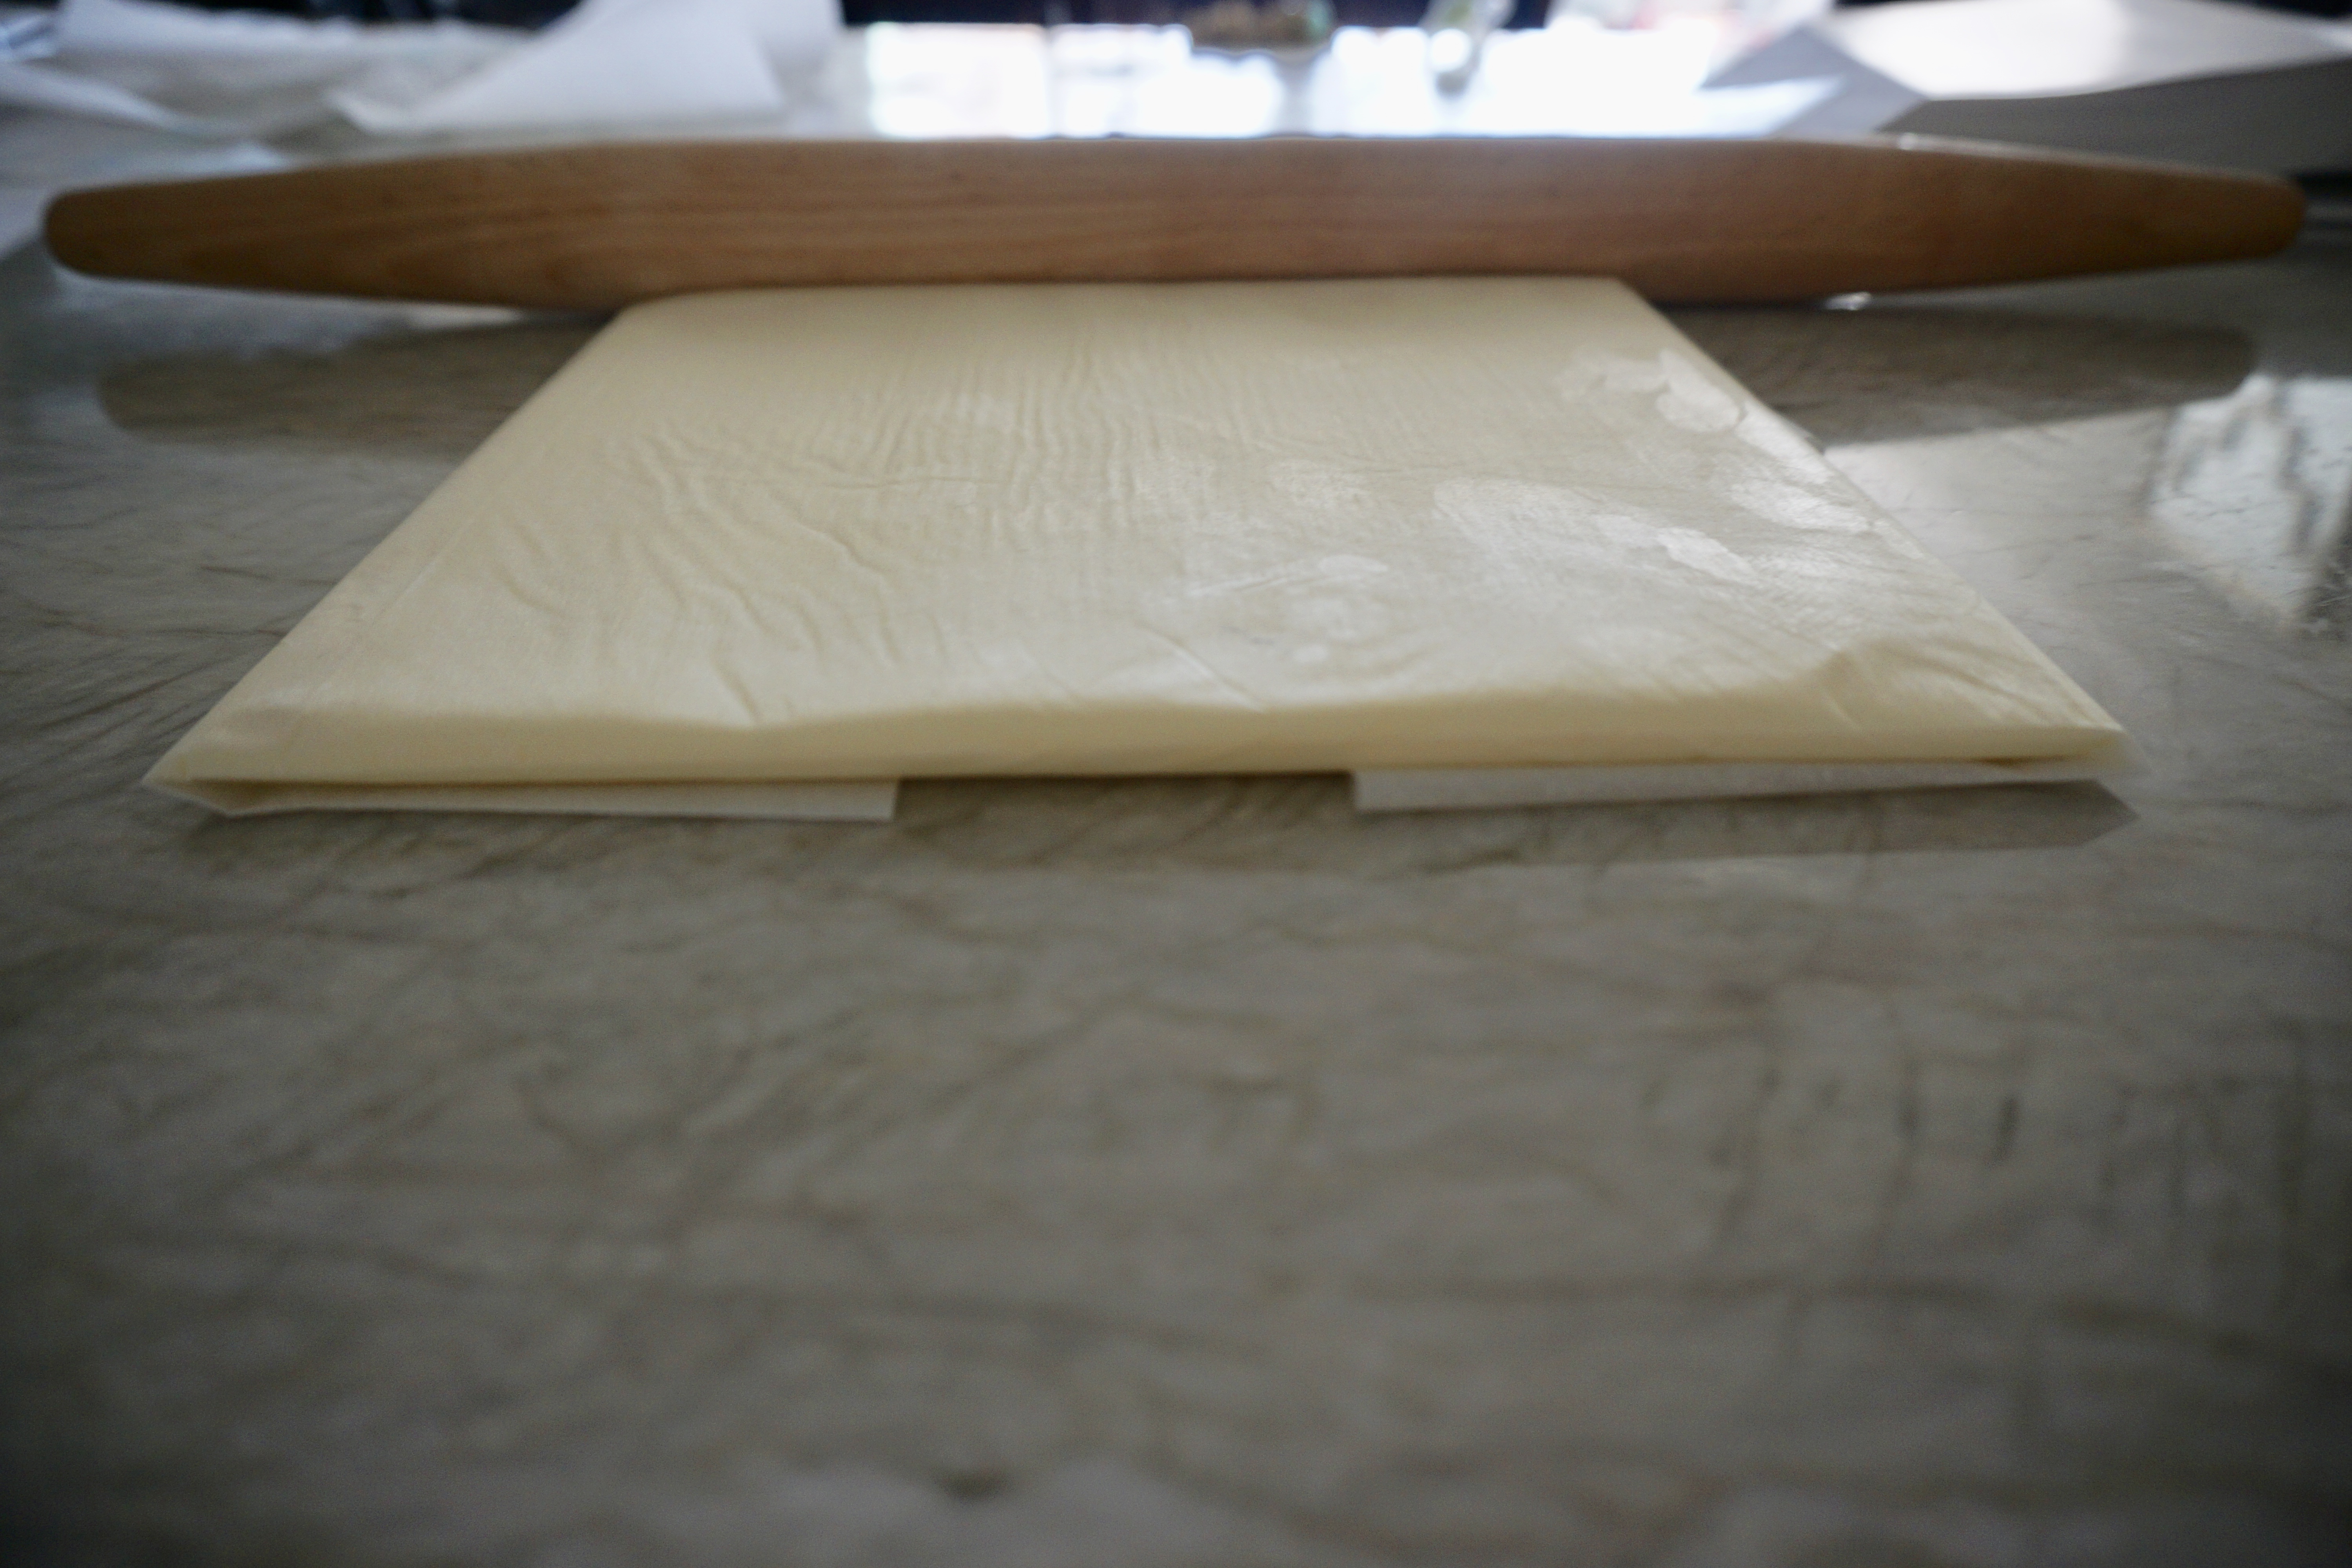
Once the square packet is ready, I measured out 24 tablespoons of cold unsalted butter. European style is best because it has less water in it, making it less likely to leak out while baking. I have made this recipe with Plugra unsalted and Kerrygold unsalted. Both worked great. I then used my rolling pin to beat the butter into a square. The idea isn’t to get the butter soft, but to make it more pliable. Next, I put the butter onto one side of the 8-by-8-inch square in the parchment packet. I folded it all back in place and then turned the packet over. Using my rolling pin I gently and carefully rolled the butter into all of the corners and surfaces of the parchment packet. I made sure to check that the butter was evenly spread out and also an even thickness. After shaping it, put it back into the refrigerator for at least 45 minutes, but the longer the better because, the butter block needs to be VERY cold before being put into the dough.
Back to the dough:

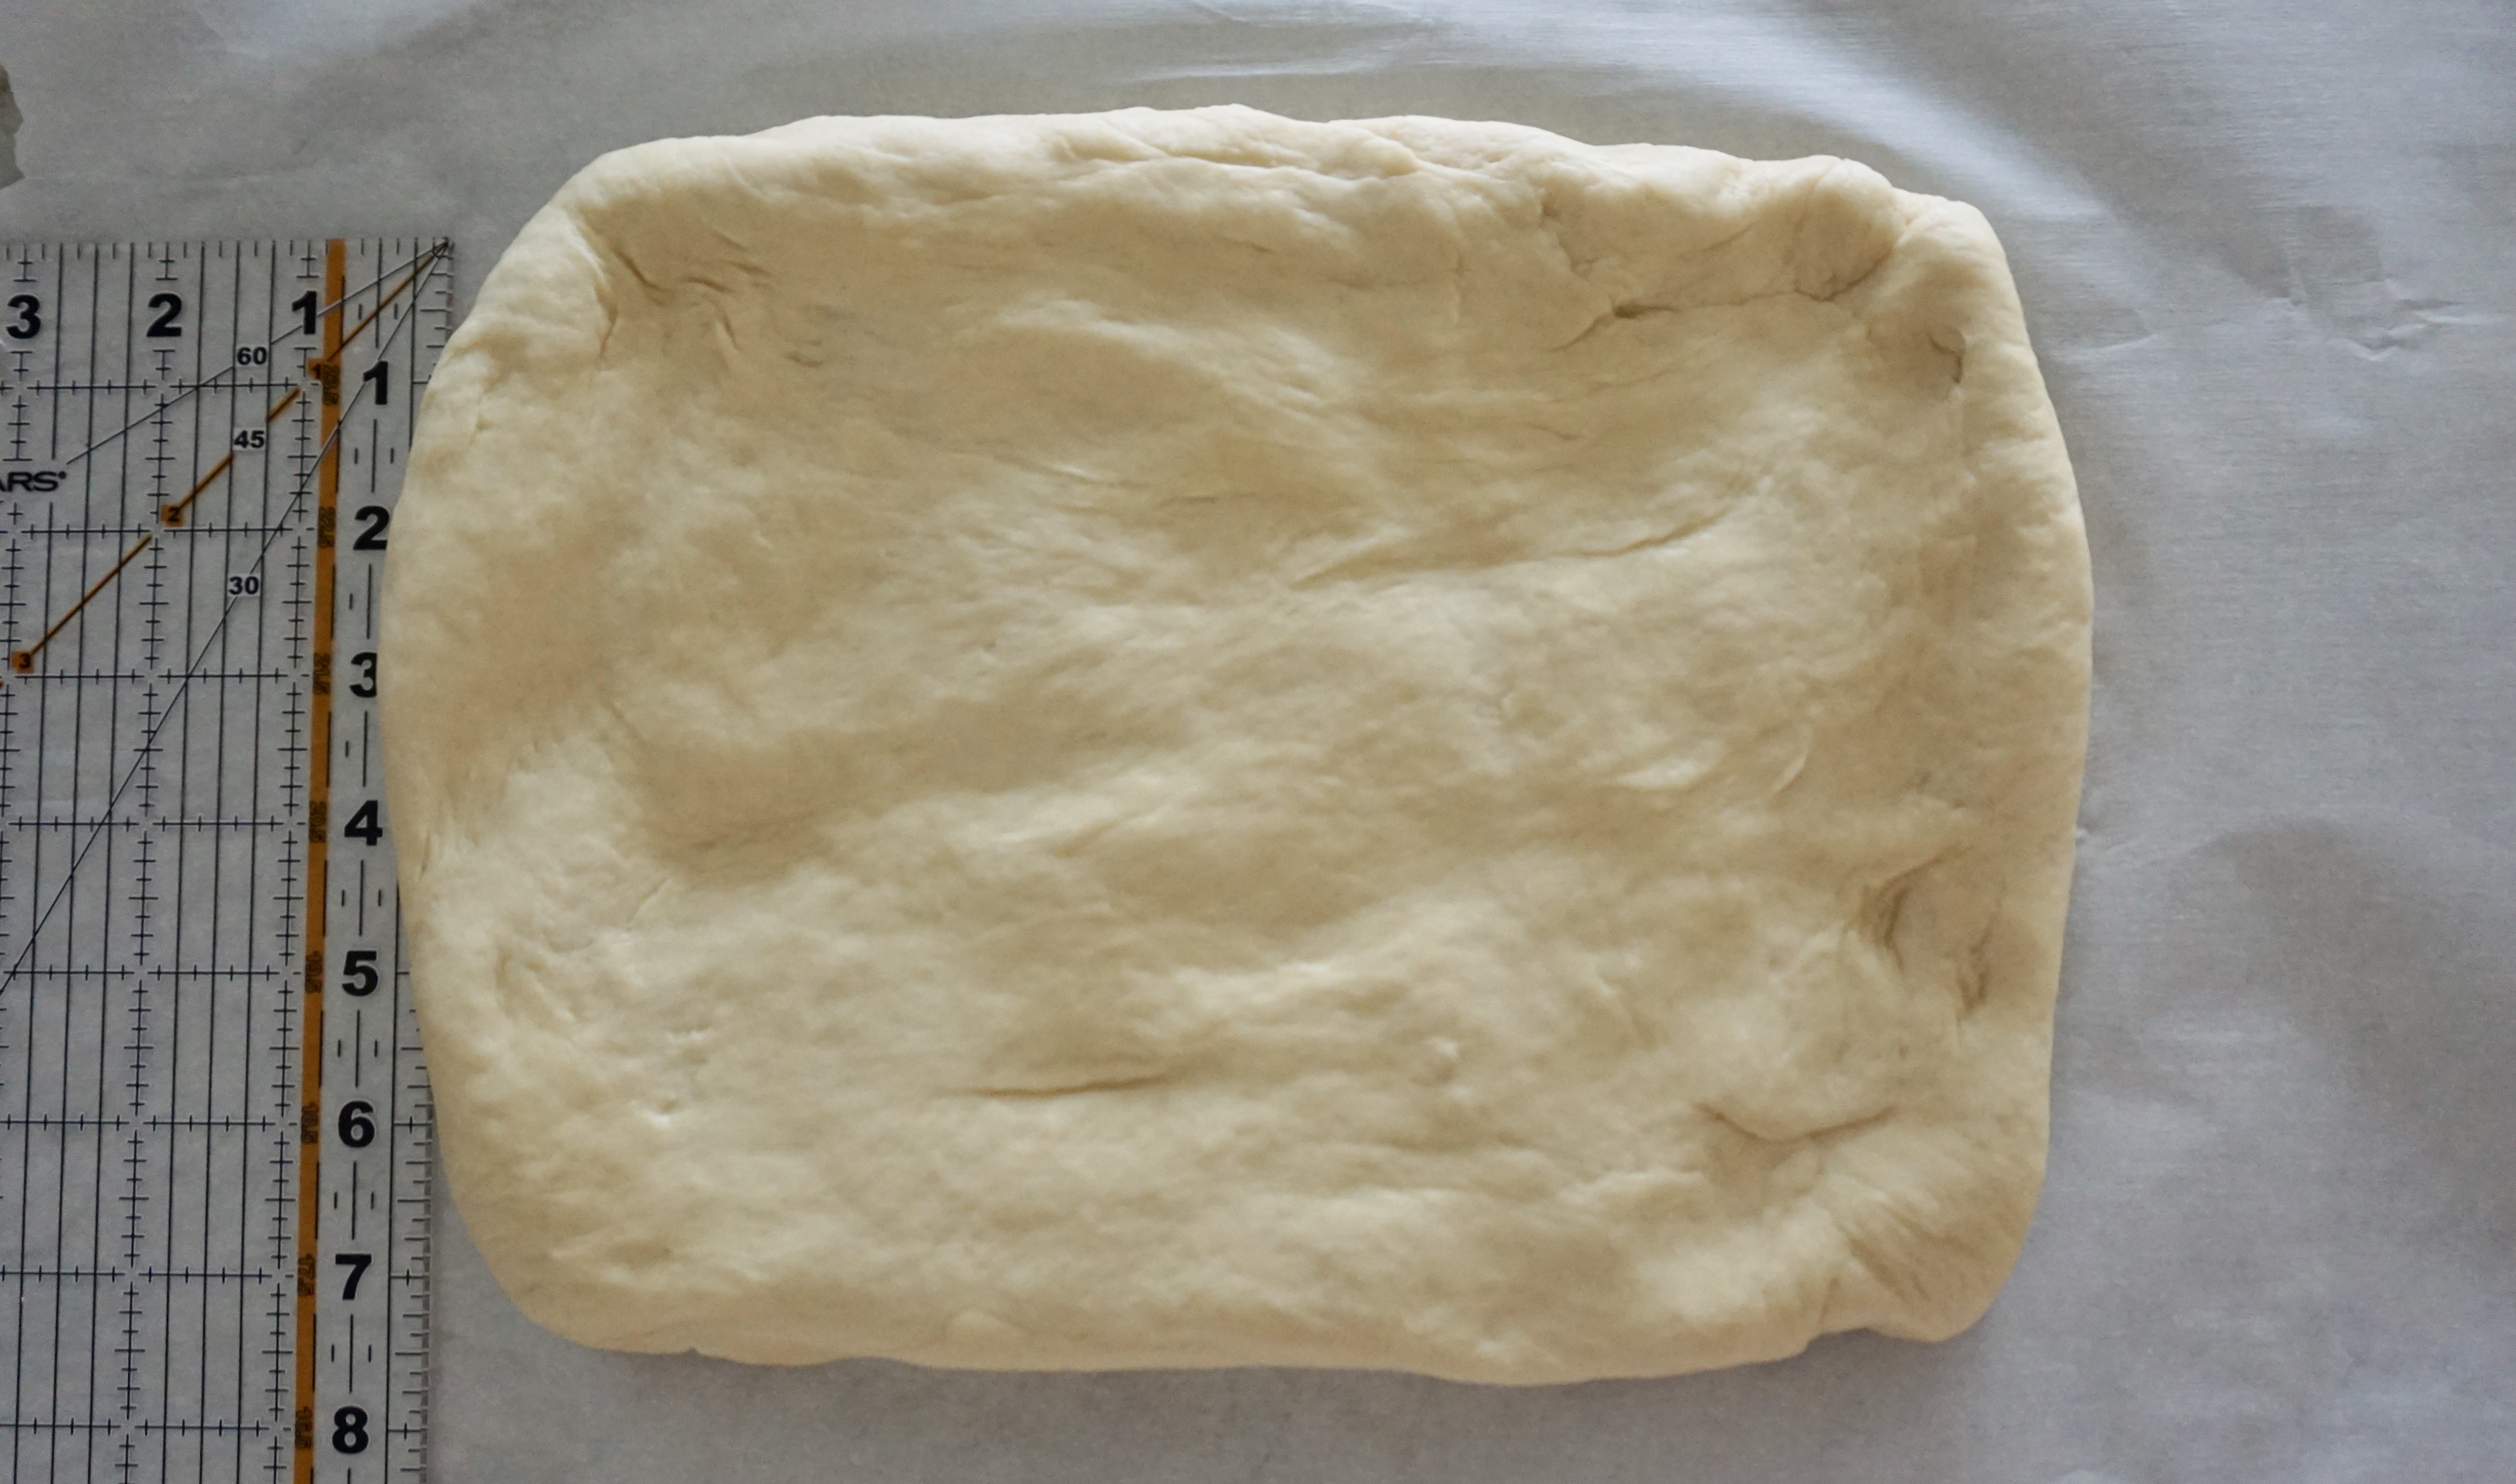

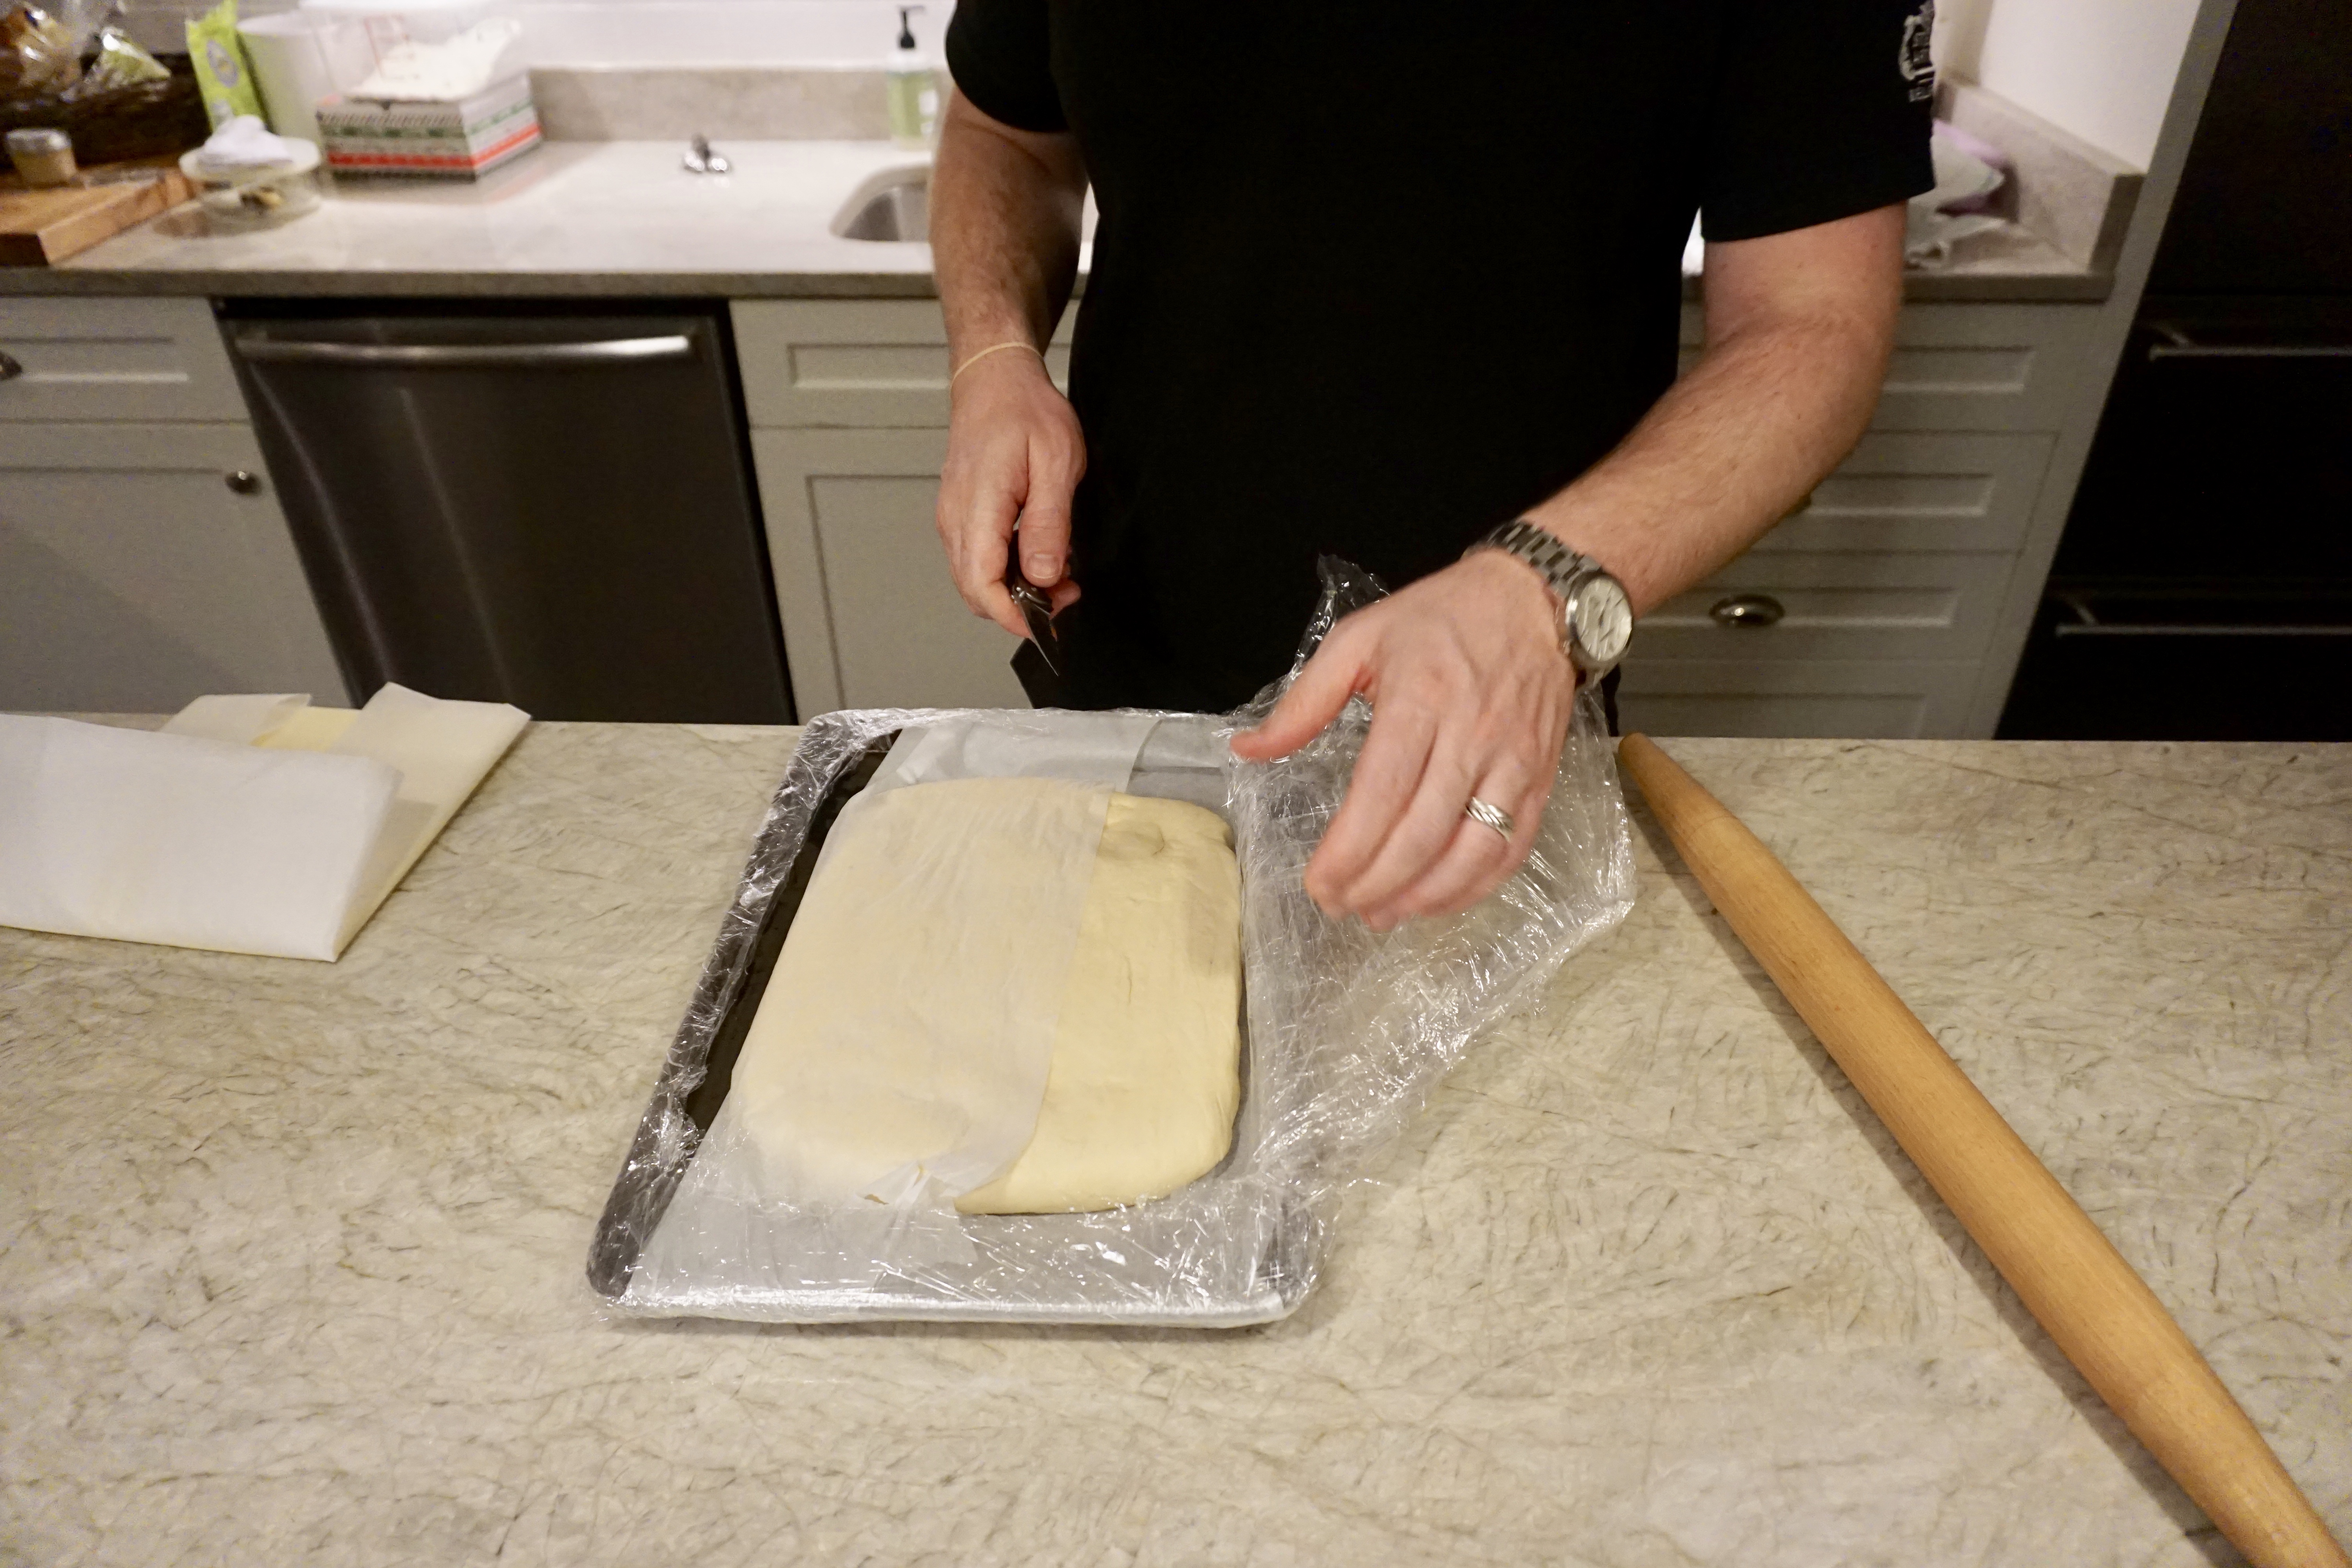
After 30 minutes of rise and rest time, I took the dough out of the mixing bowl and used my hands to gently shape it into a 10-by-7-inch rectangle. Then I moved the parchment paper to a sheet pan that I knew would fit in BOTH my fridge and freezer and wrapped the dough tightly in plastic wrap and put it in the fridge for 2 hours. After 2 hours, I moved it to the freezer for 30 minutes to really firm up.
Time to laminate:

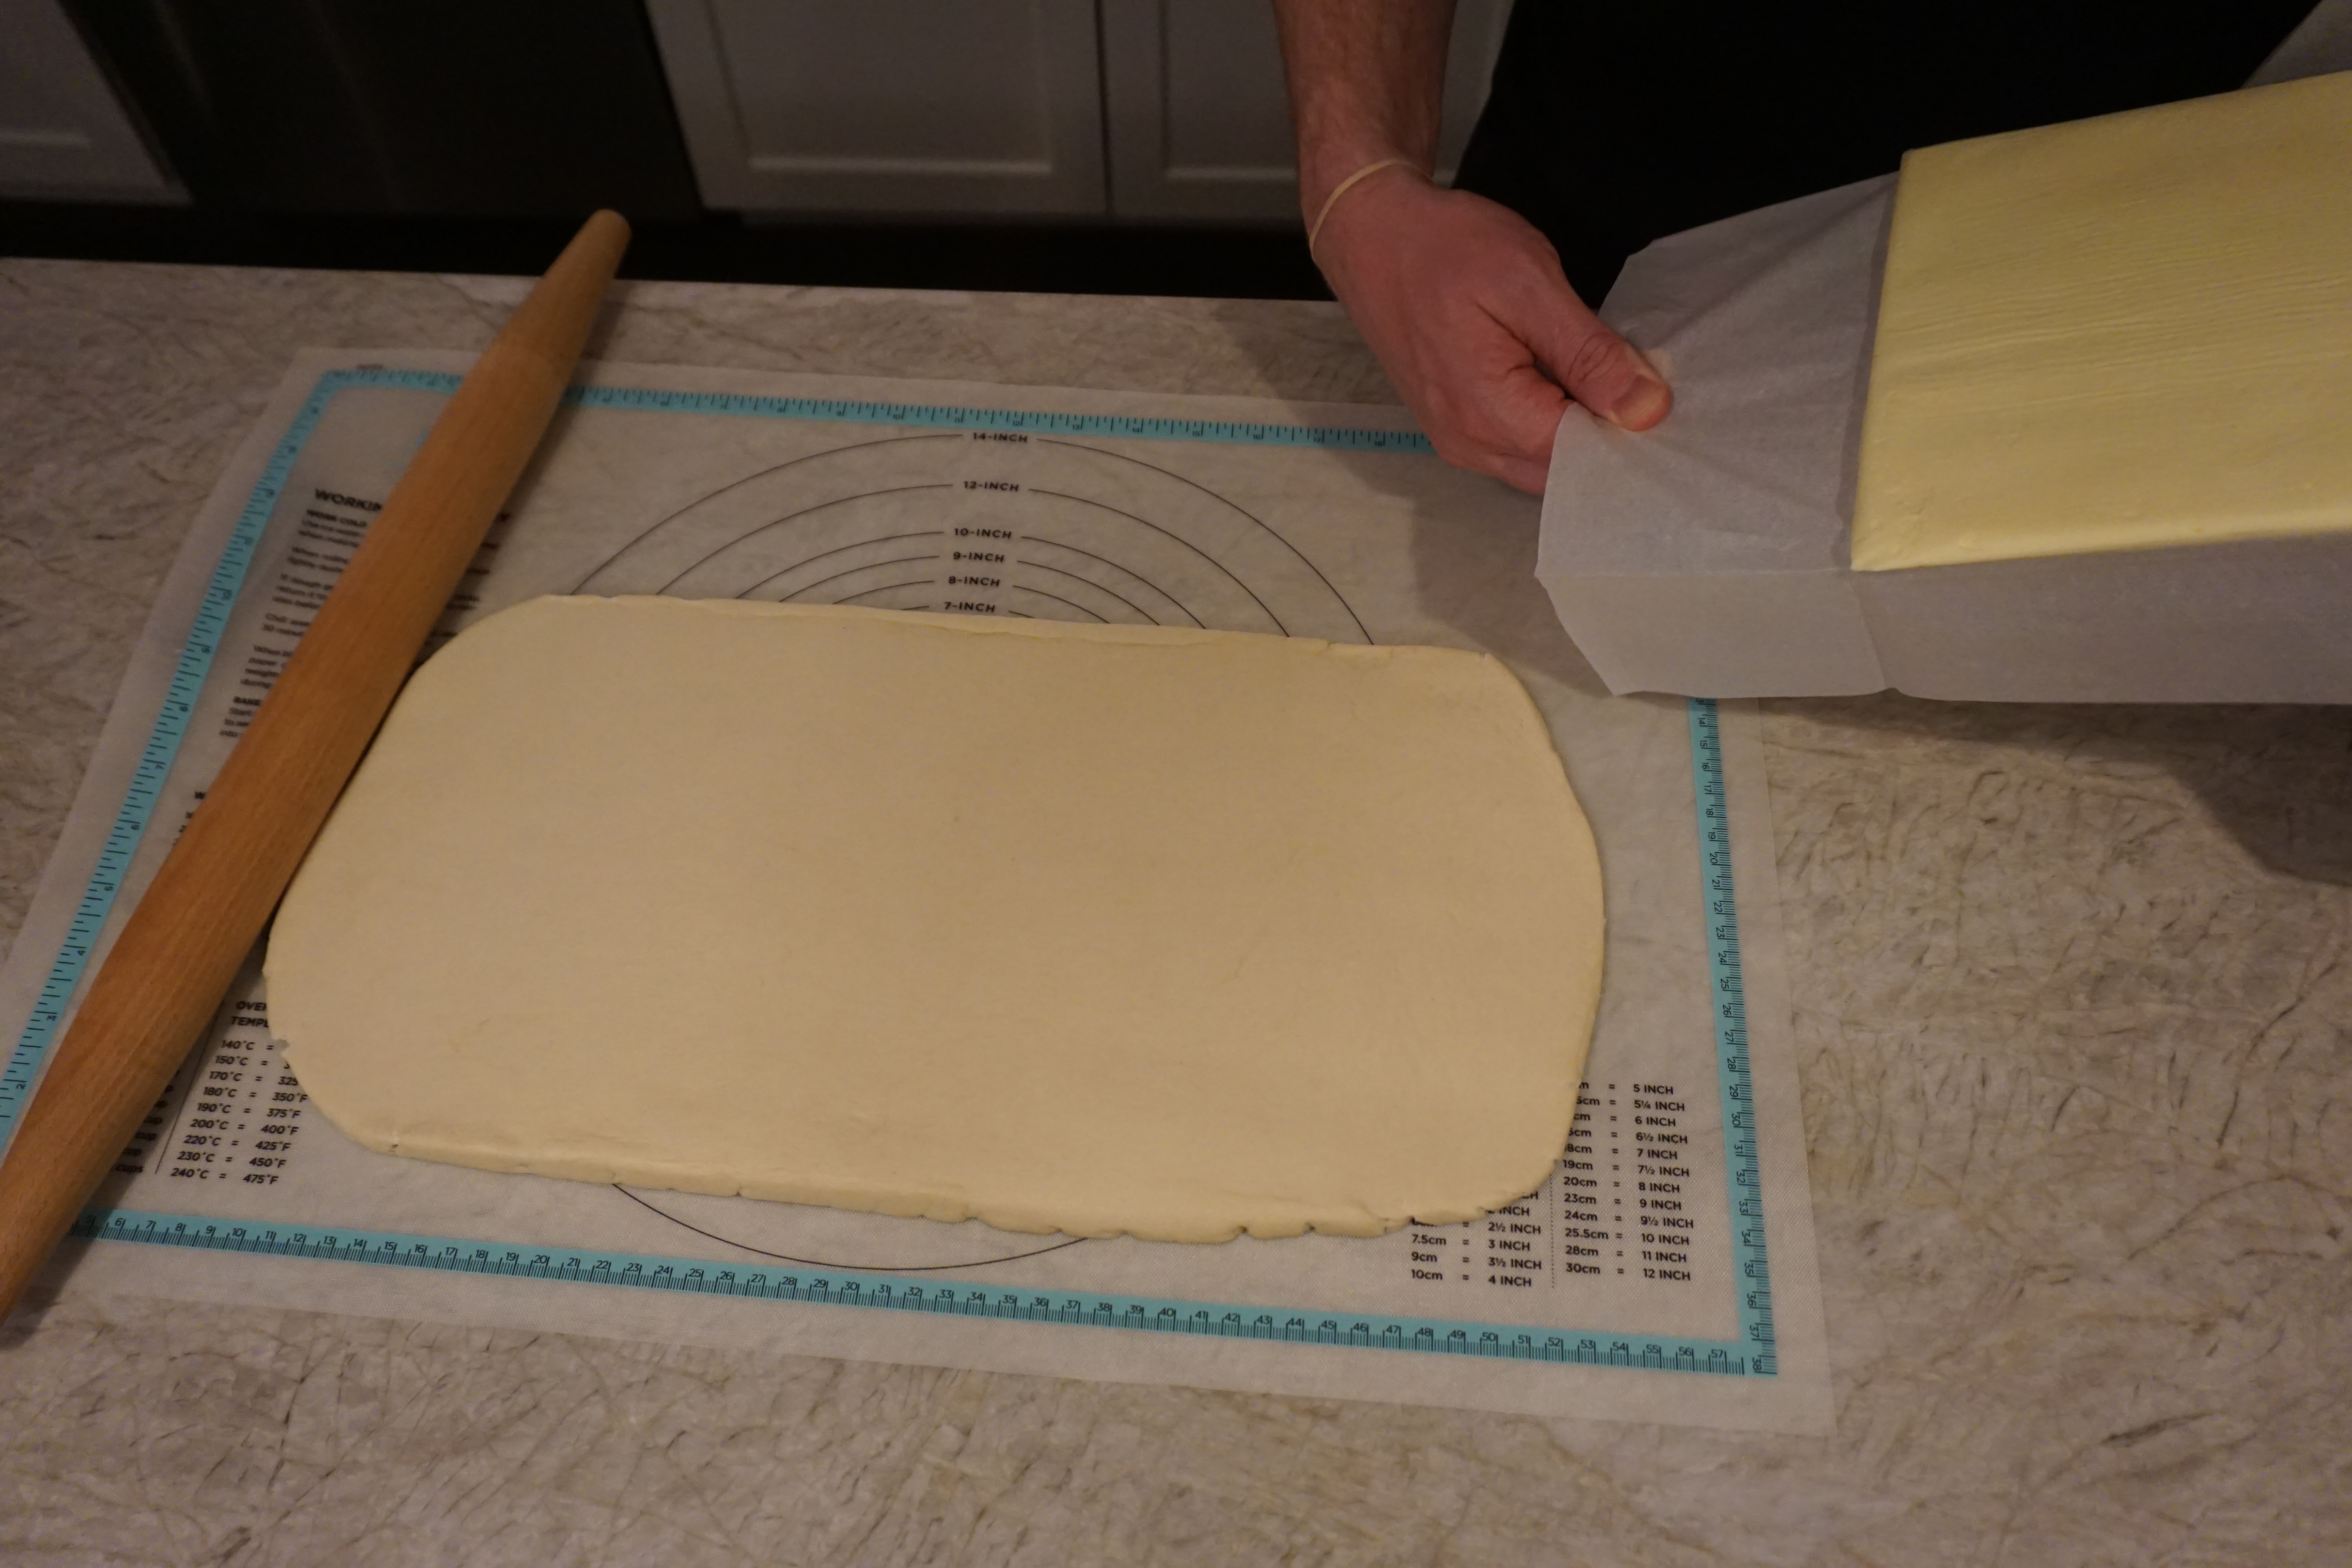
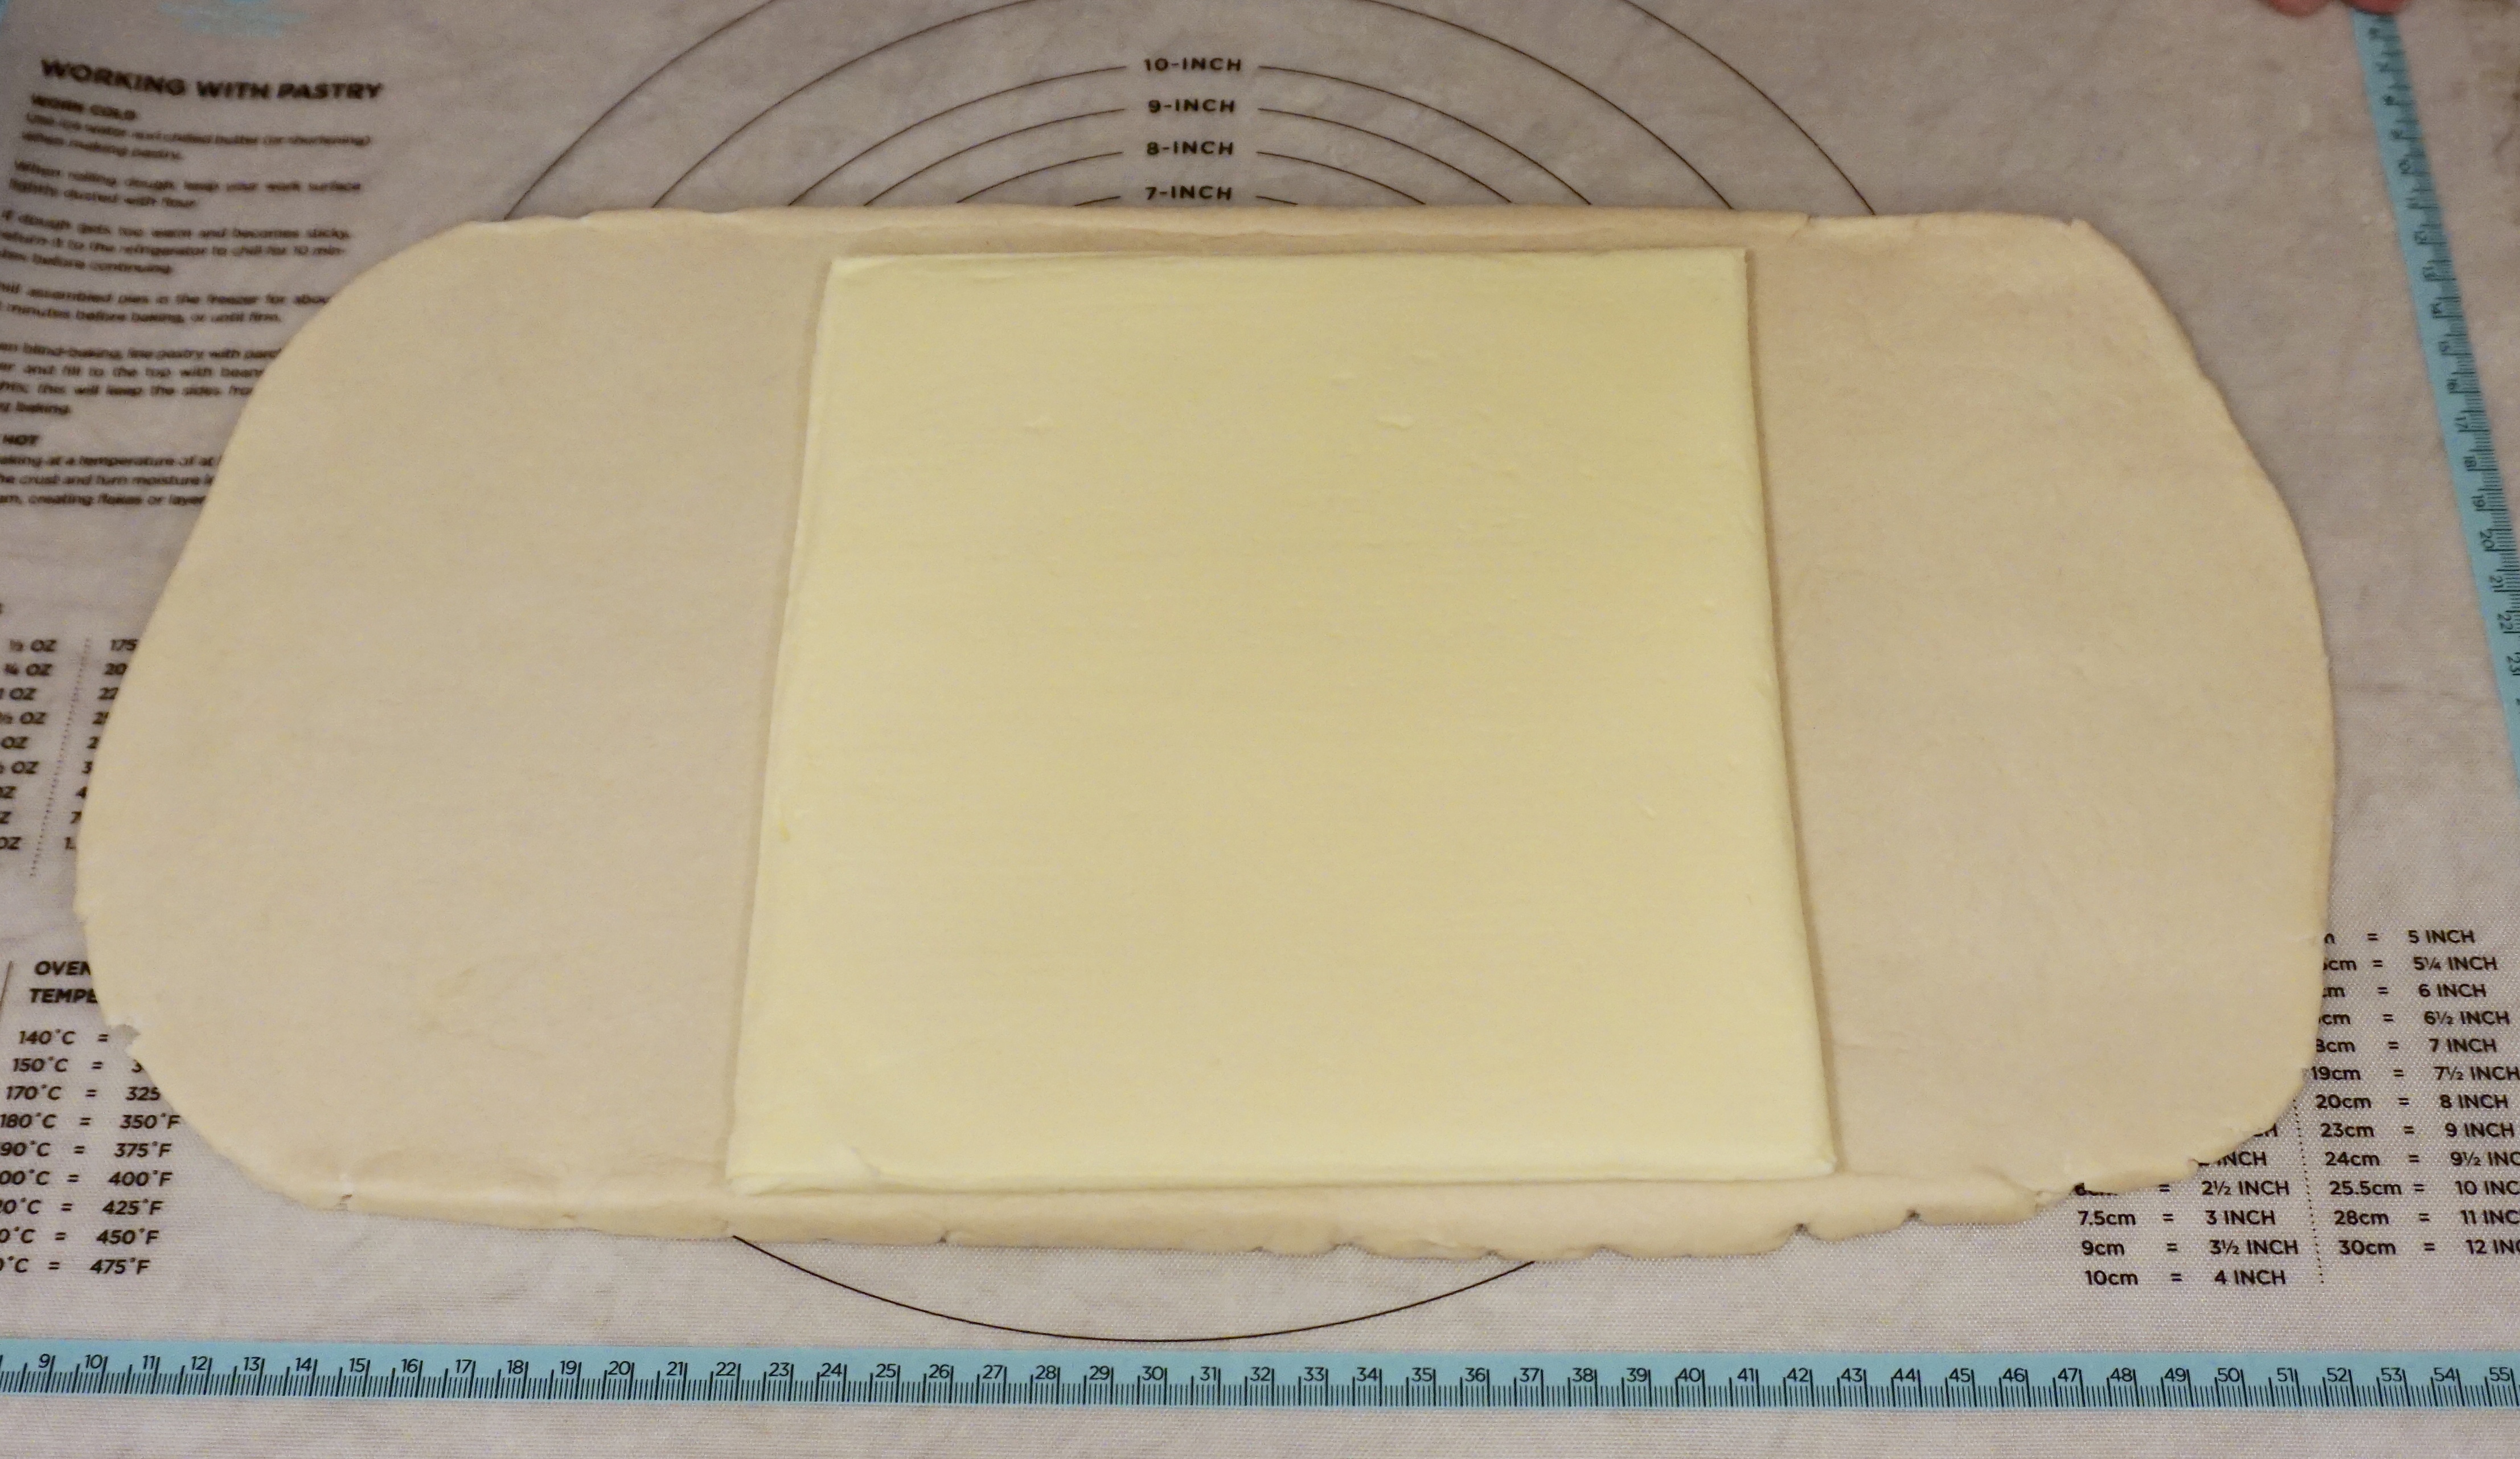

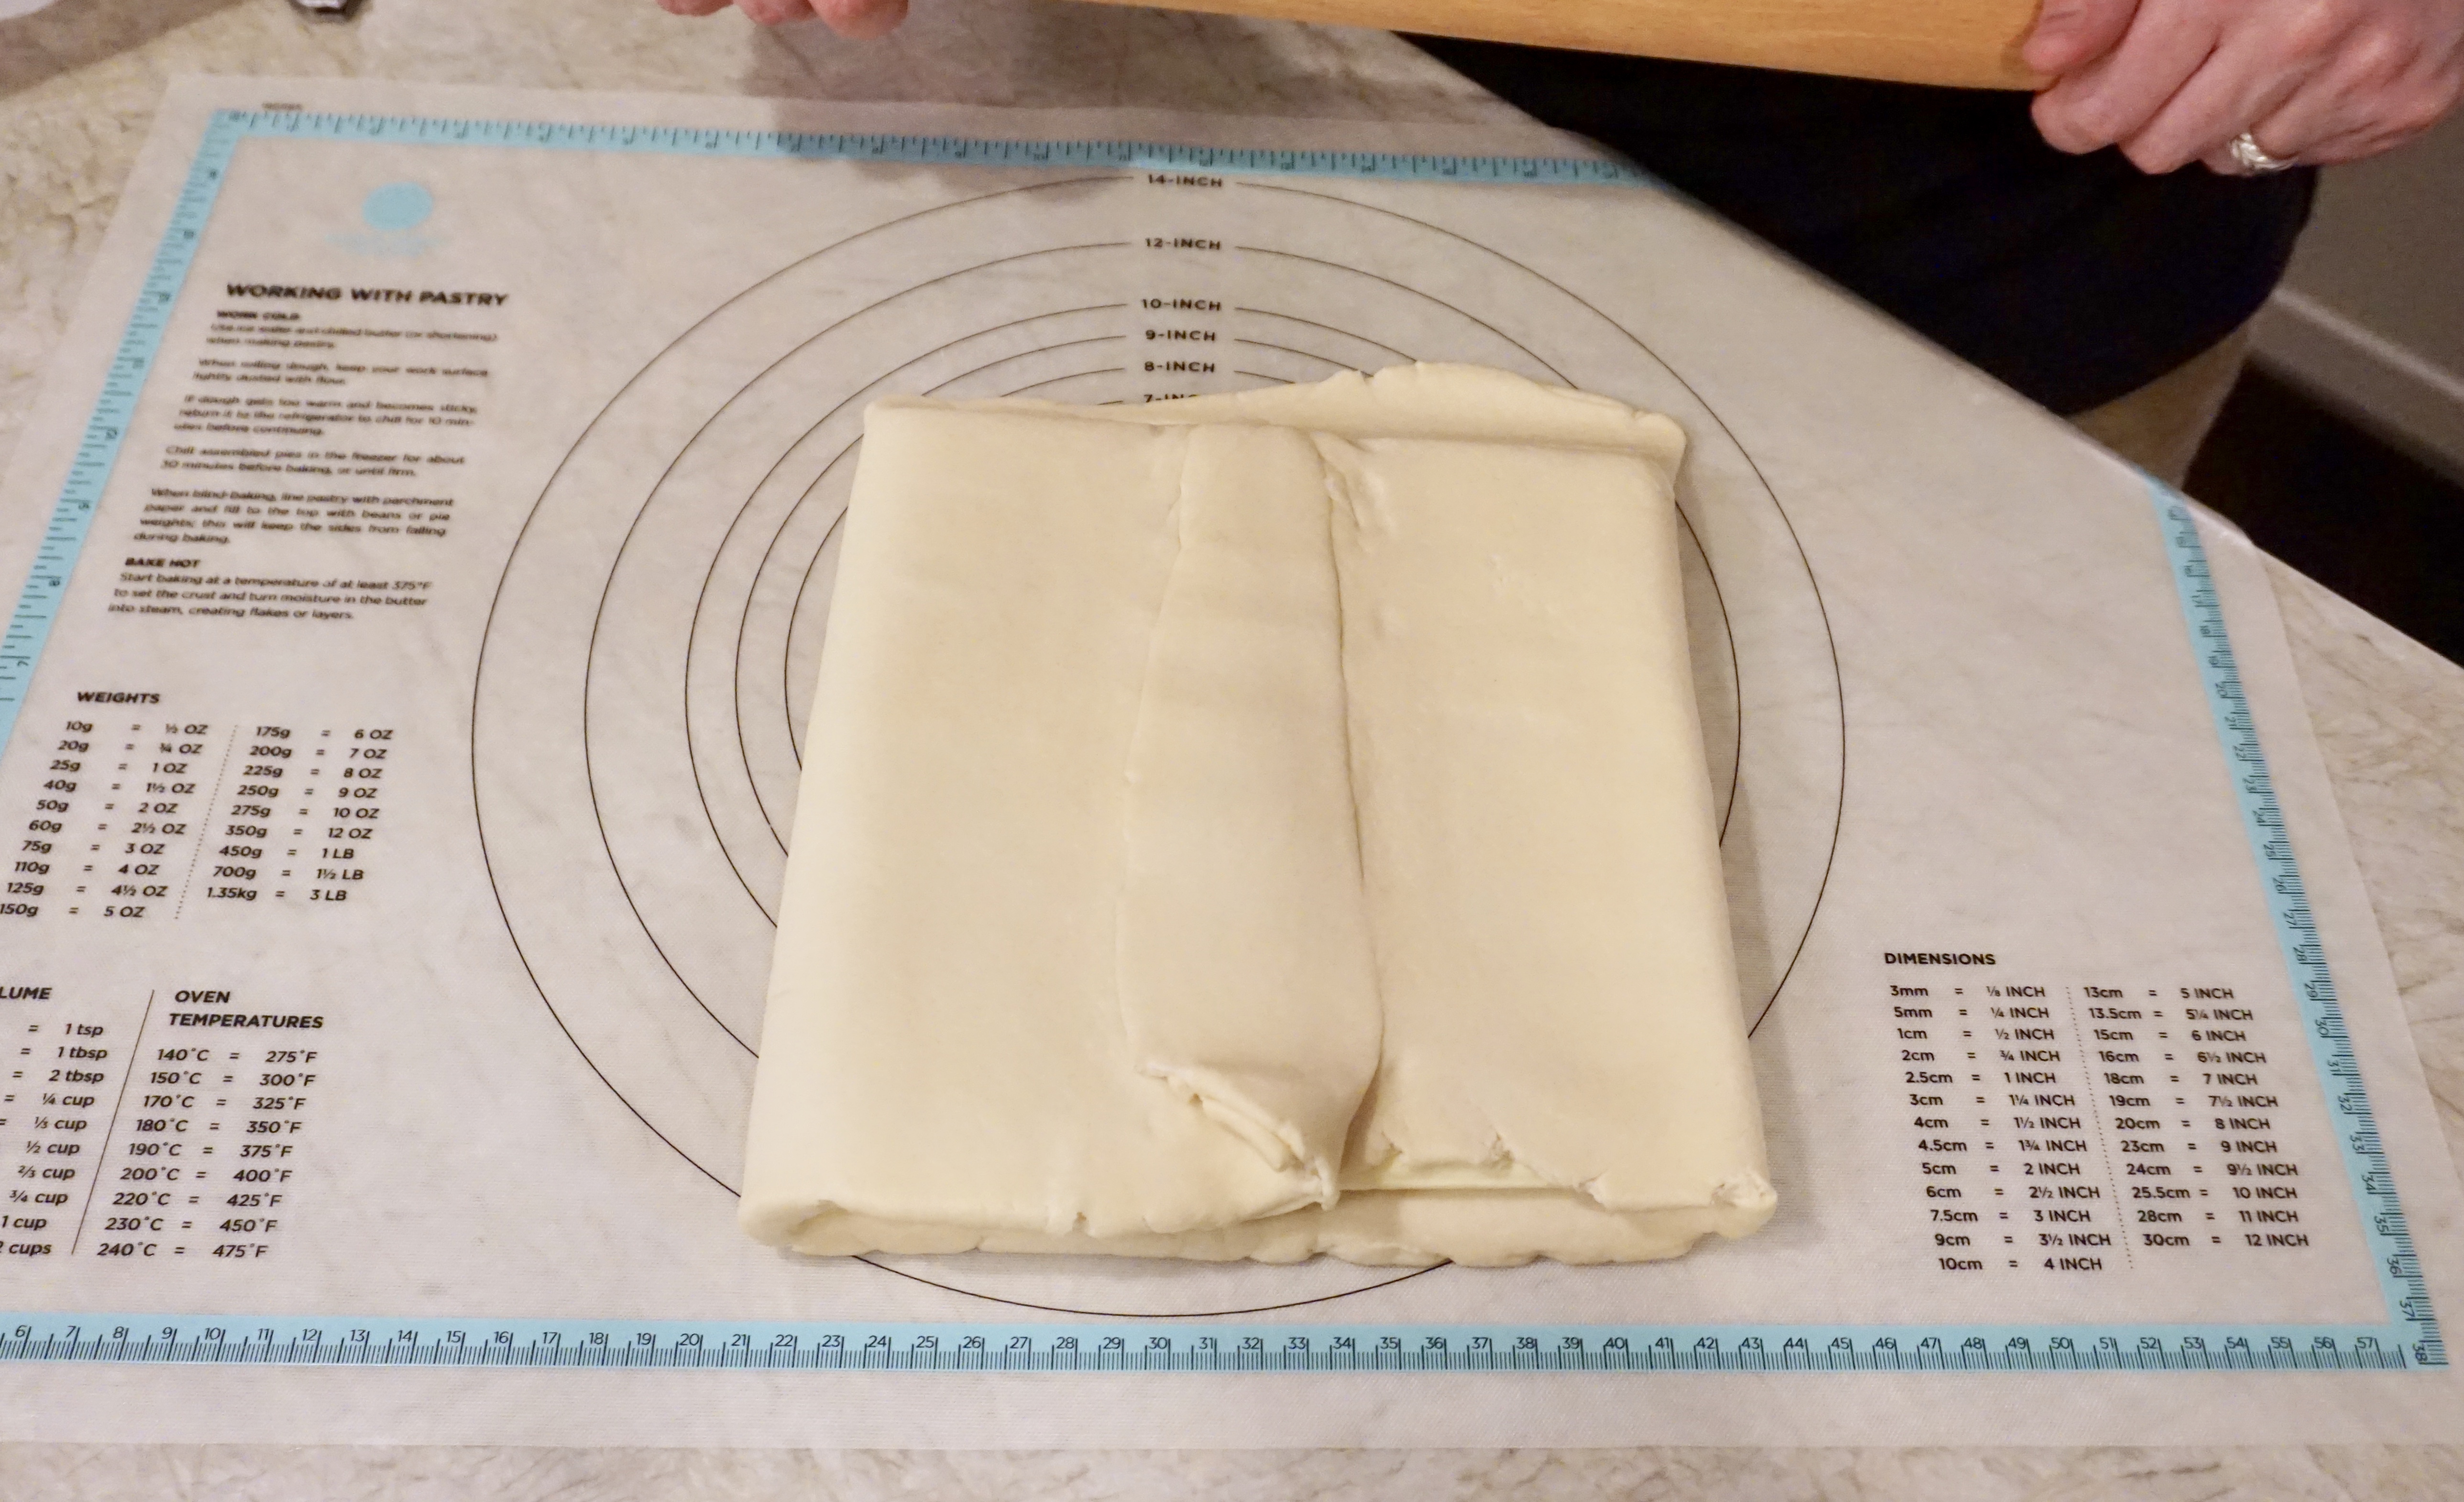
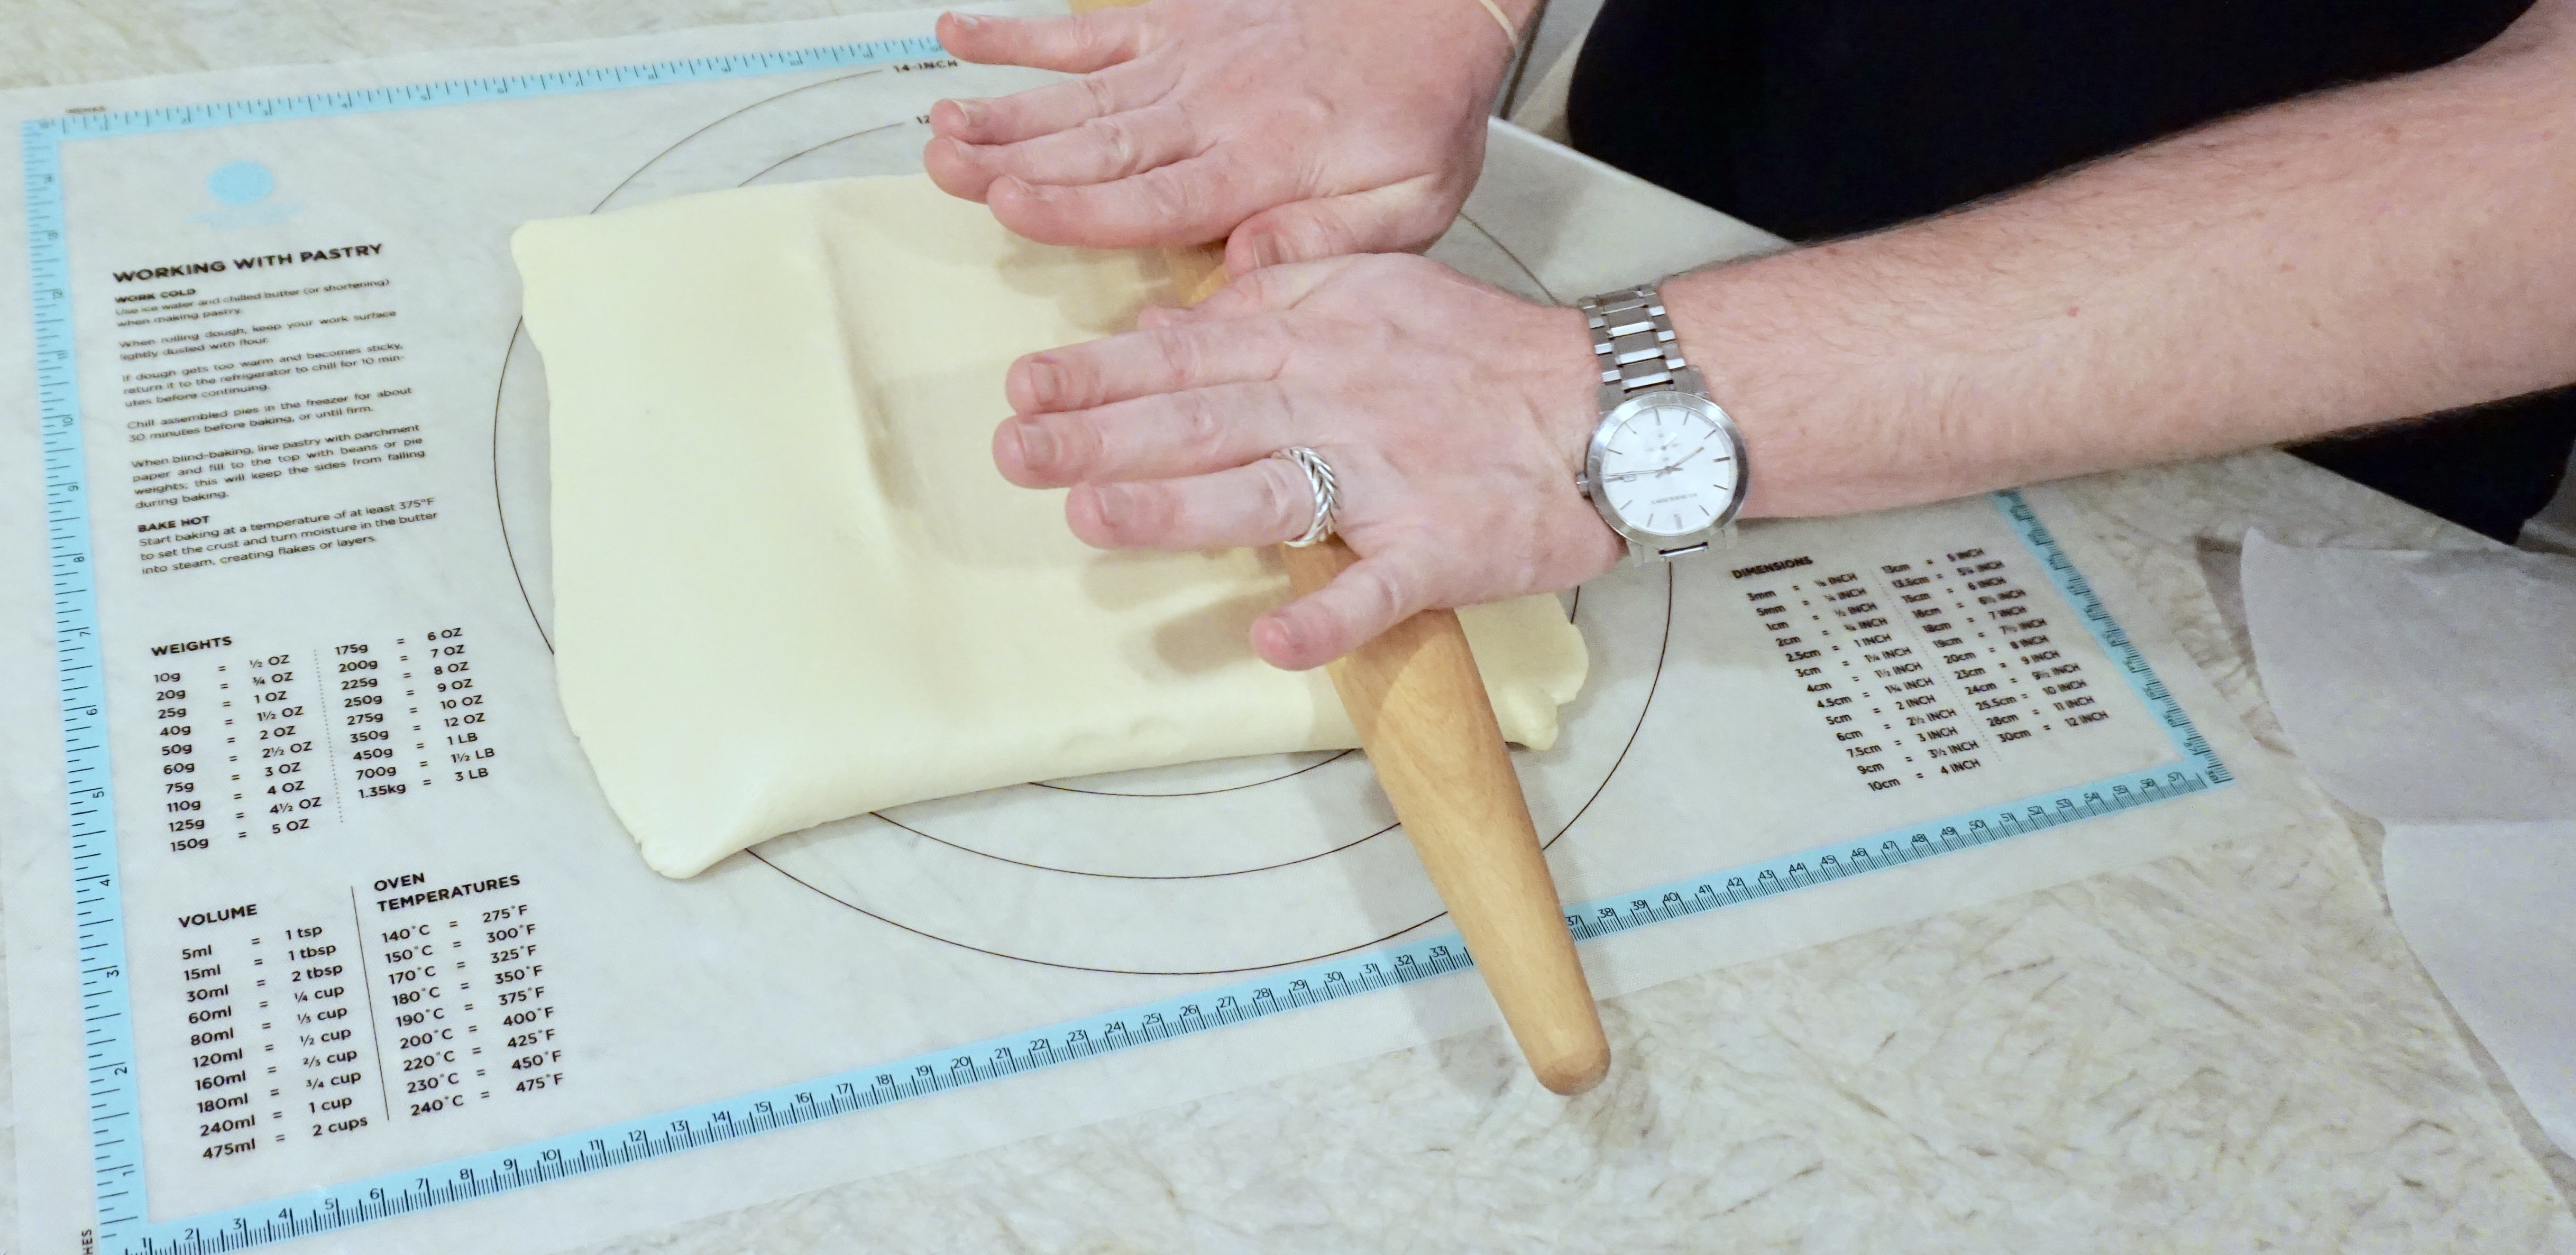

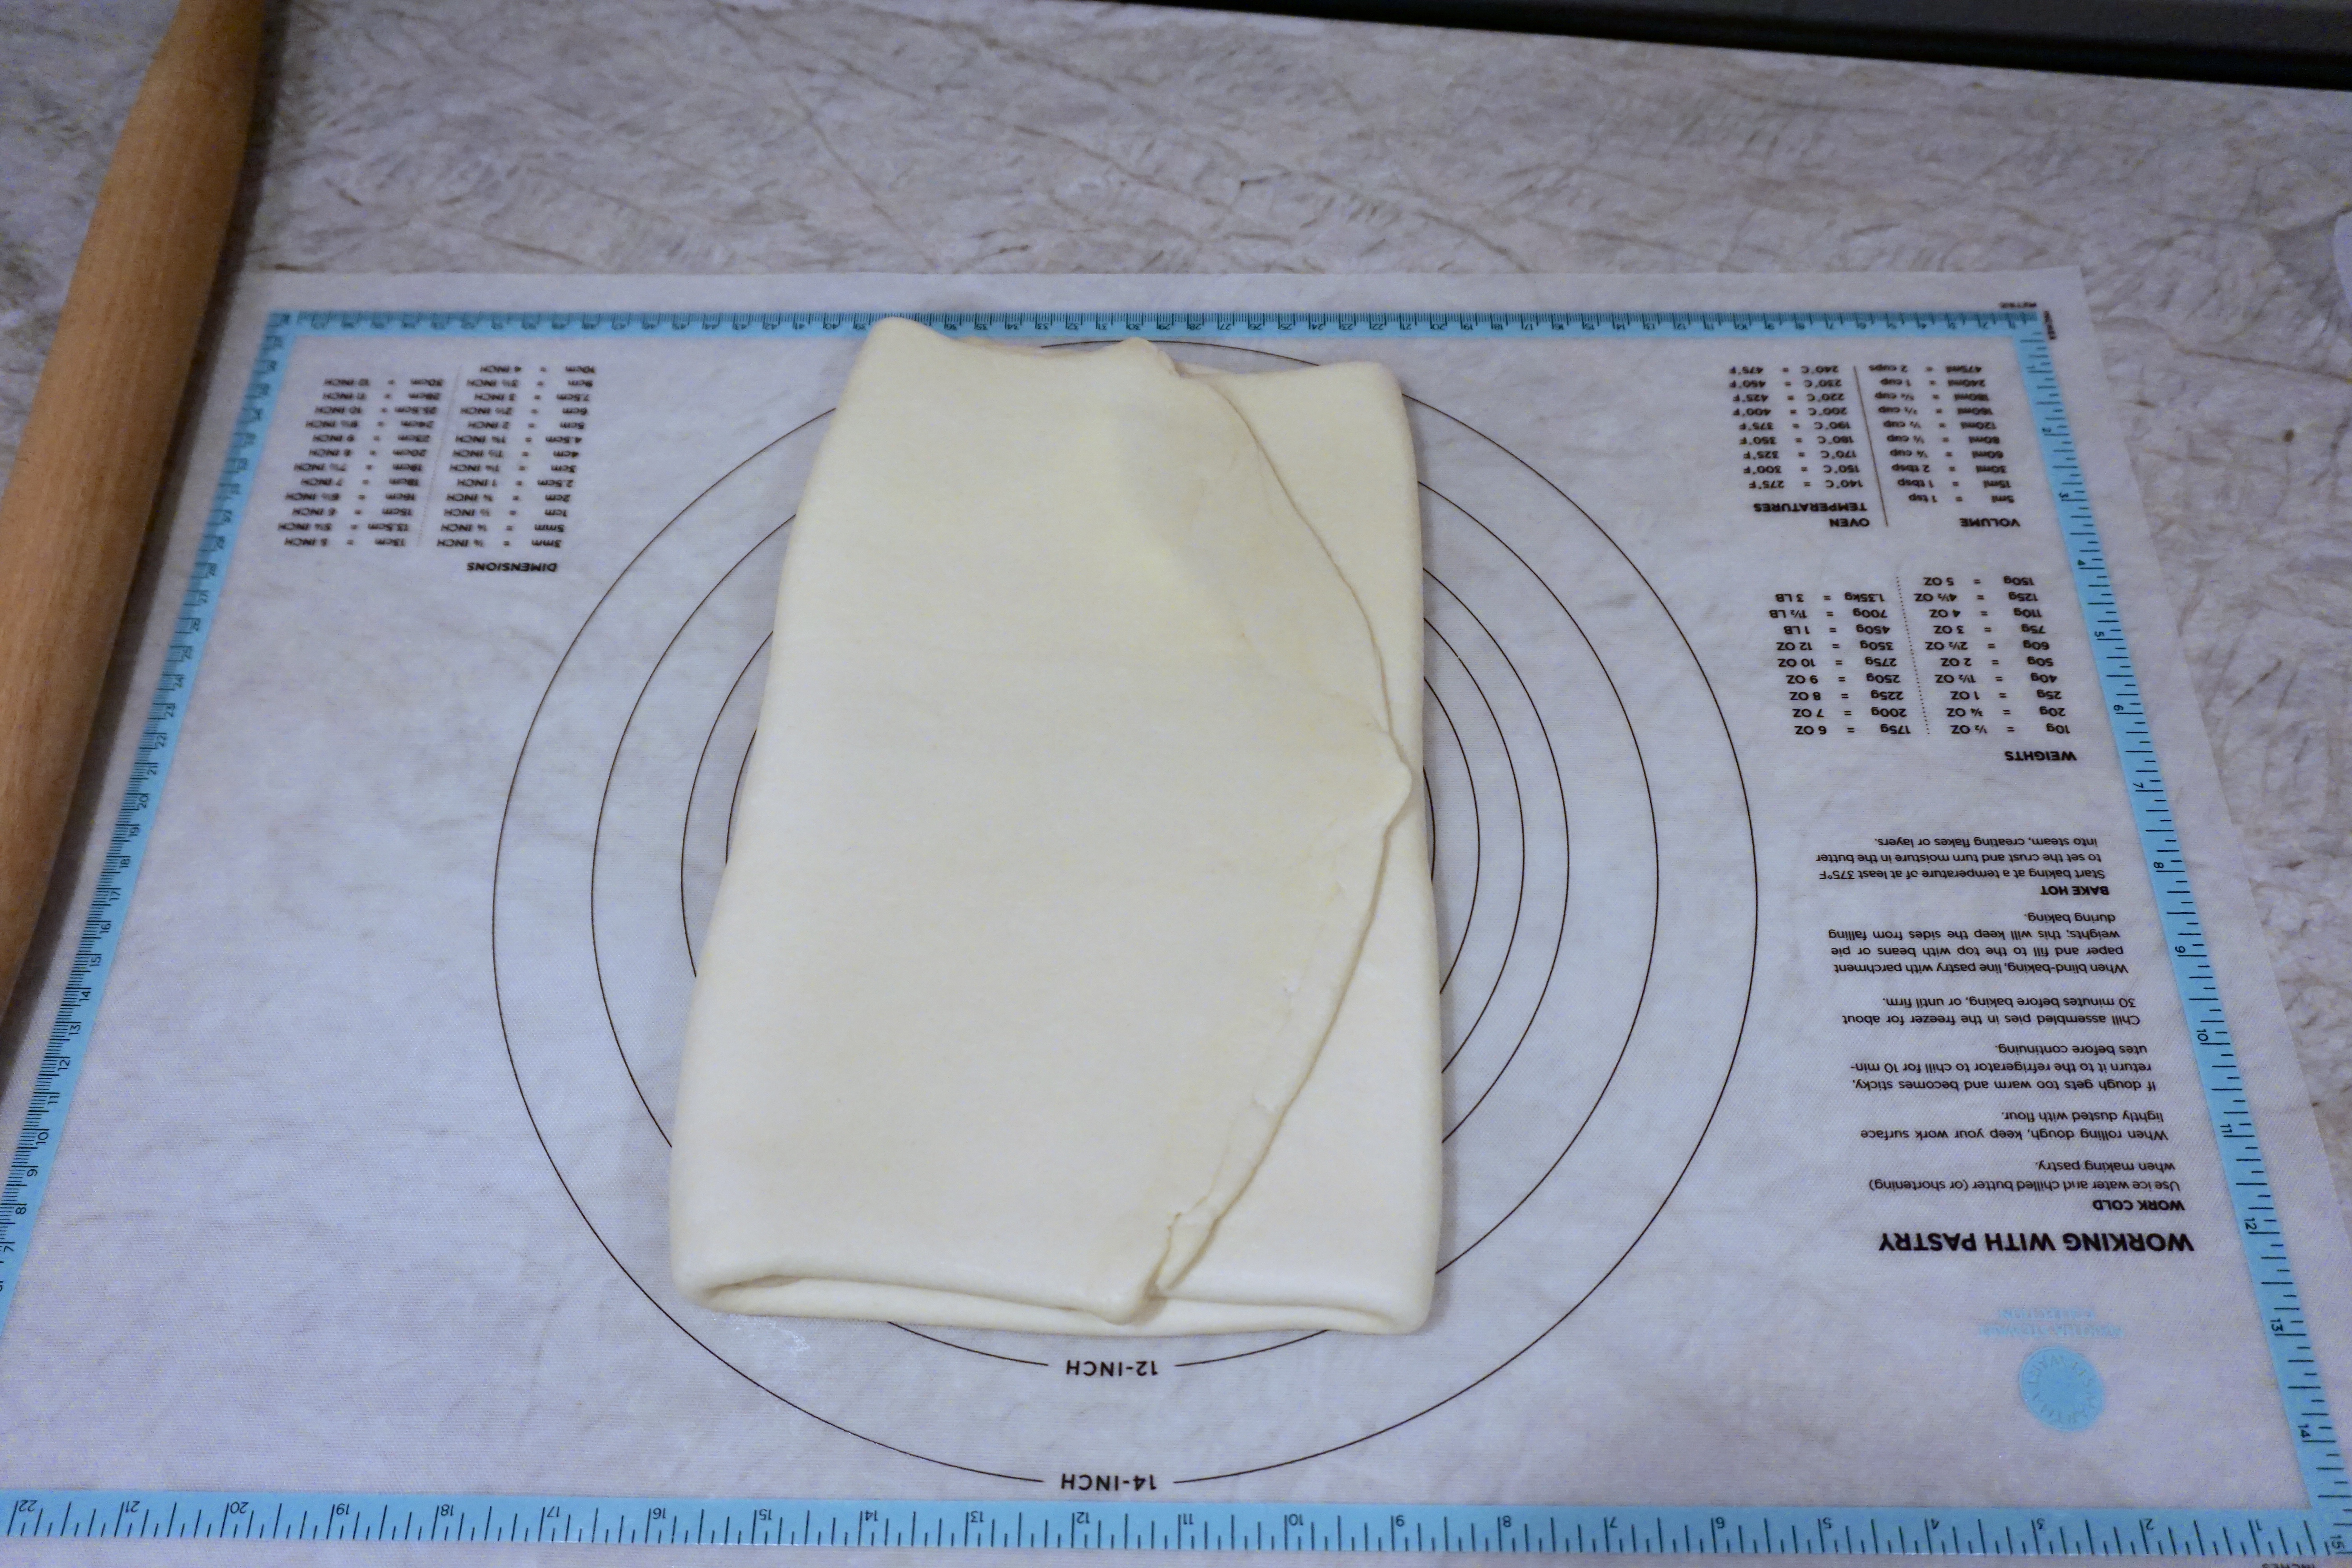

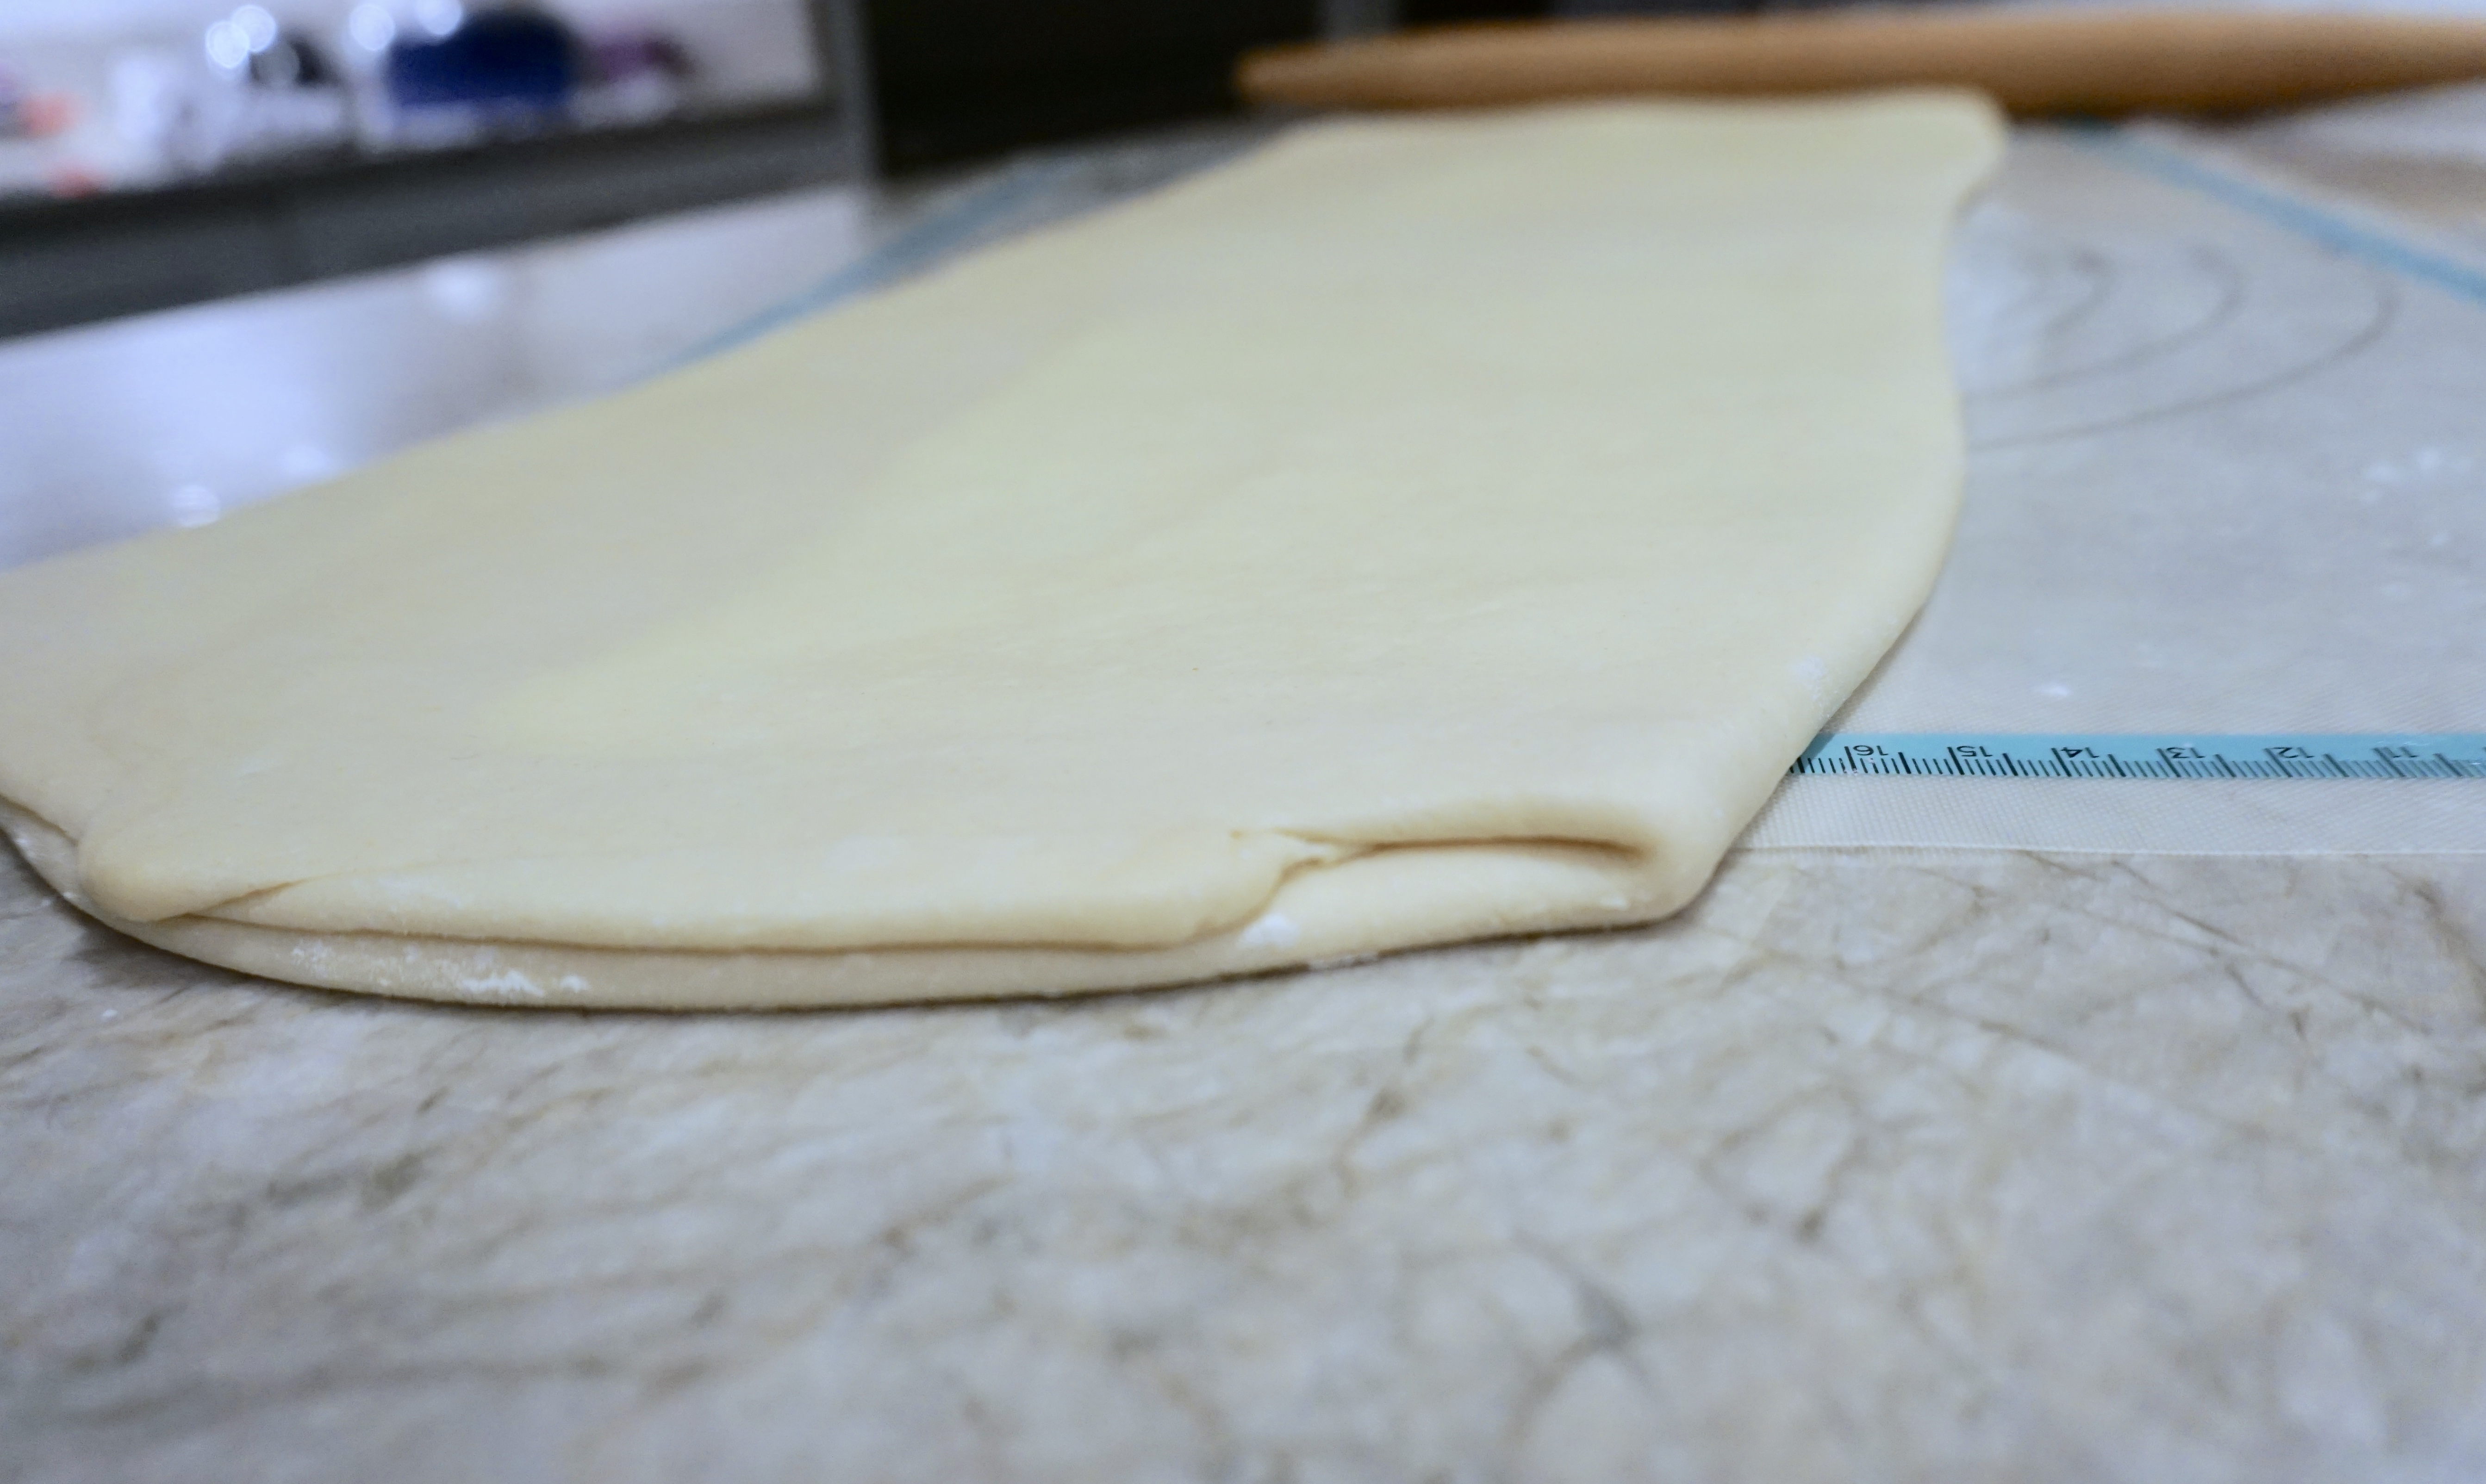
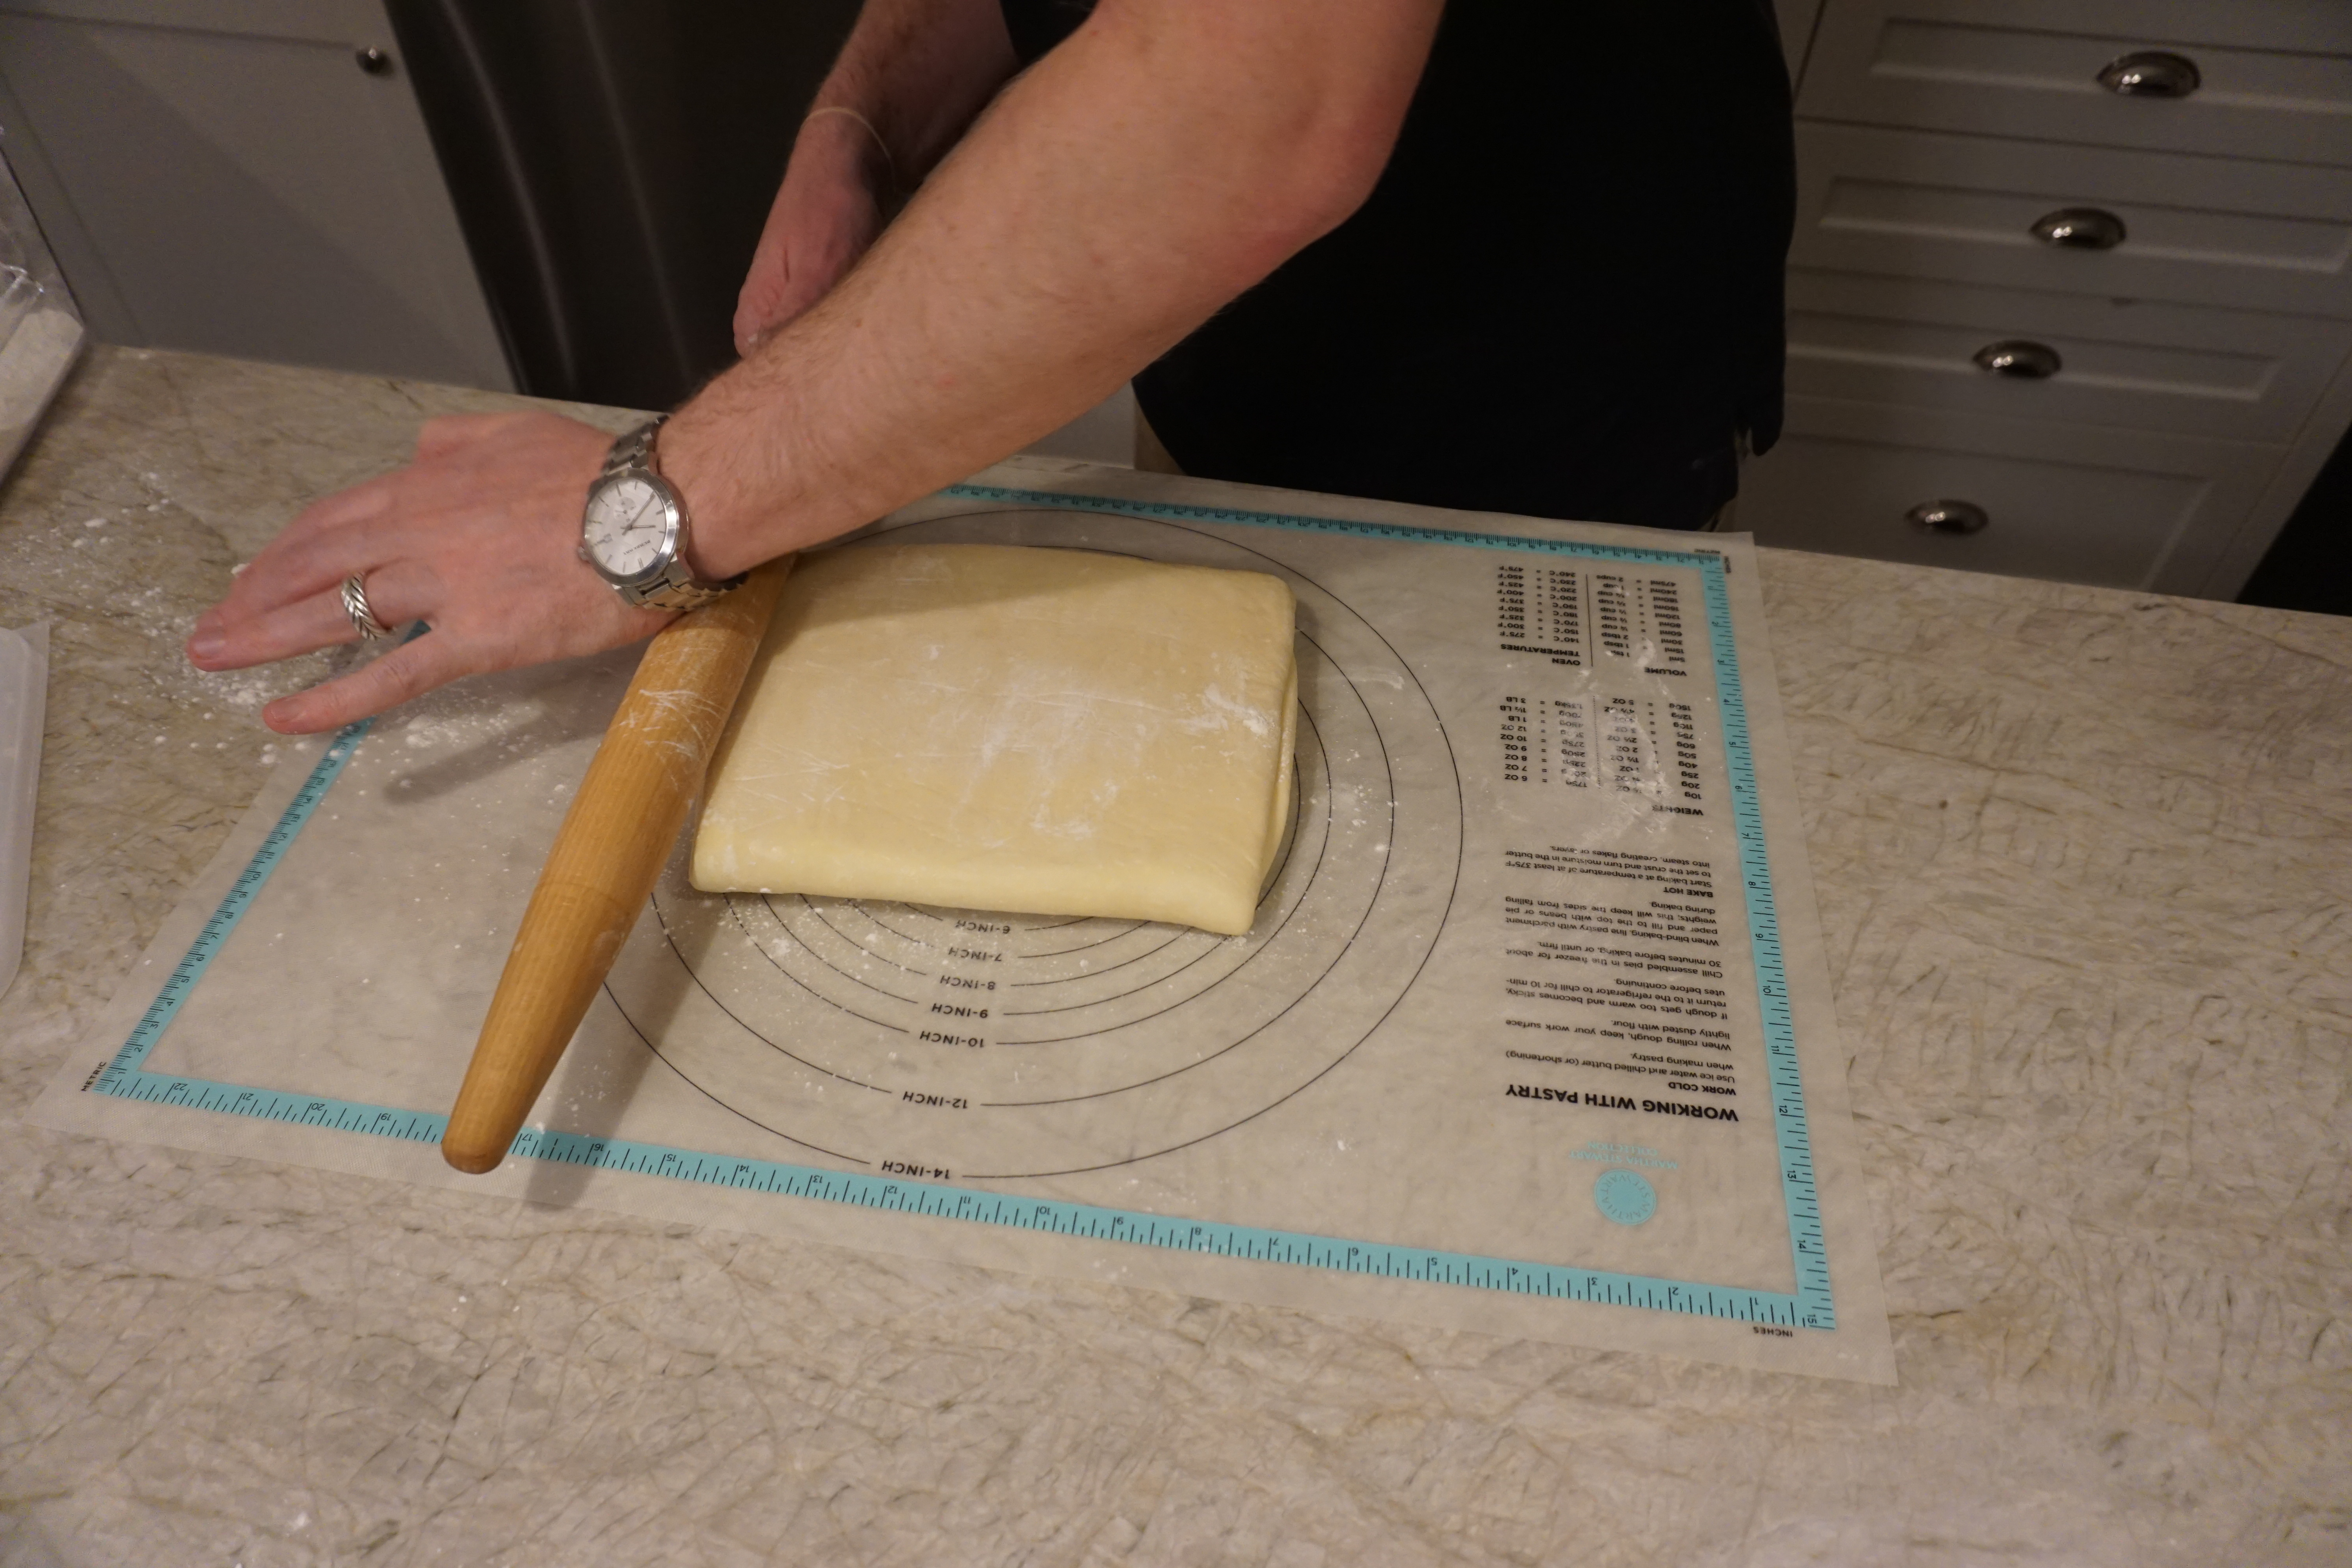
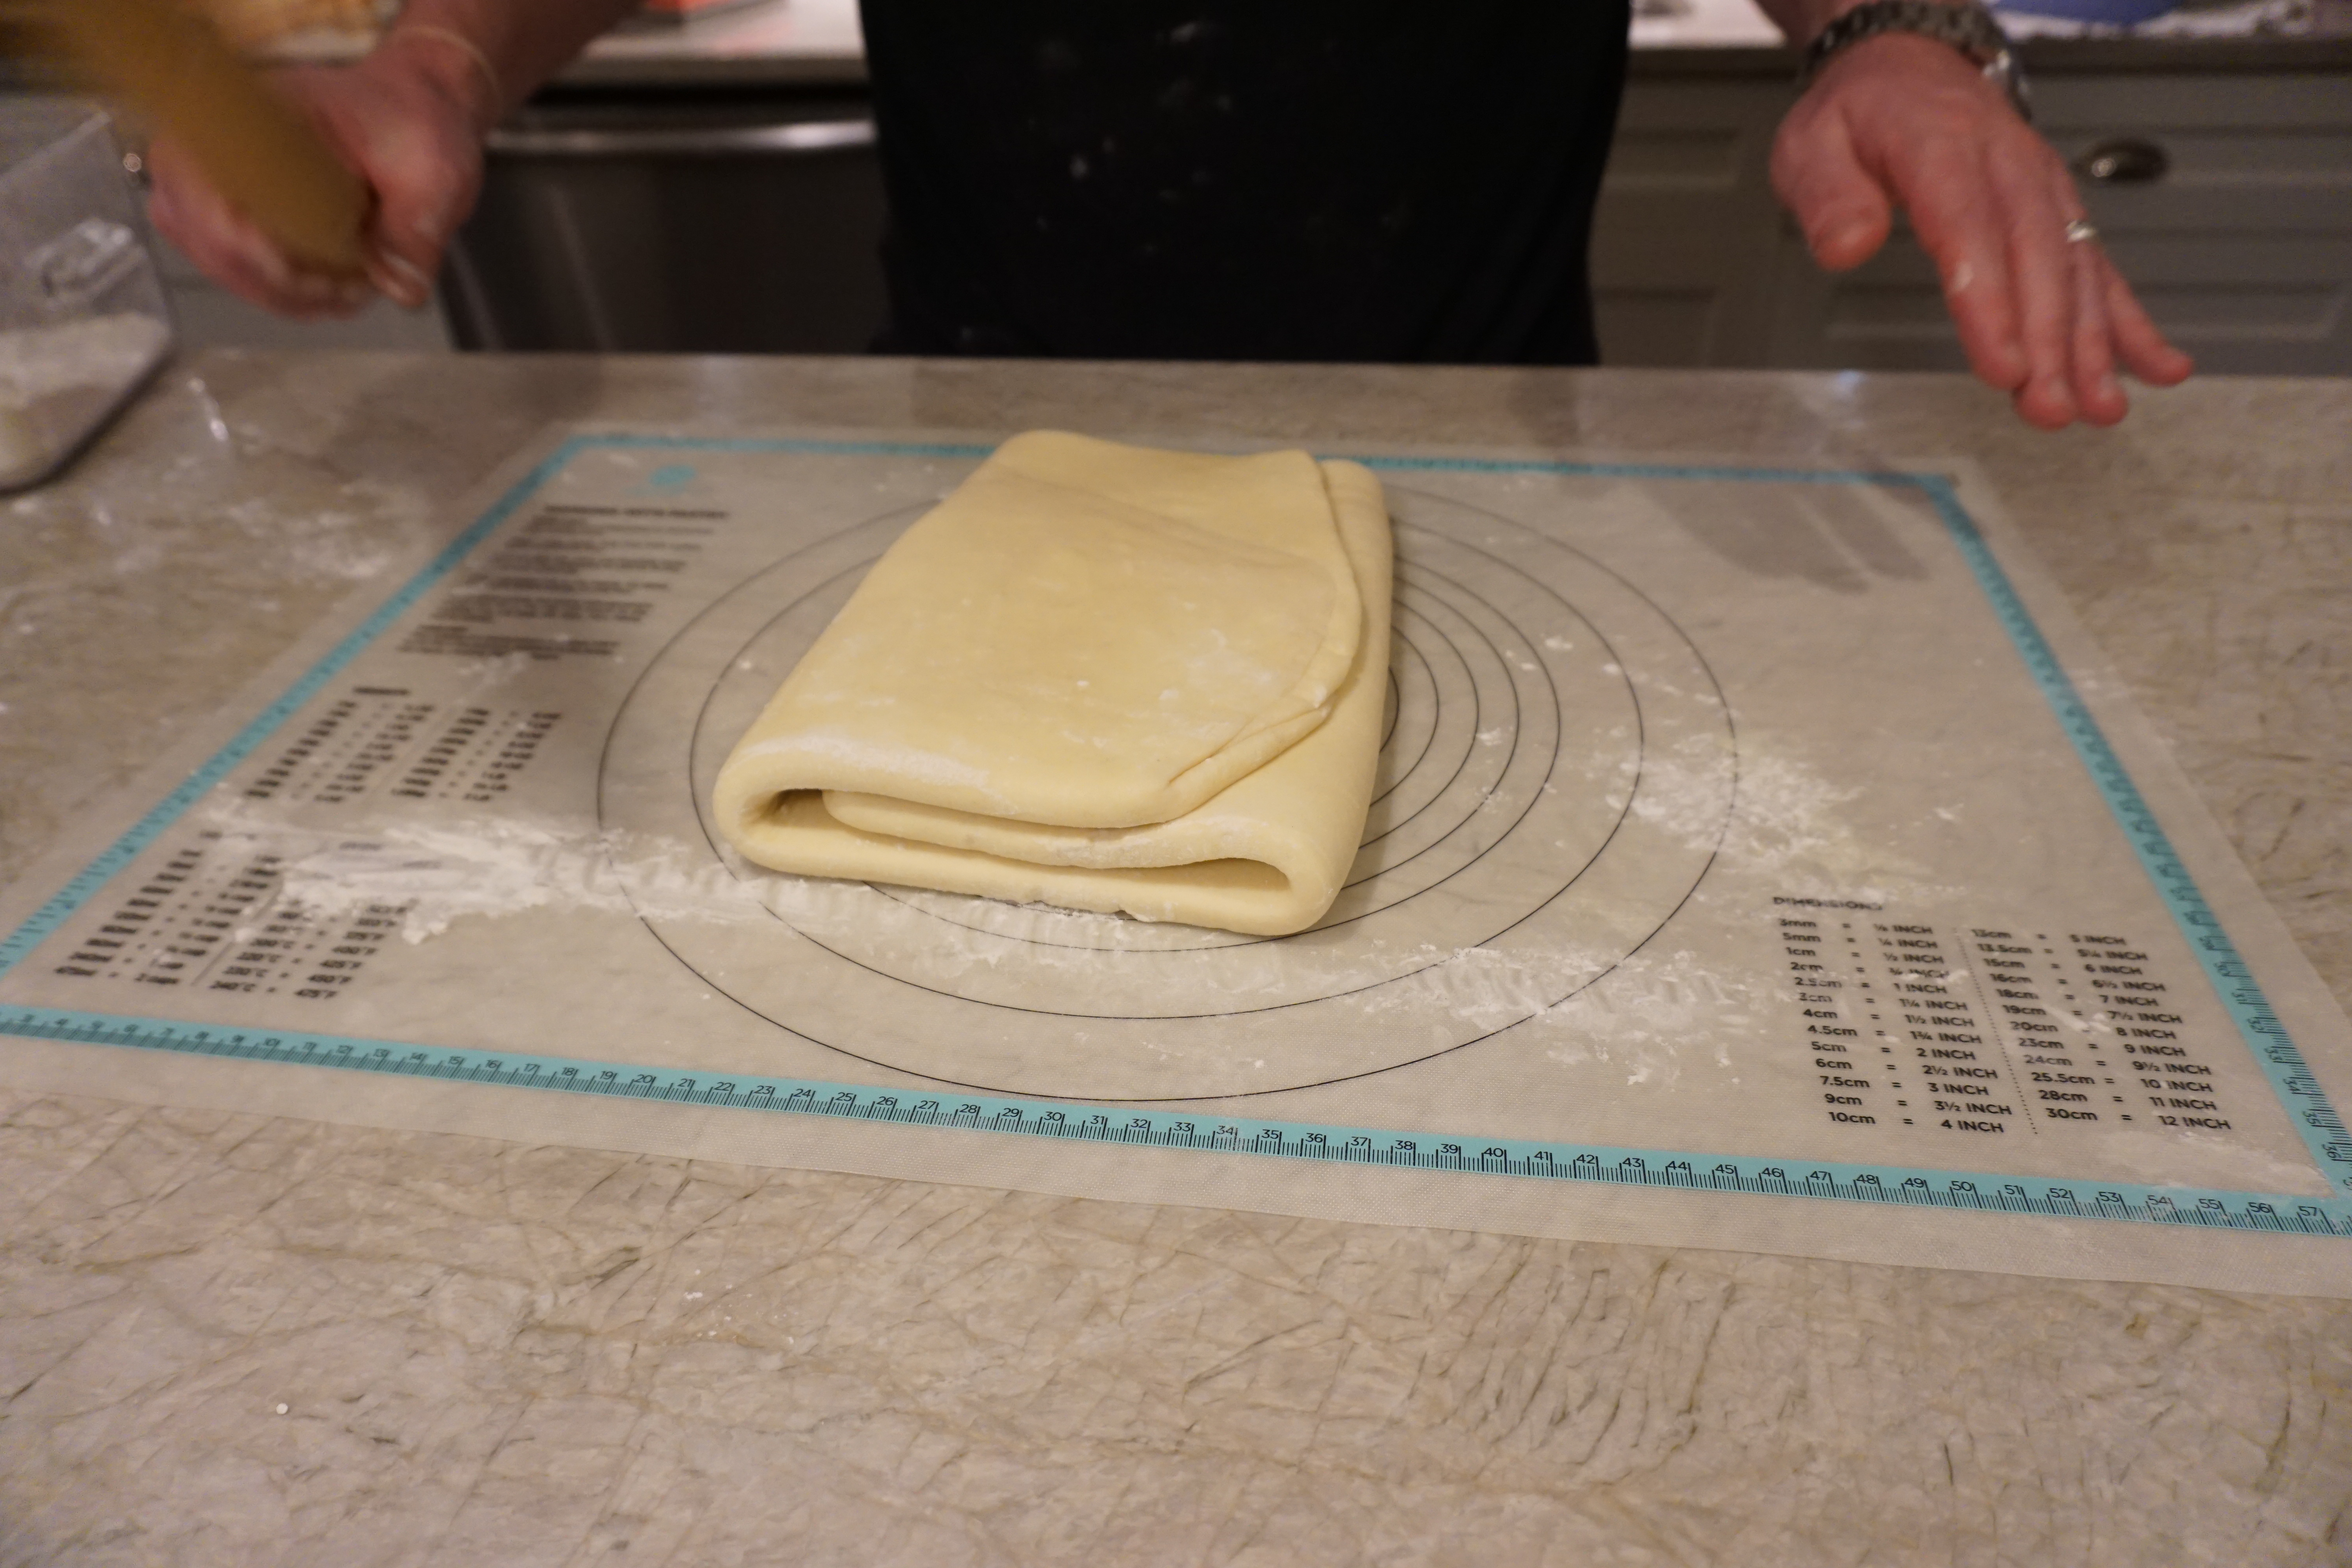
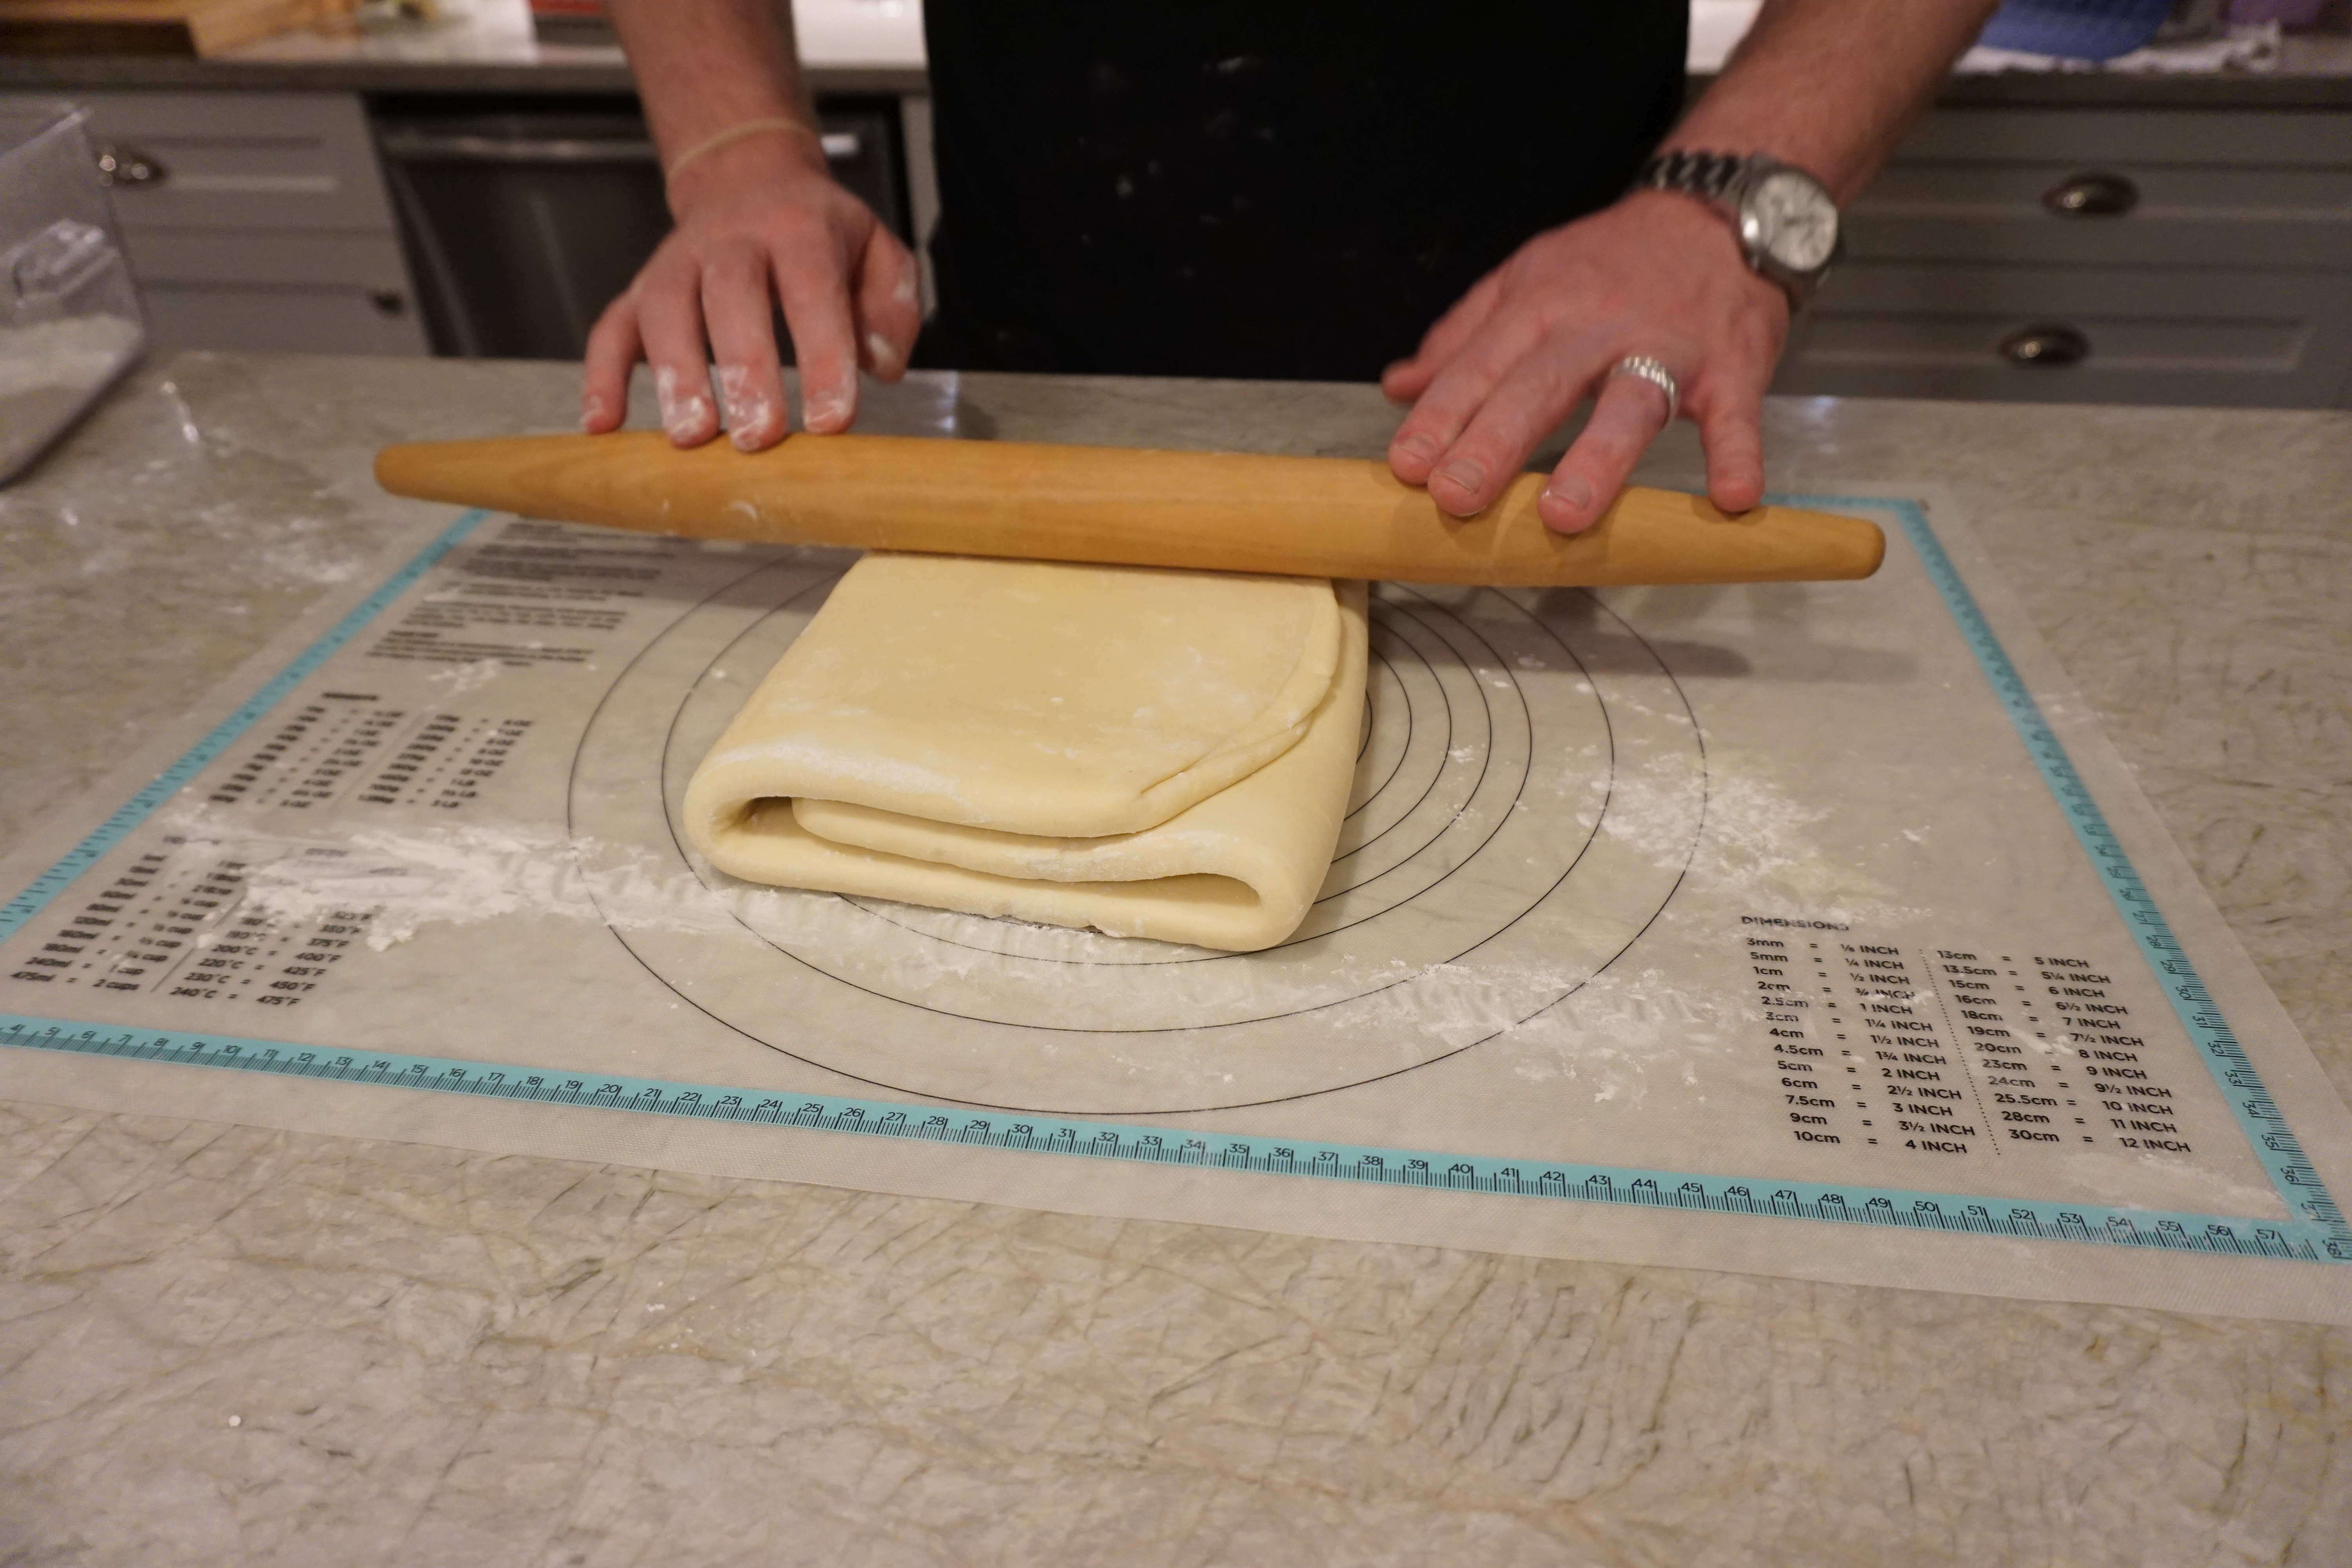
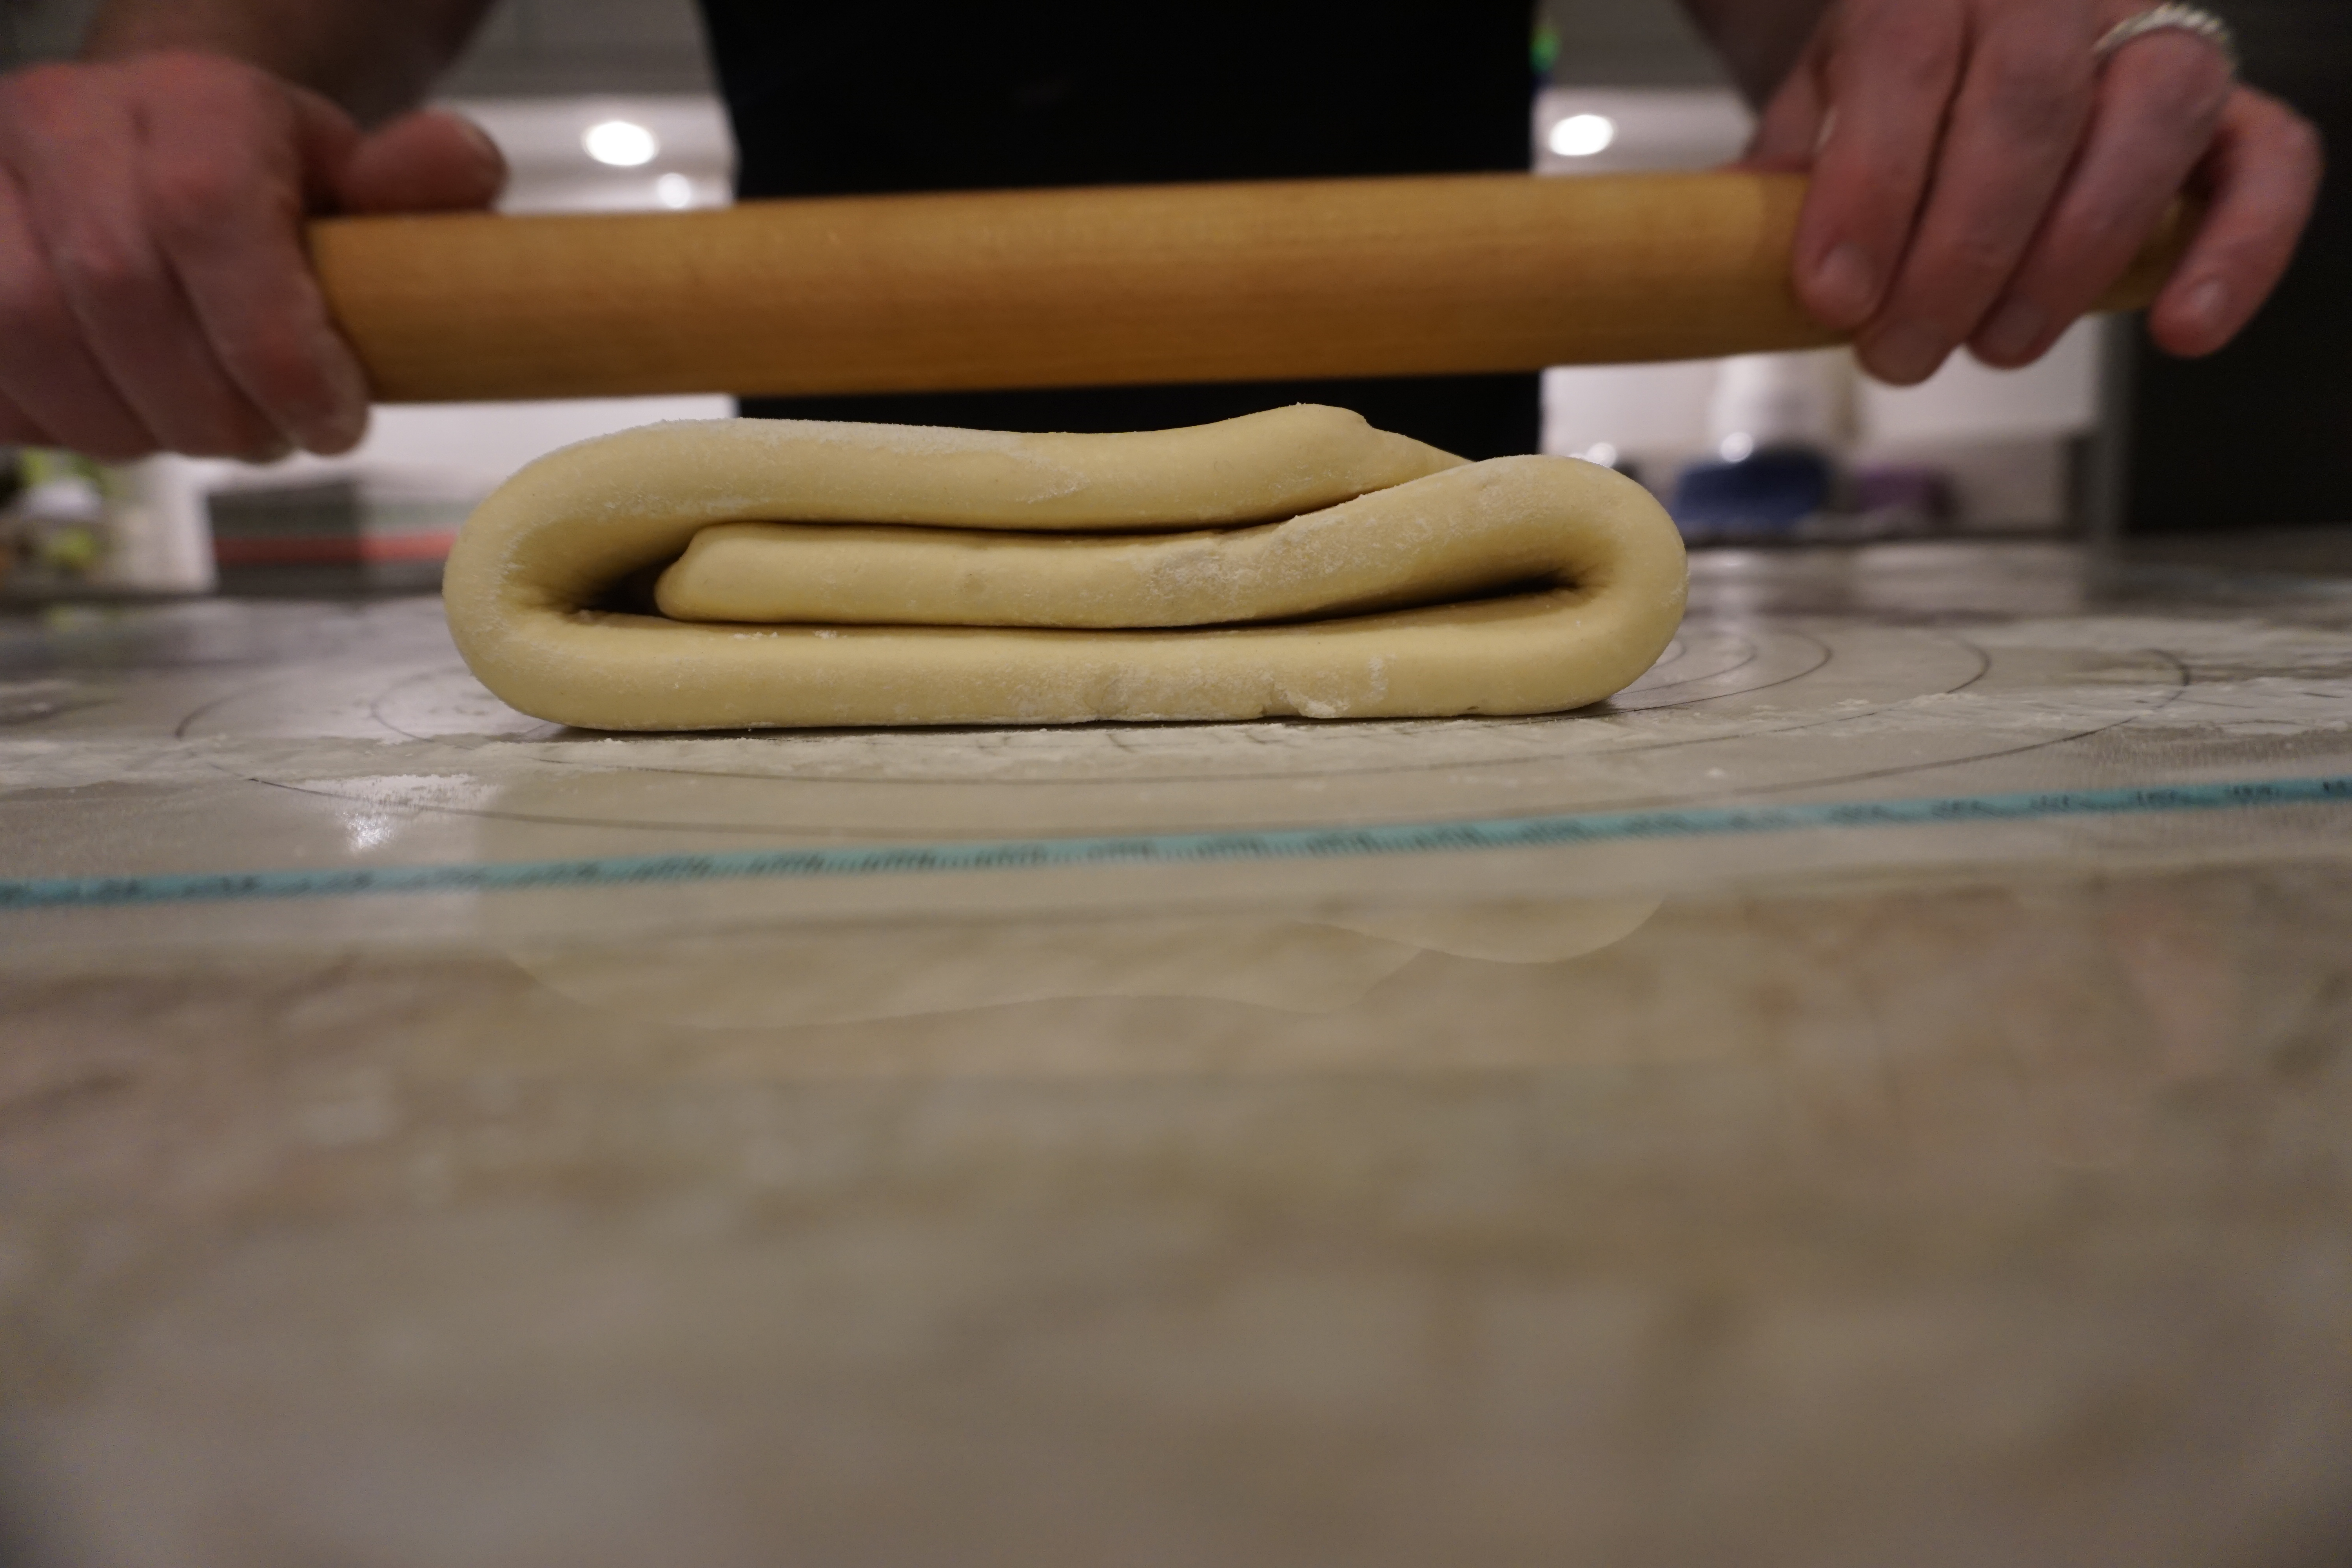
After the 2 1/2 hours has passed, I pulled the dough out of the freezer and Kevin got in on the action by rolling the dough out to a 17-by-8-inch rectangle for me so that I could take pictures during the laminating steps. We have learned the hard way to make sure to gently dust your work surface and top of the dough with flour whenever you are rolling it out. Then, he unwrapped the butter block and placed it in the middle of the rectangle. He folded both sides up to the middle of the butter block and pinched them together. Next, he used the rolling pin to press together the dough at the top and bottom of the butter block. The idea is that the butter is completely surrounded by dough and unable to escape when rolled out. After it is completely sealed, he rolled the dough out to a 24-by-8-inch rectangle. Then fold the dough into thirds like you were folding a piece of paper to put into an envelope. Make sure to dust off any extra flour that may be stuck to your dough while folding it.

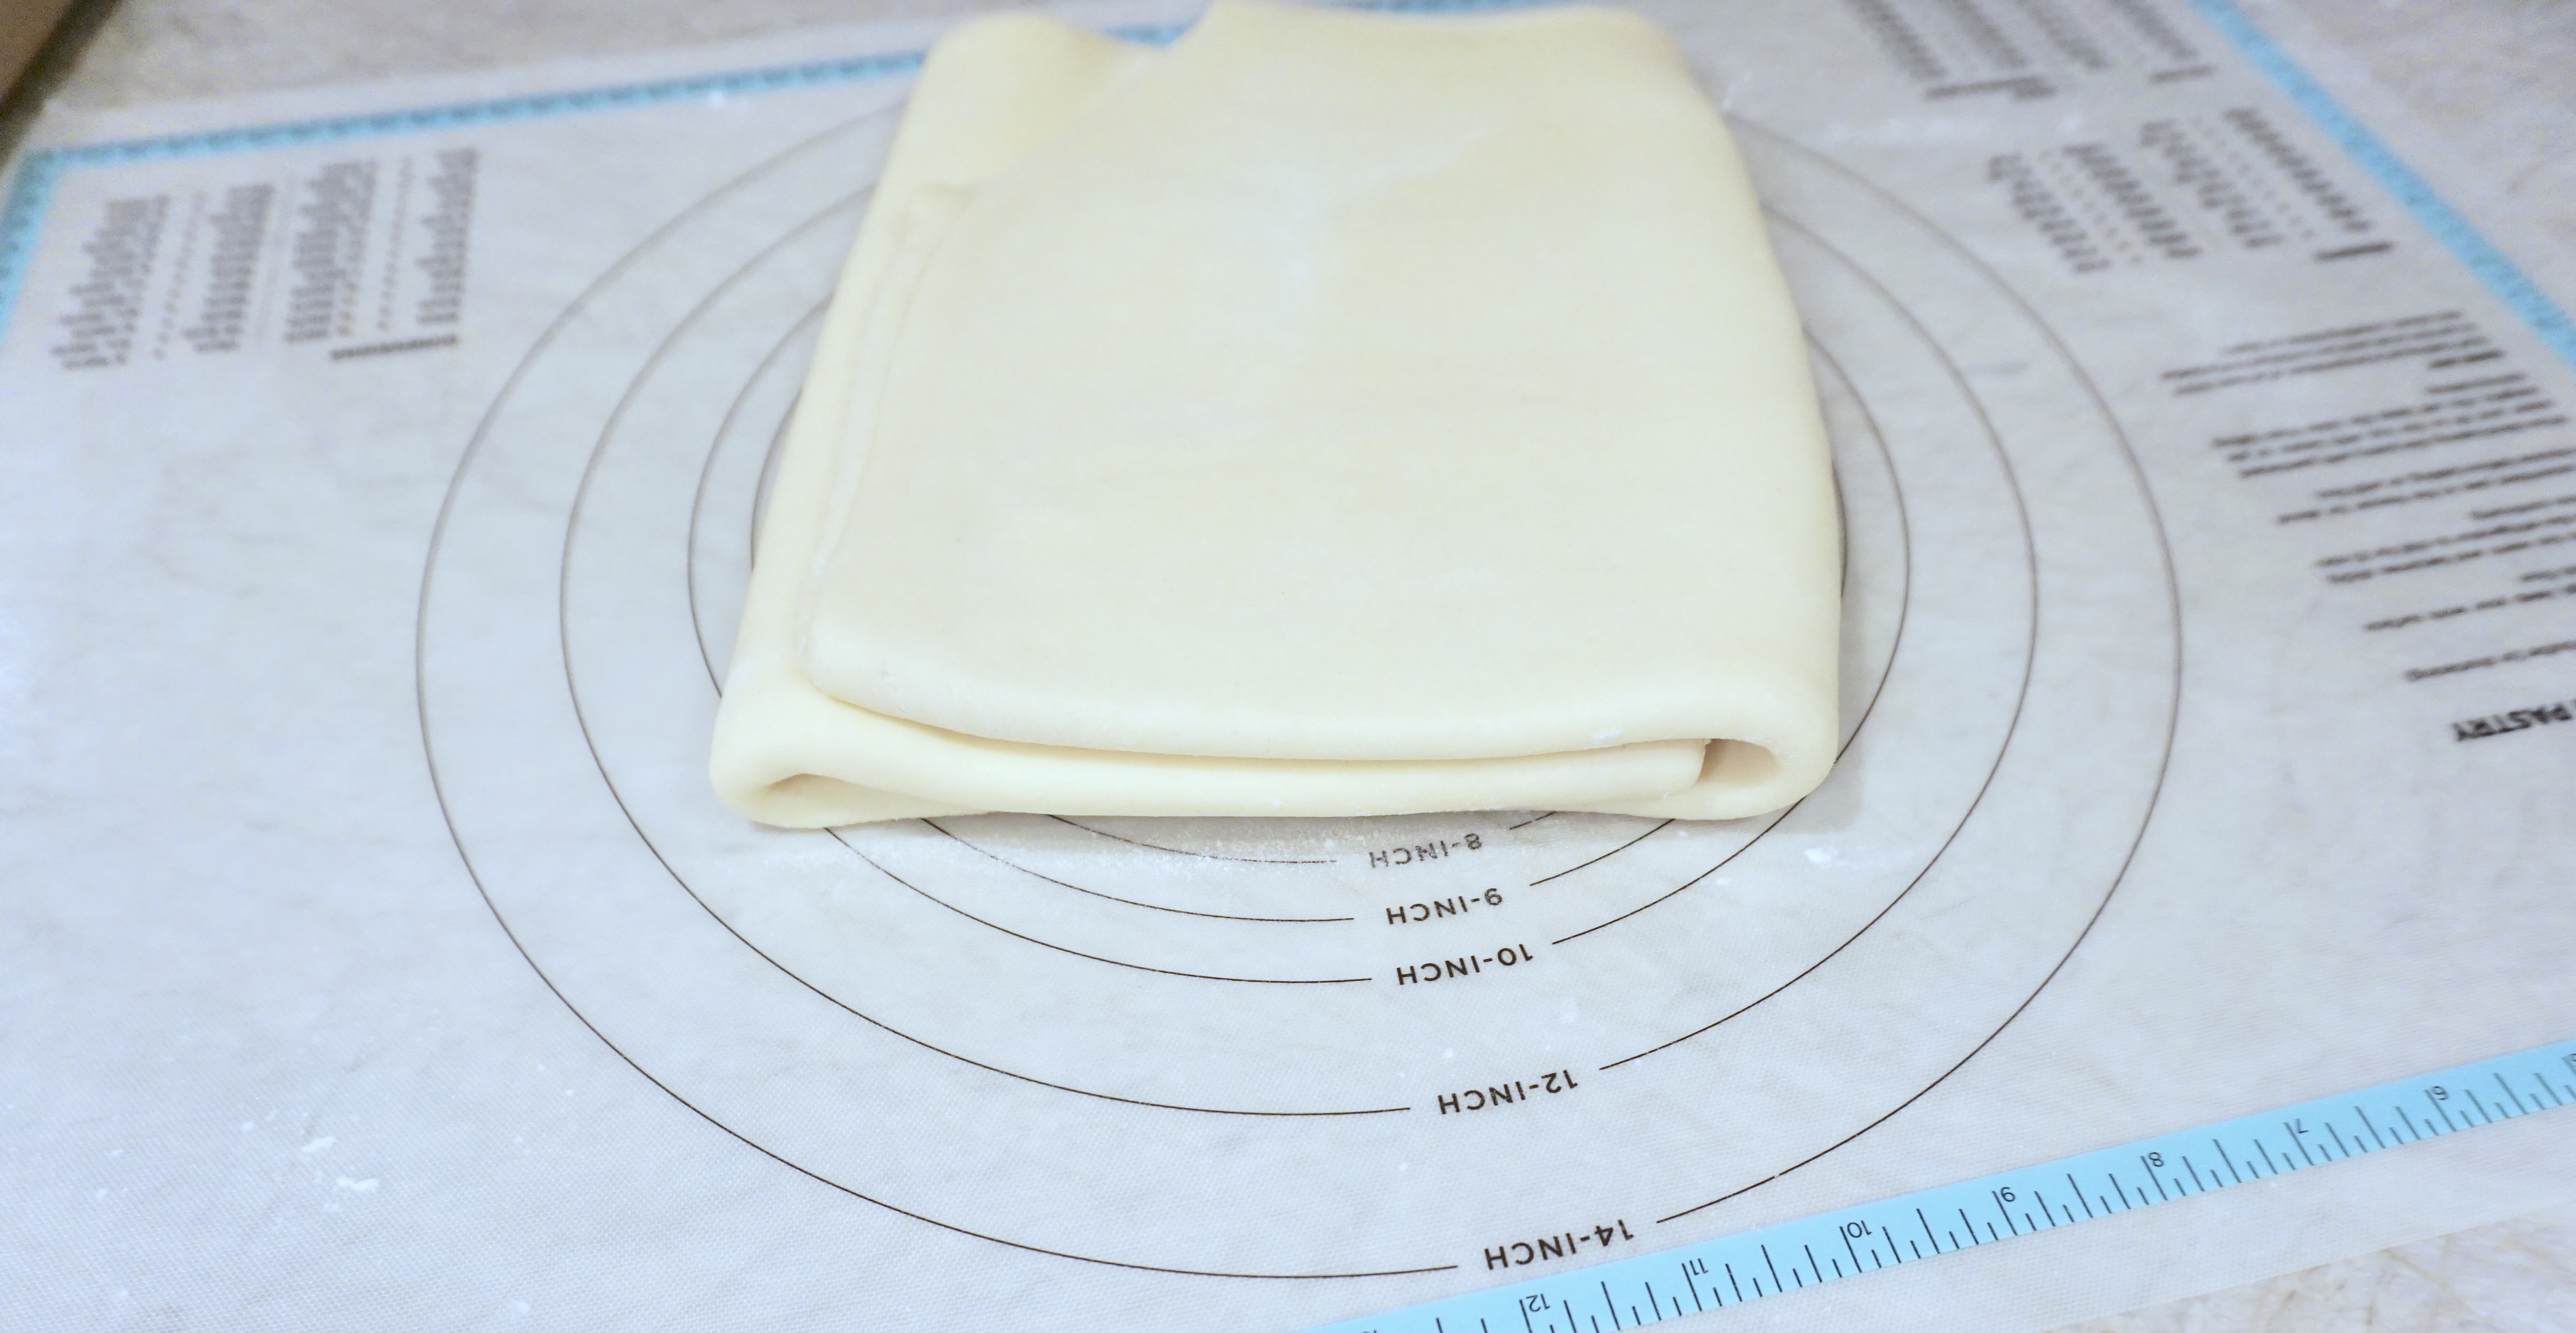
Next, we turned our dough 90 degrees and rolled it out again into a 24-by-8-inch rectangle. Then we folded it again into thirds, letter style, wrapped it up and put it back in the freezer for 30 minutes.
Having done this recipe several times now, I have noticed that my rectangle usually ends up 24-inches long, but sometimes gets a little wider than 8-inches in the process. Don’t sweat it- it isn’t perfect but it is close. Also, if you notice your dough is getting too warm during the laminating process, you can always re-wrap it up and put it back in the freezer for a few minutes. Or if you notice any small holes appear in your dough while you are rolling it, try your best to patch them with a little bit of flour to try to keep the butter from having any places to escape or melt out.


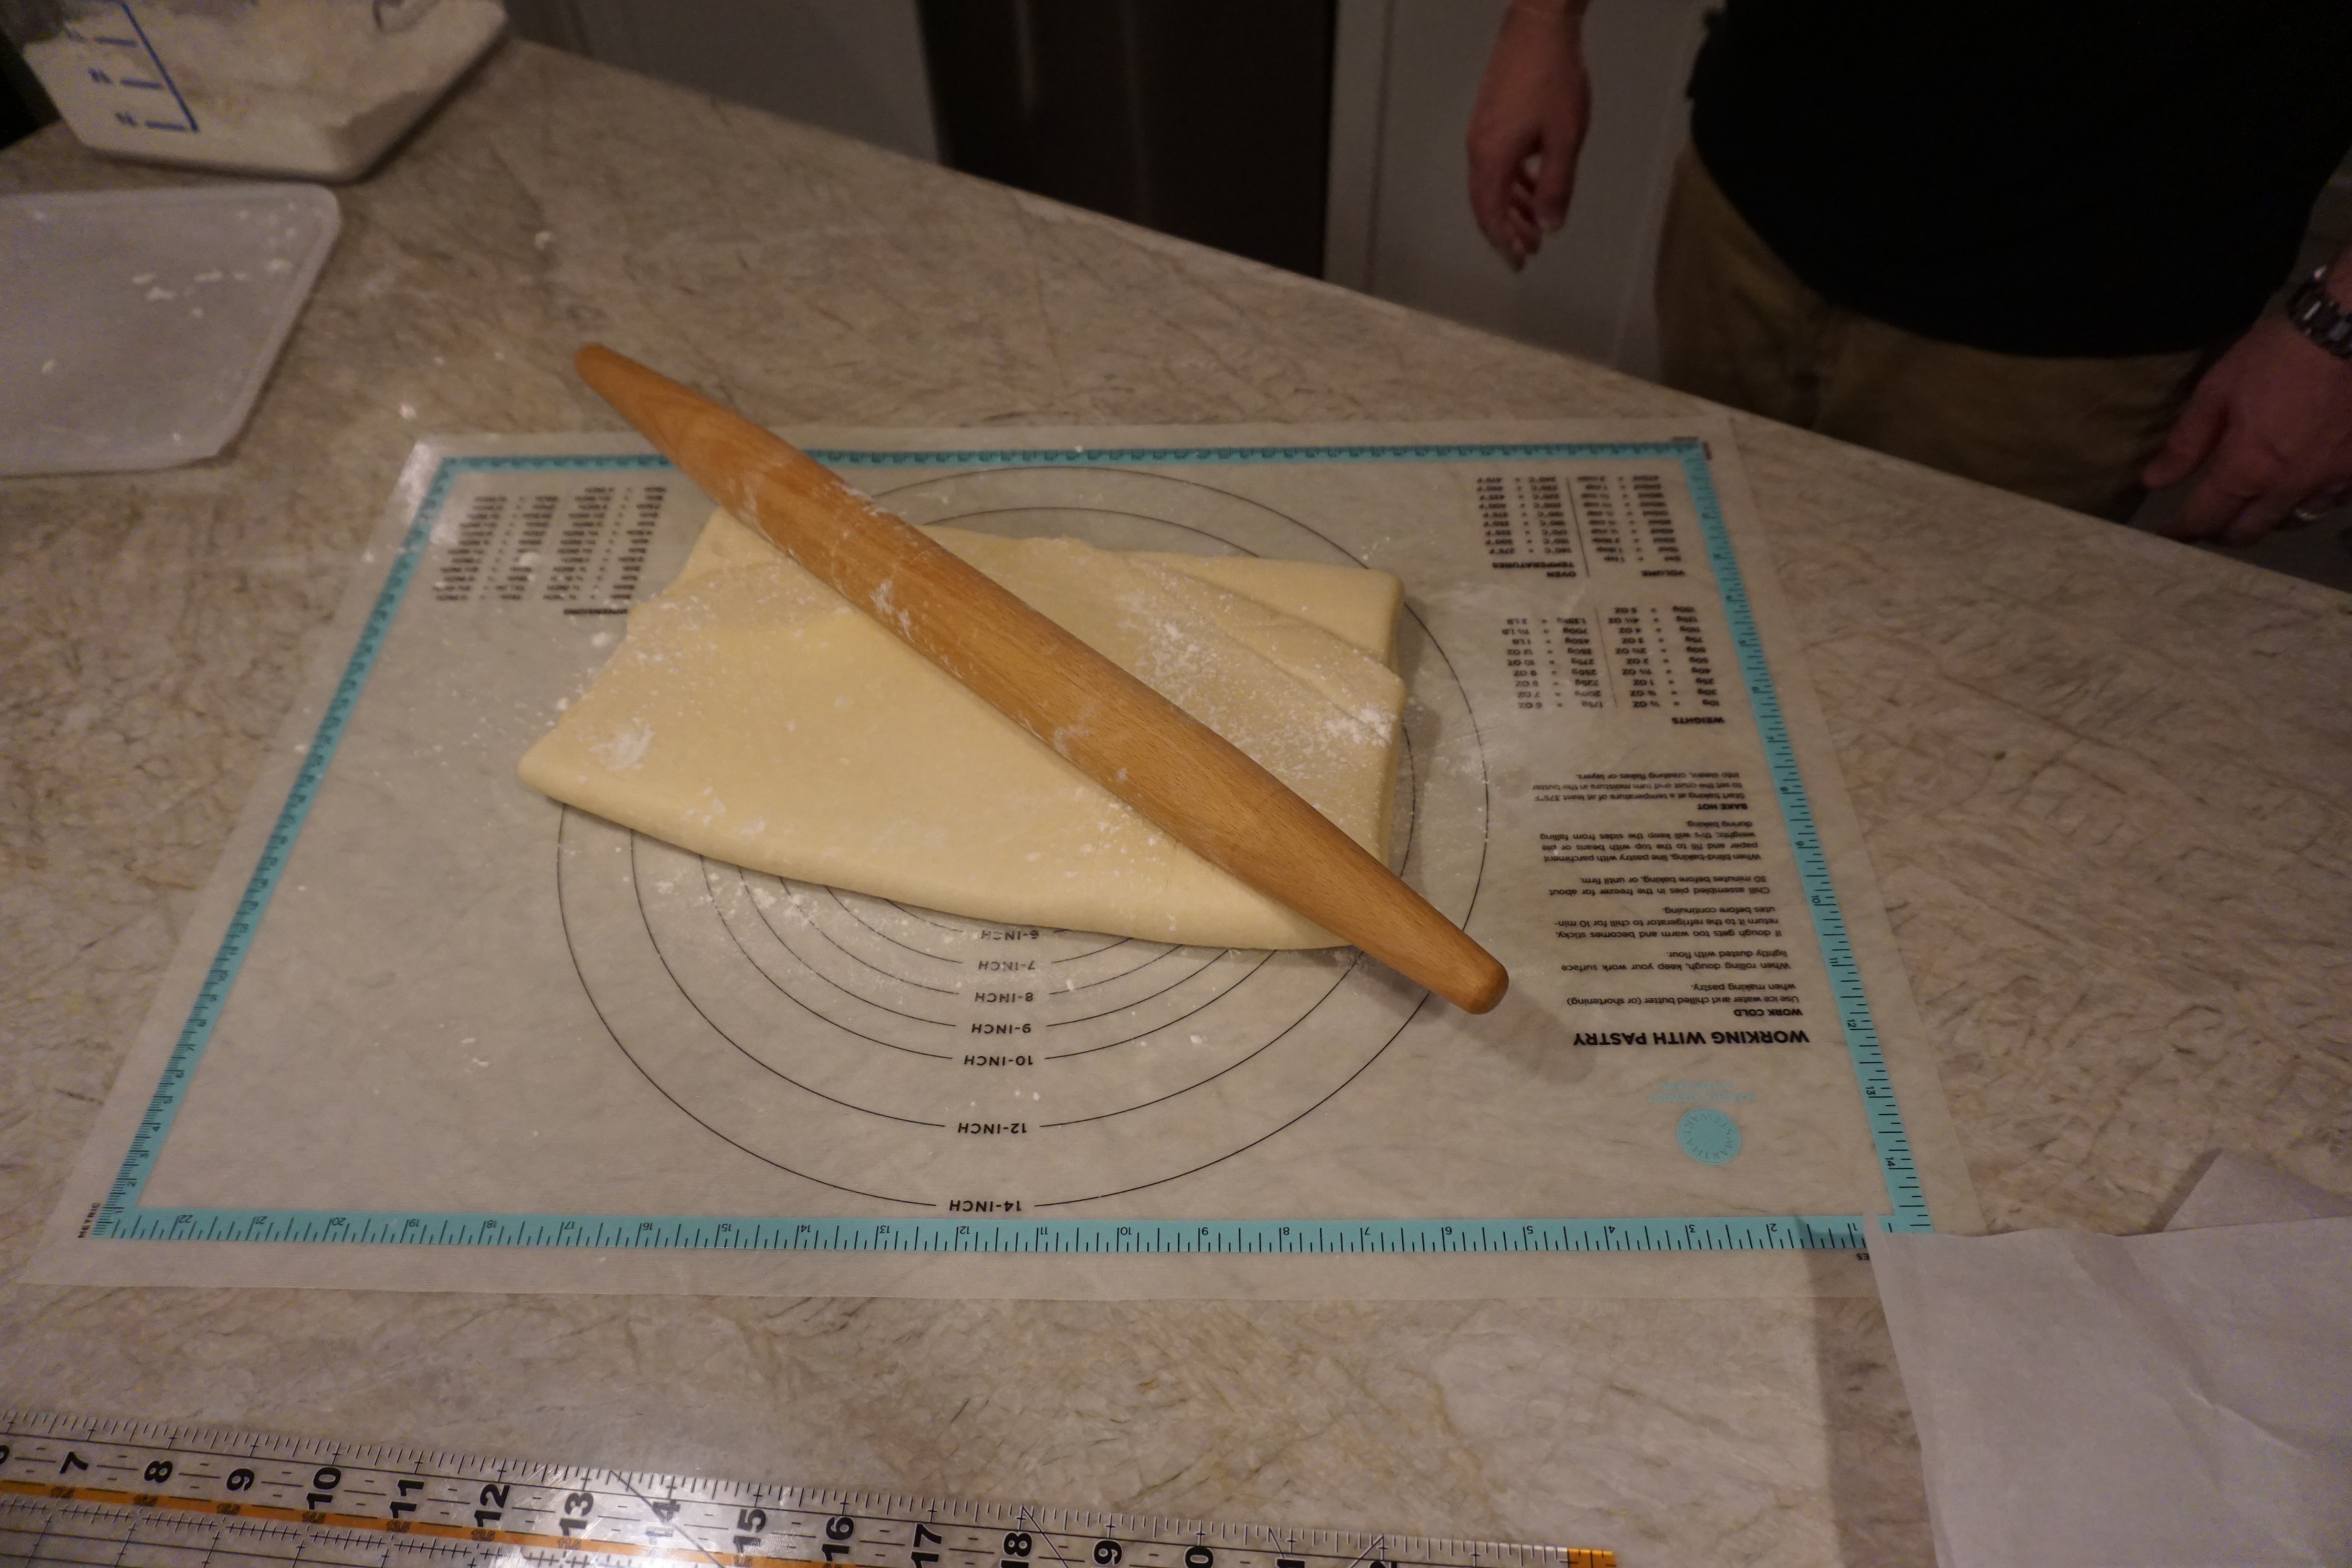
Guess what! After it rests for 30 minutes- you get to roll it out 1 more time! Pull it out of the freezer and rotate it 90 degrees again and roll it out to 24-by-8ish-inches long. Fold it into thirds like a letter, wrap it tightly in plastic wrap and place it on the fridge for 2 hours and then transfer it to the freezer for 30 minutes.
Prepare the fillings:
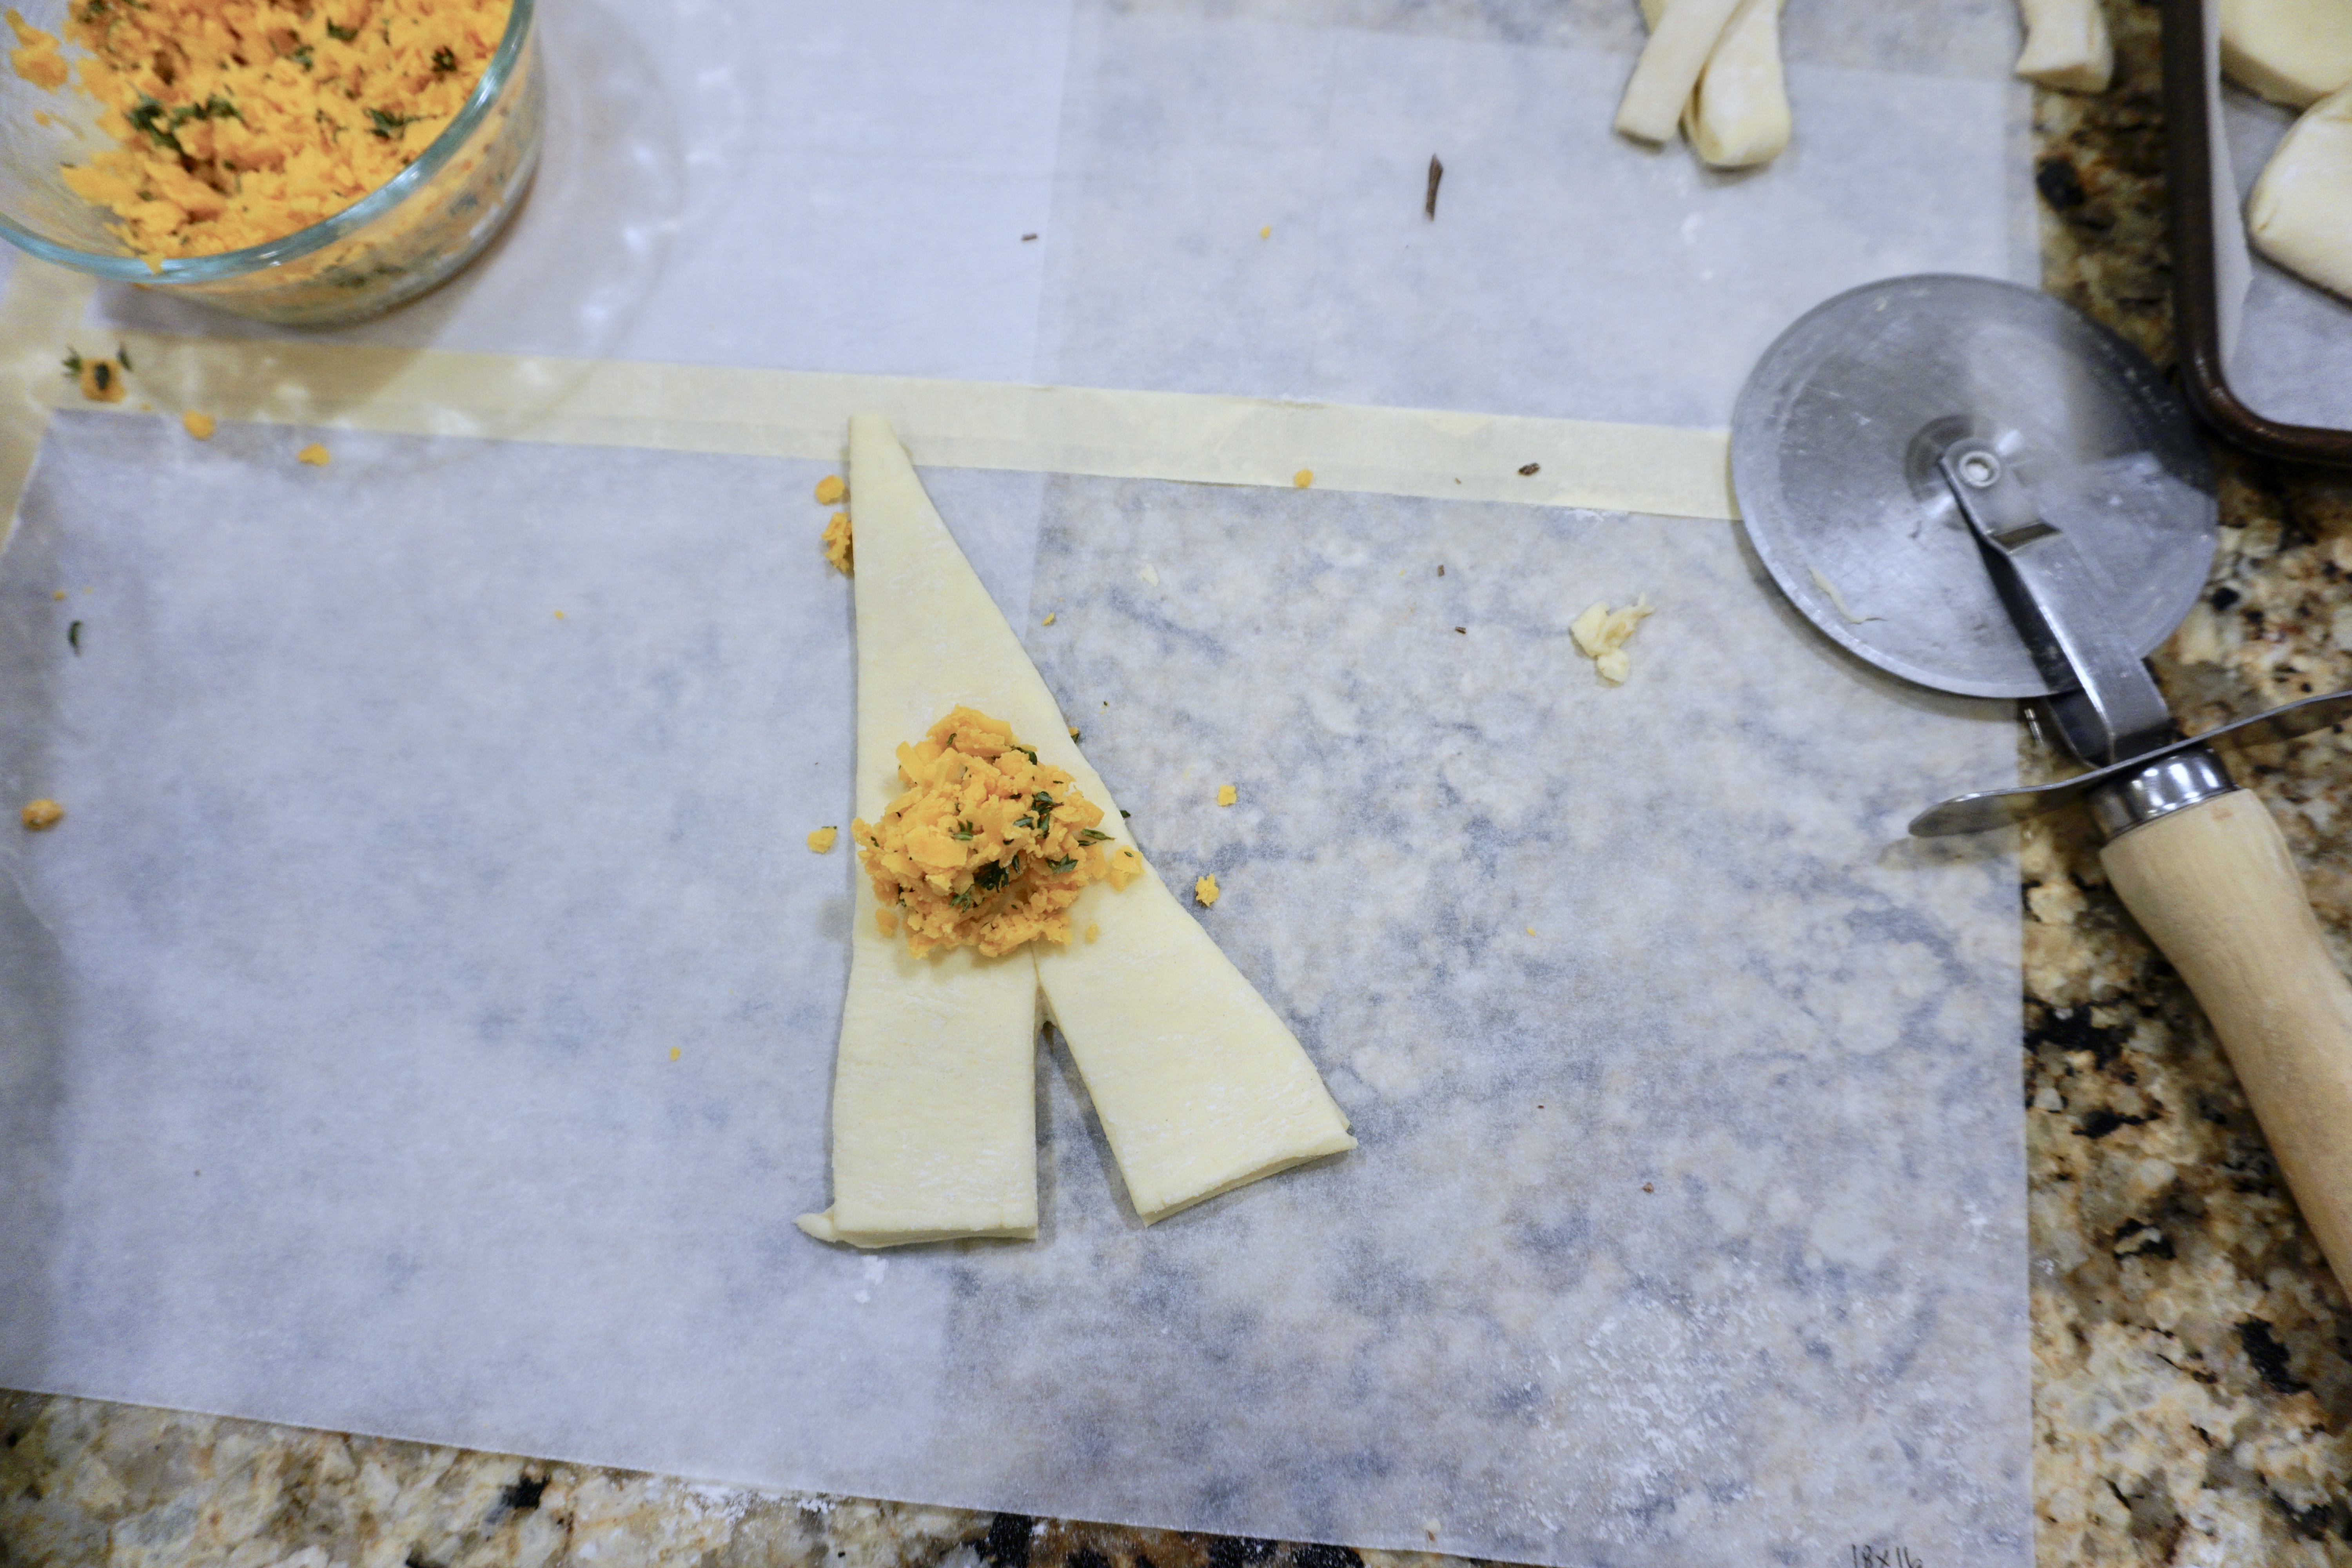
While everything is resting, I took the time to get our fillings ready. We decided to fill our croissants with super sharp grated cheddar cheese mixed with fresh thyme (we love this combo, it is the same one I used when I made the cheddar swirl buns) and large slices of dark chocolate. Previously we have also made an almond paste to fill them too, but decided that 2 fillings was enough since some of the best ones are also the plain ones.
Roll, Cut, Shape & Fill the Croissants:
So here is the step I forgot to photograph the first time around. So you may notice some differences from the other pictures and also a guest appearance from my mother-in-law who was super sweet and helped me out!
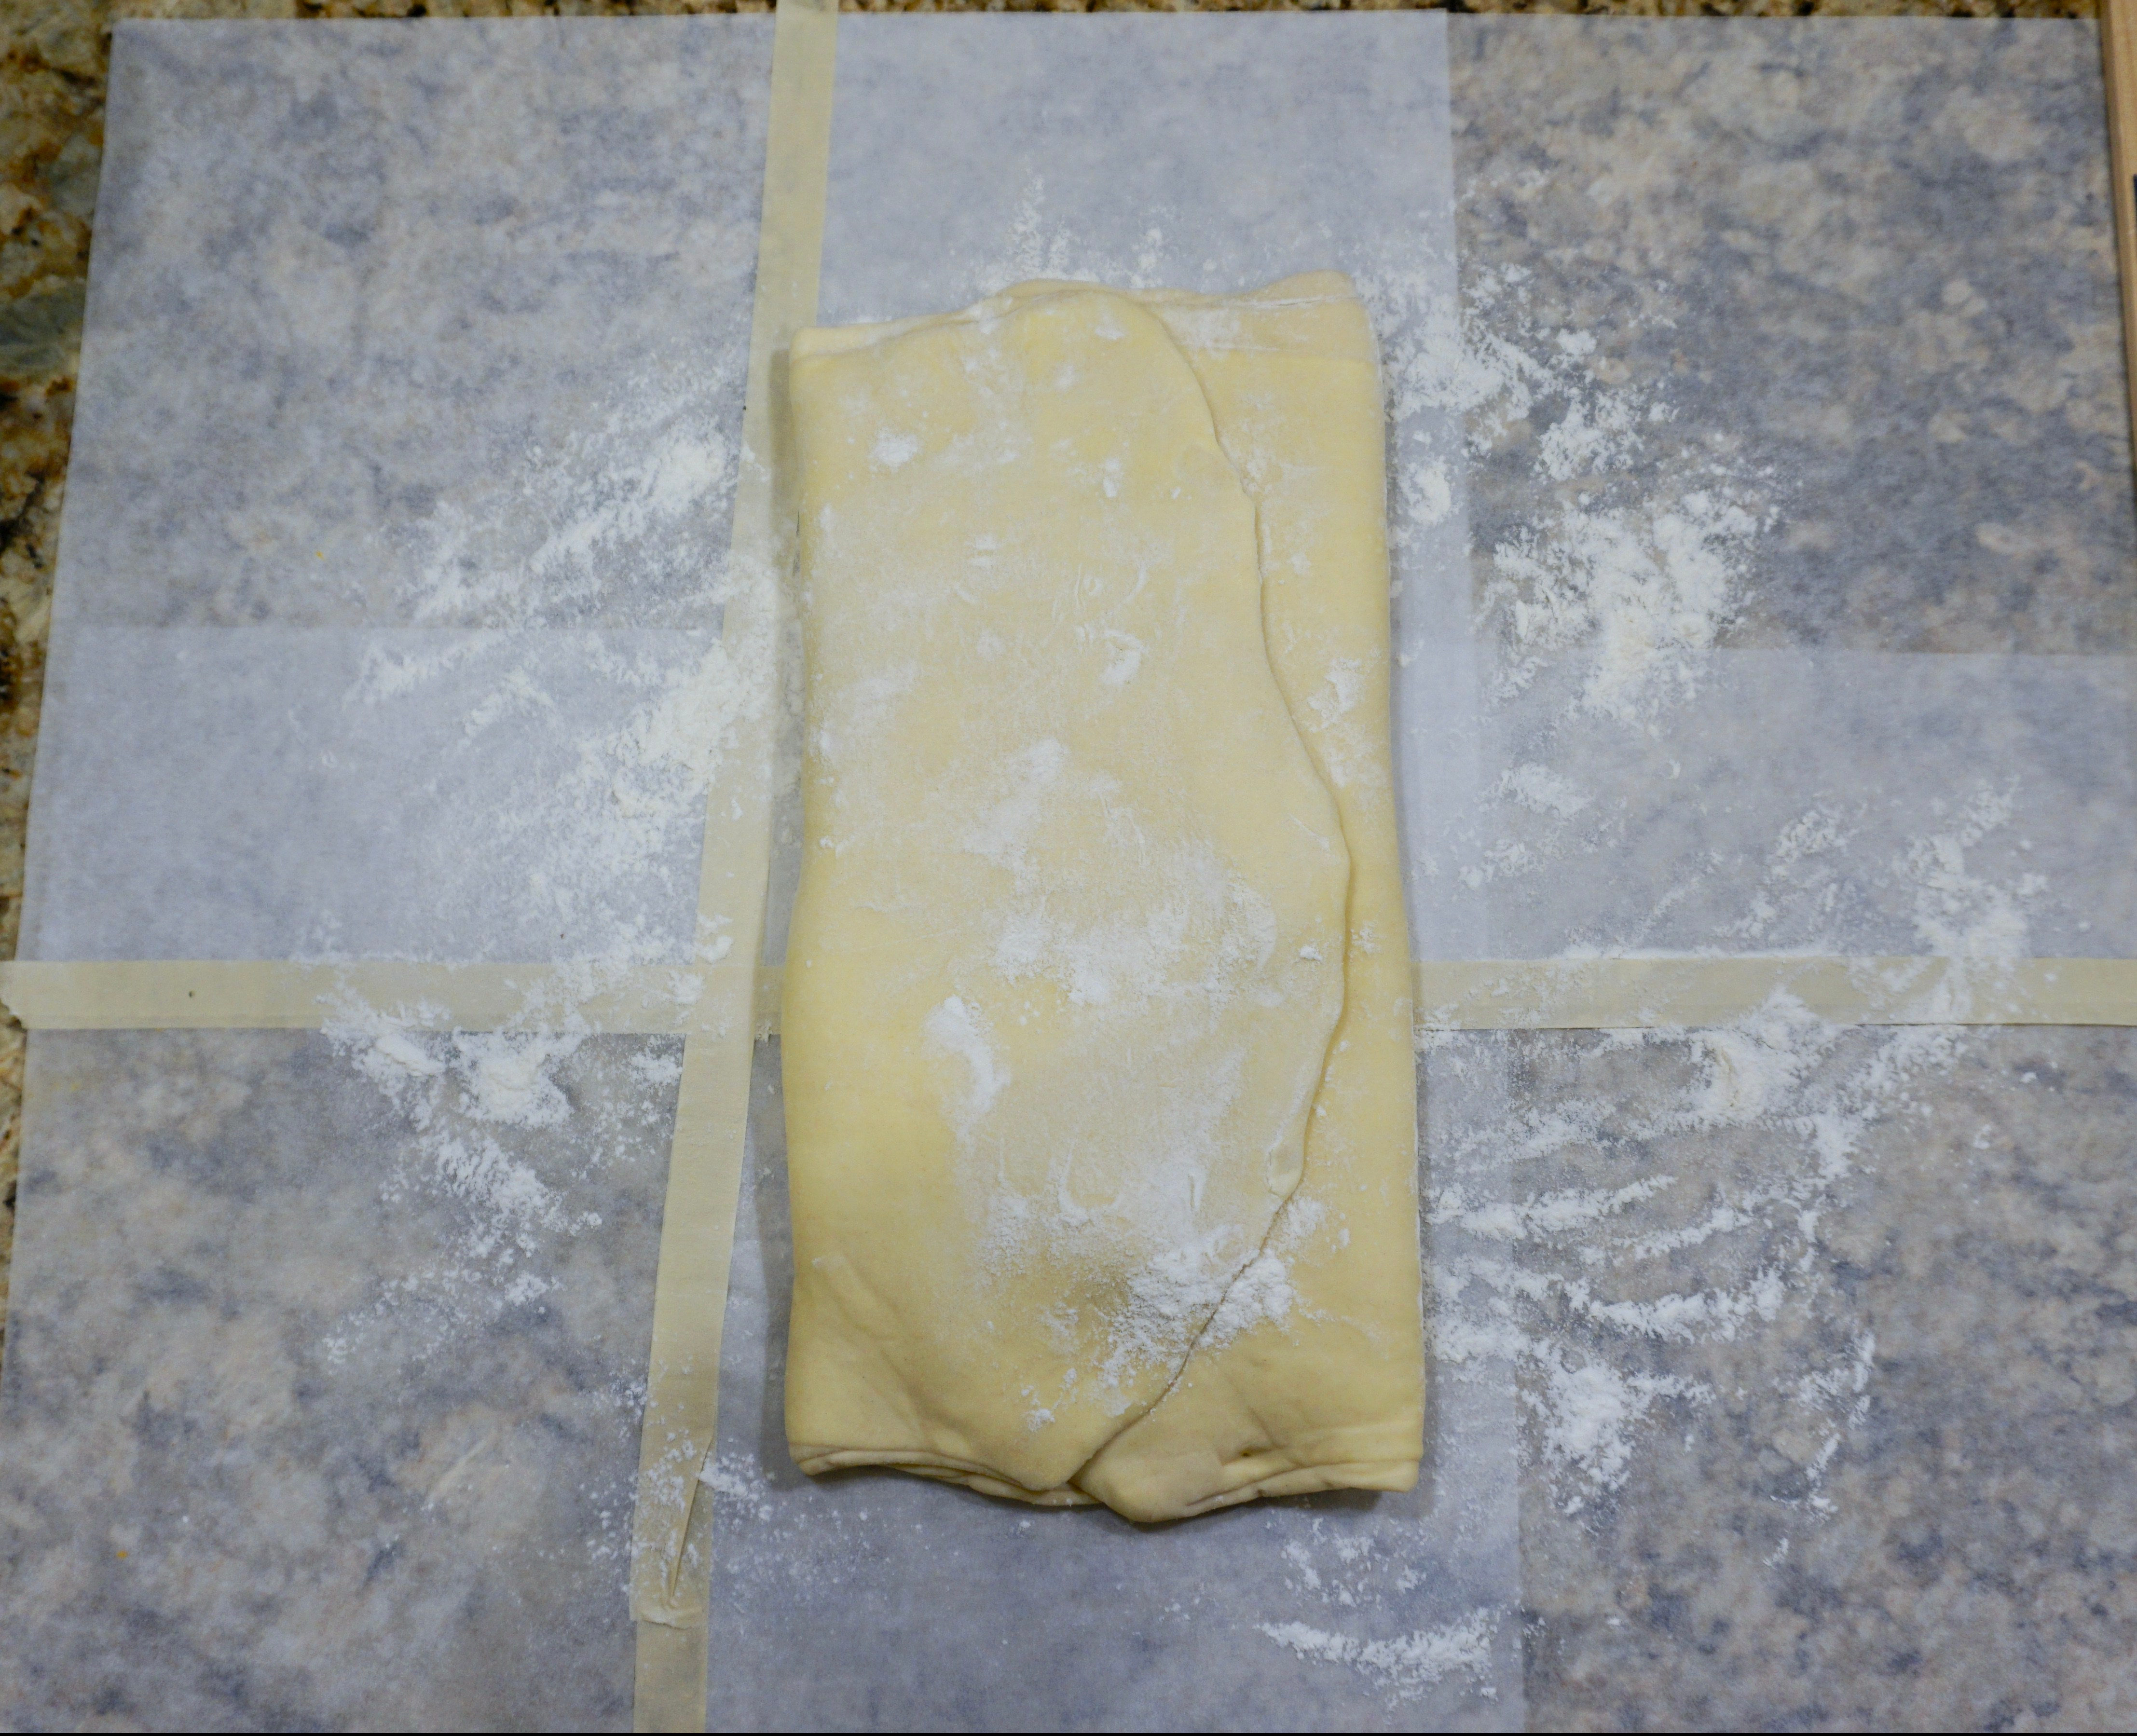

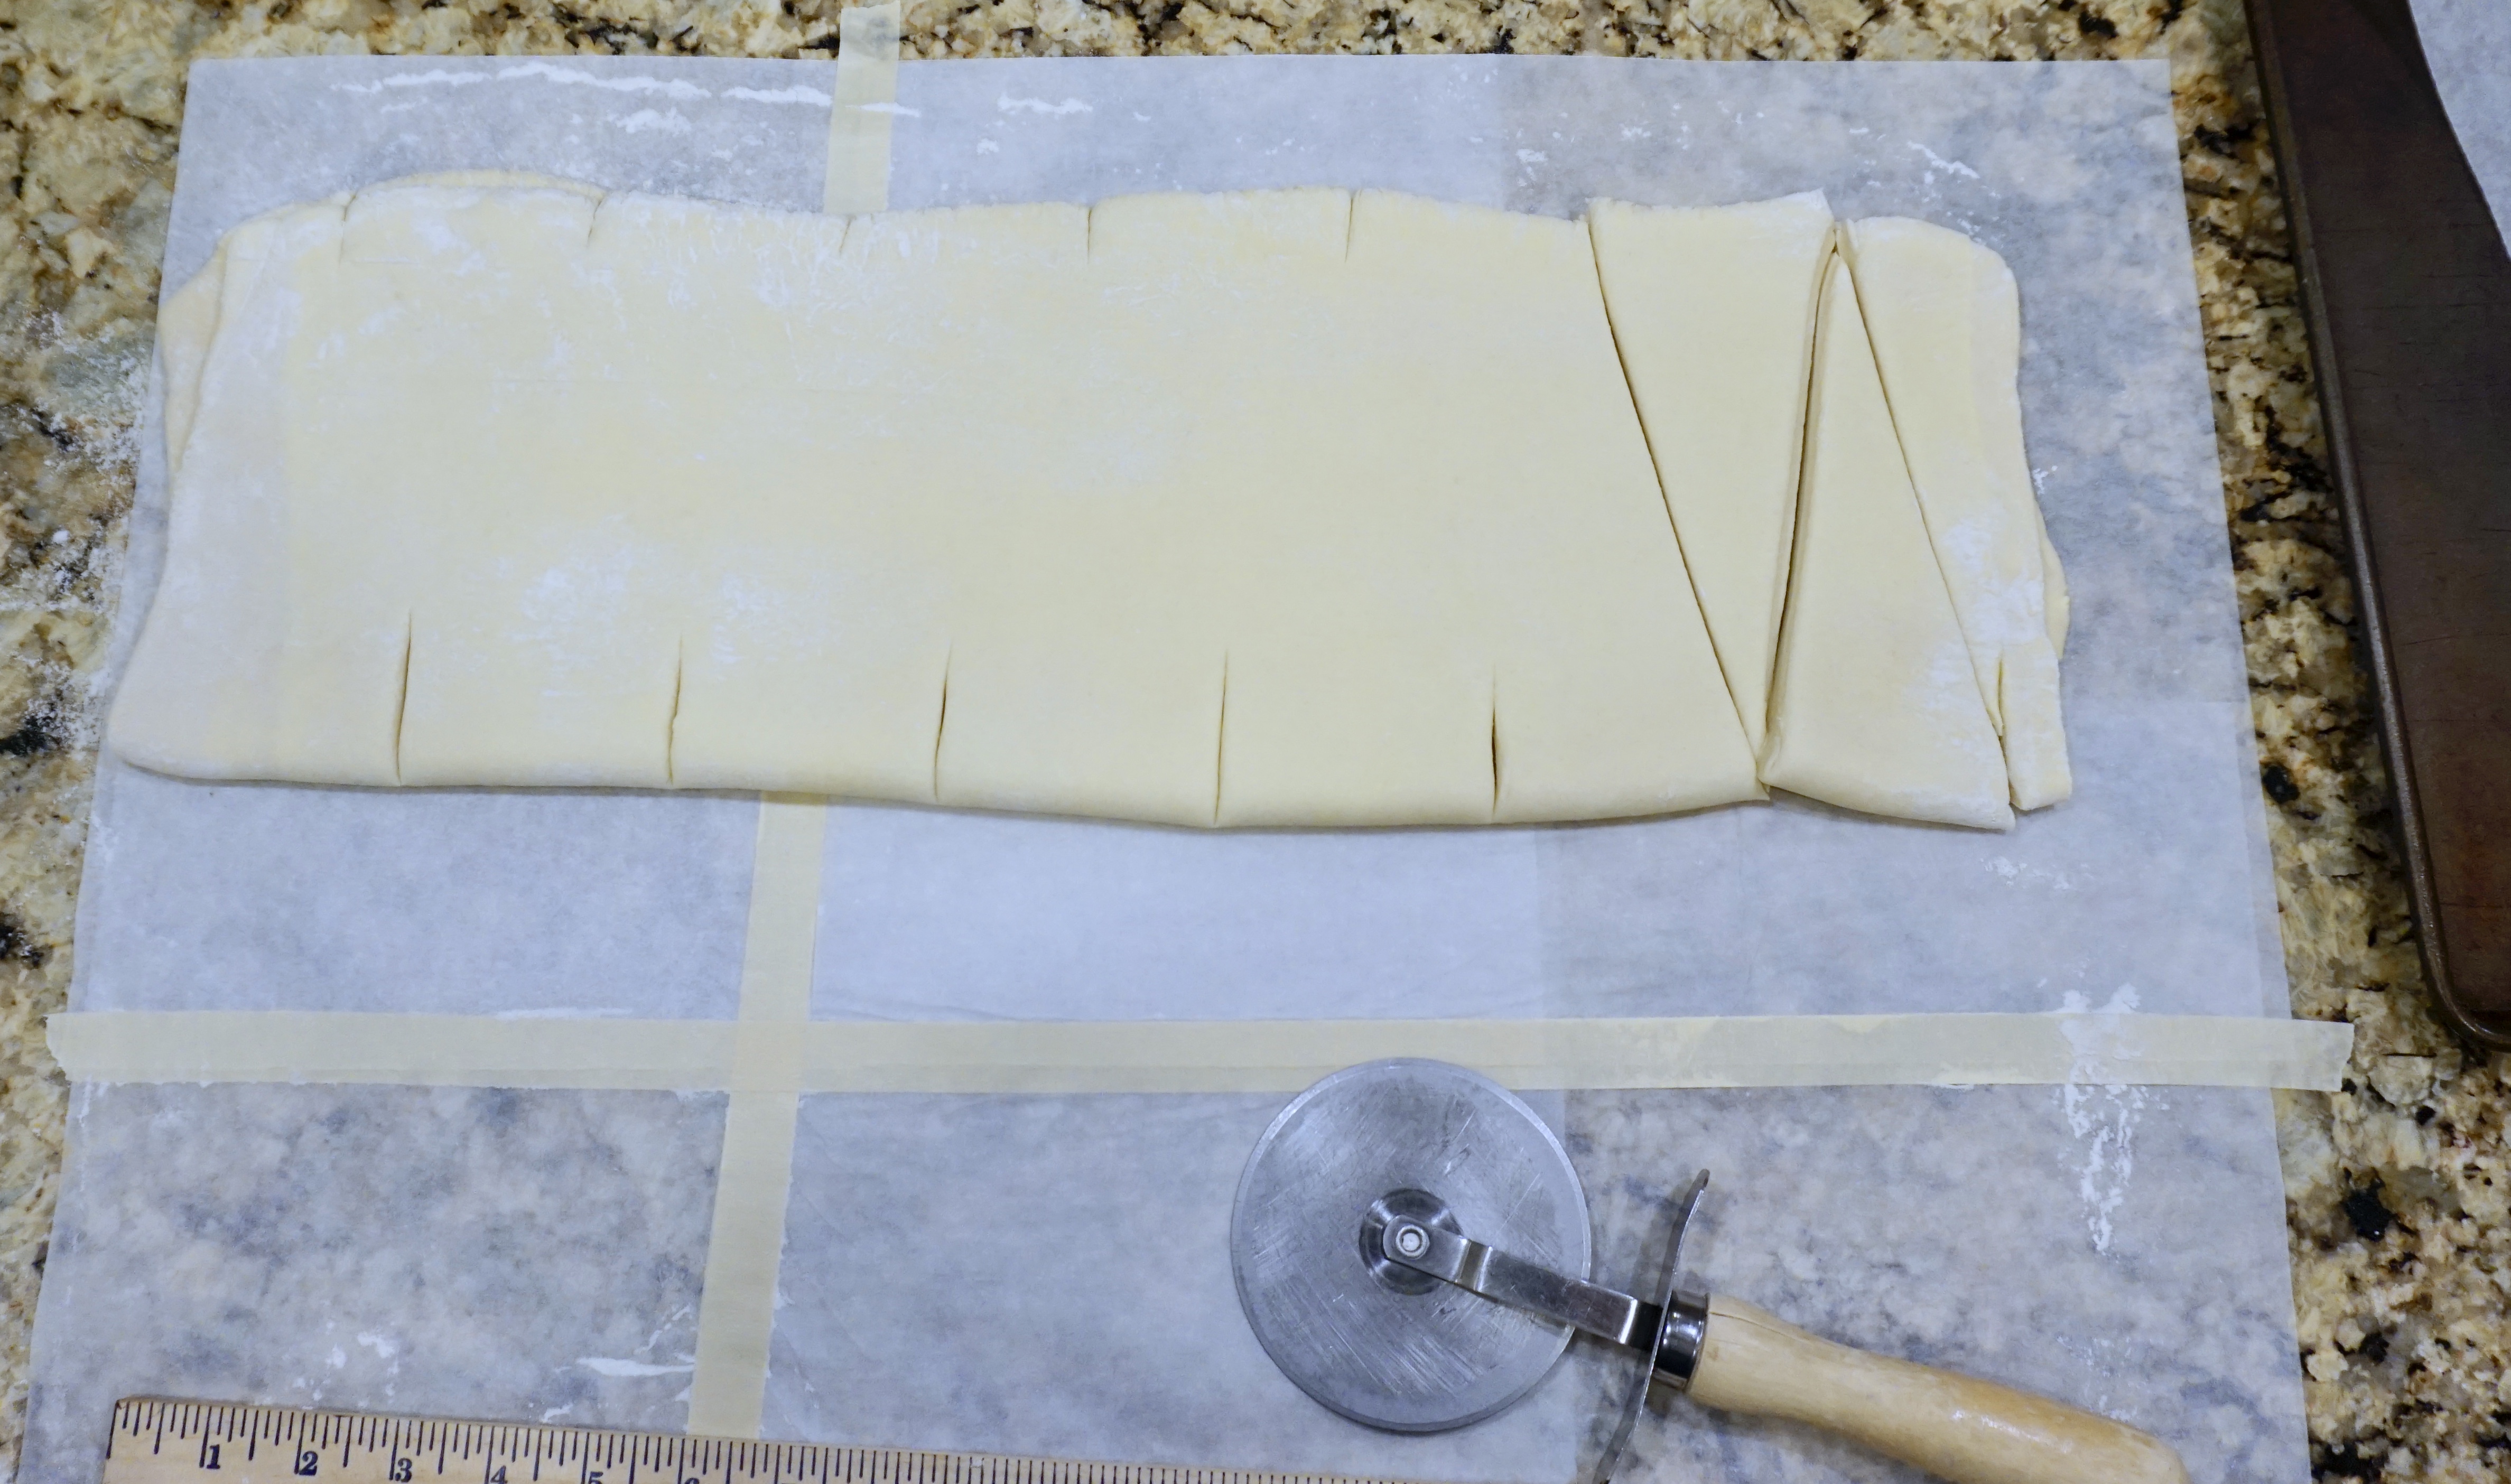

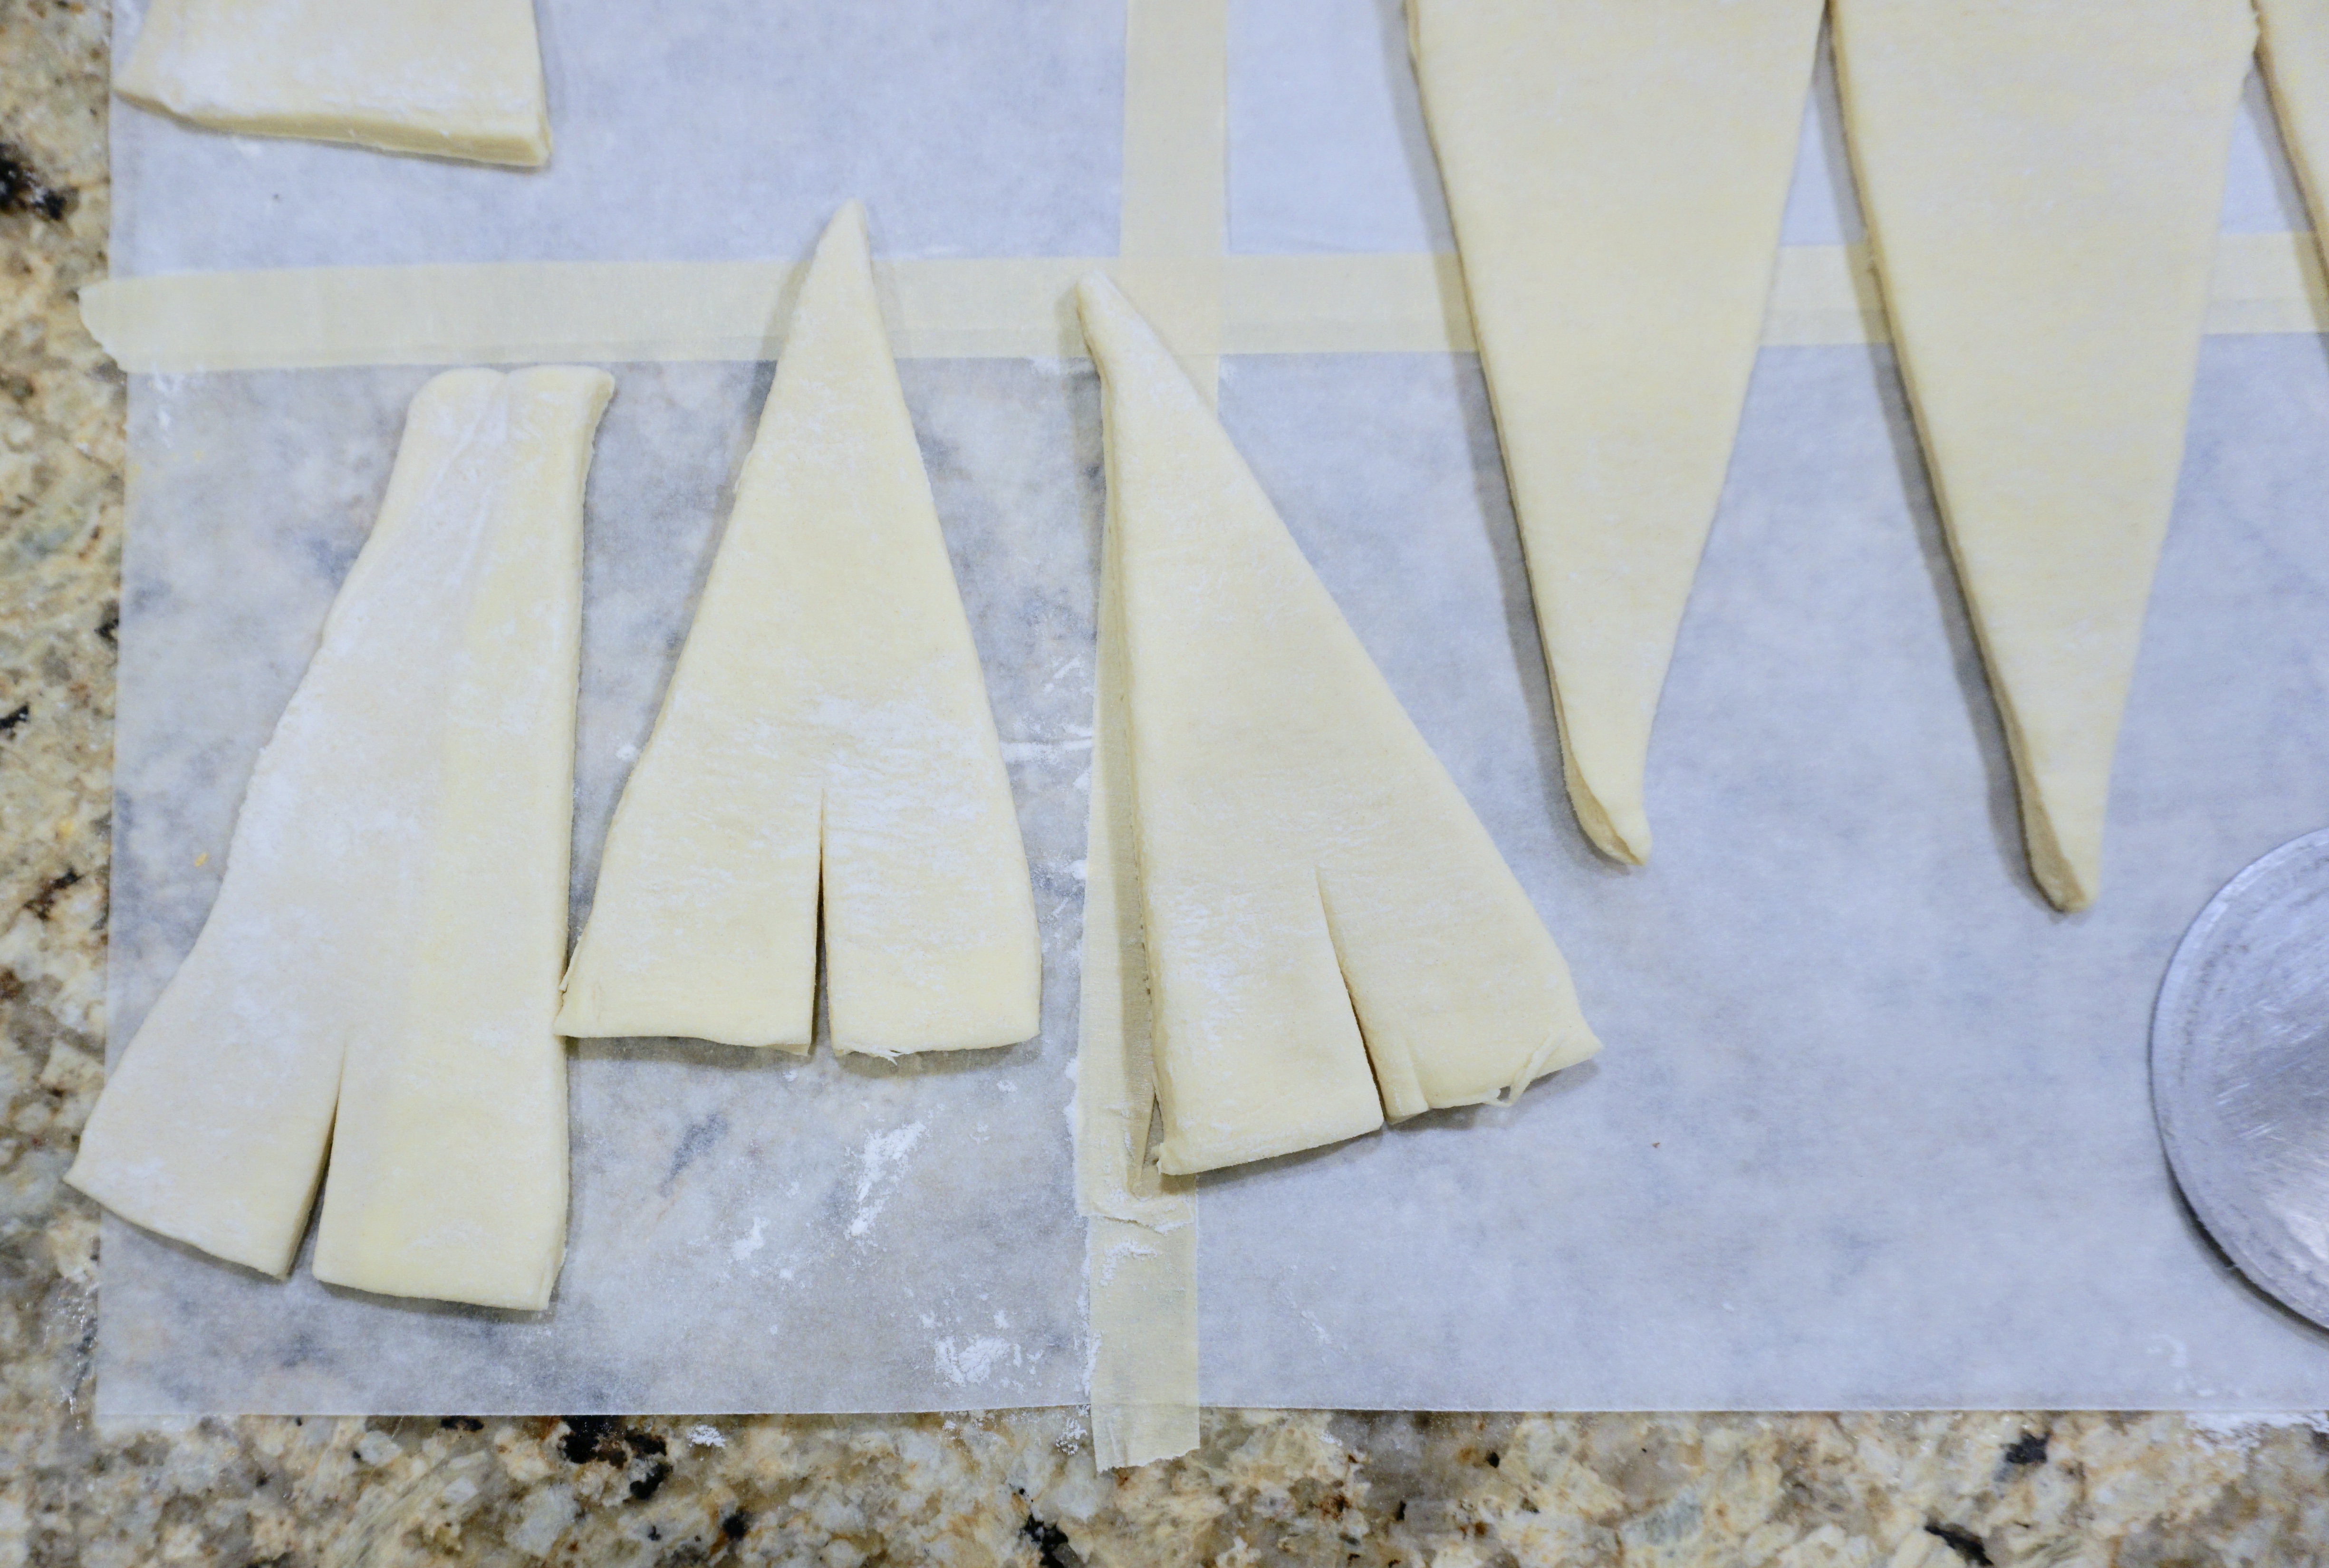


To begin the process, I pulled the dough out of the freezer and dusted it and the counter with flour. Then I rolled it out to an 18-by-16-inch rectangle. Next, I folded it so that the 18-inch sides of the rectangle met up at the top of my work surface. Using a ruler I used a pizza cutter to mark off 3 inch increments in the bottom of my dough. Then I moved my ruler to the top of the dough and marked off 1 1/2-inches from the top left side of the dough. I placed the end of my ruler at the mark and then marked off 3-inch increments from there to the end of the dough. Using the pizza cutter I connected the cuts from top to bottom making triangles. Some of the triangles were still connected at the bottom, so I unfolded those pieces and cut through the middle making them into triangles. Again if your dough gets soft, you can place it back in the freezer for a few minutes to firm up.
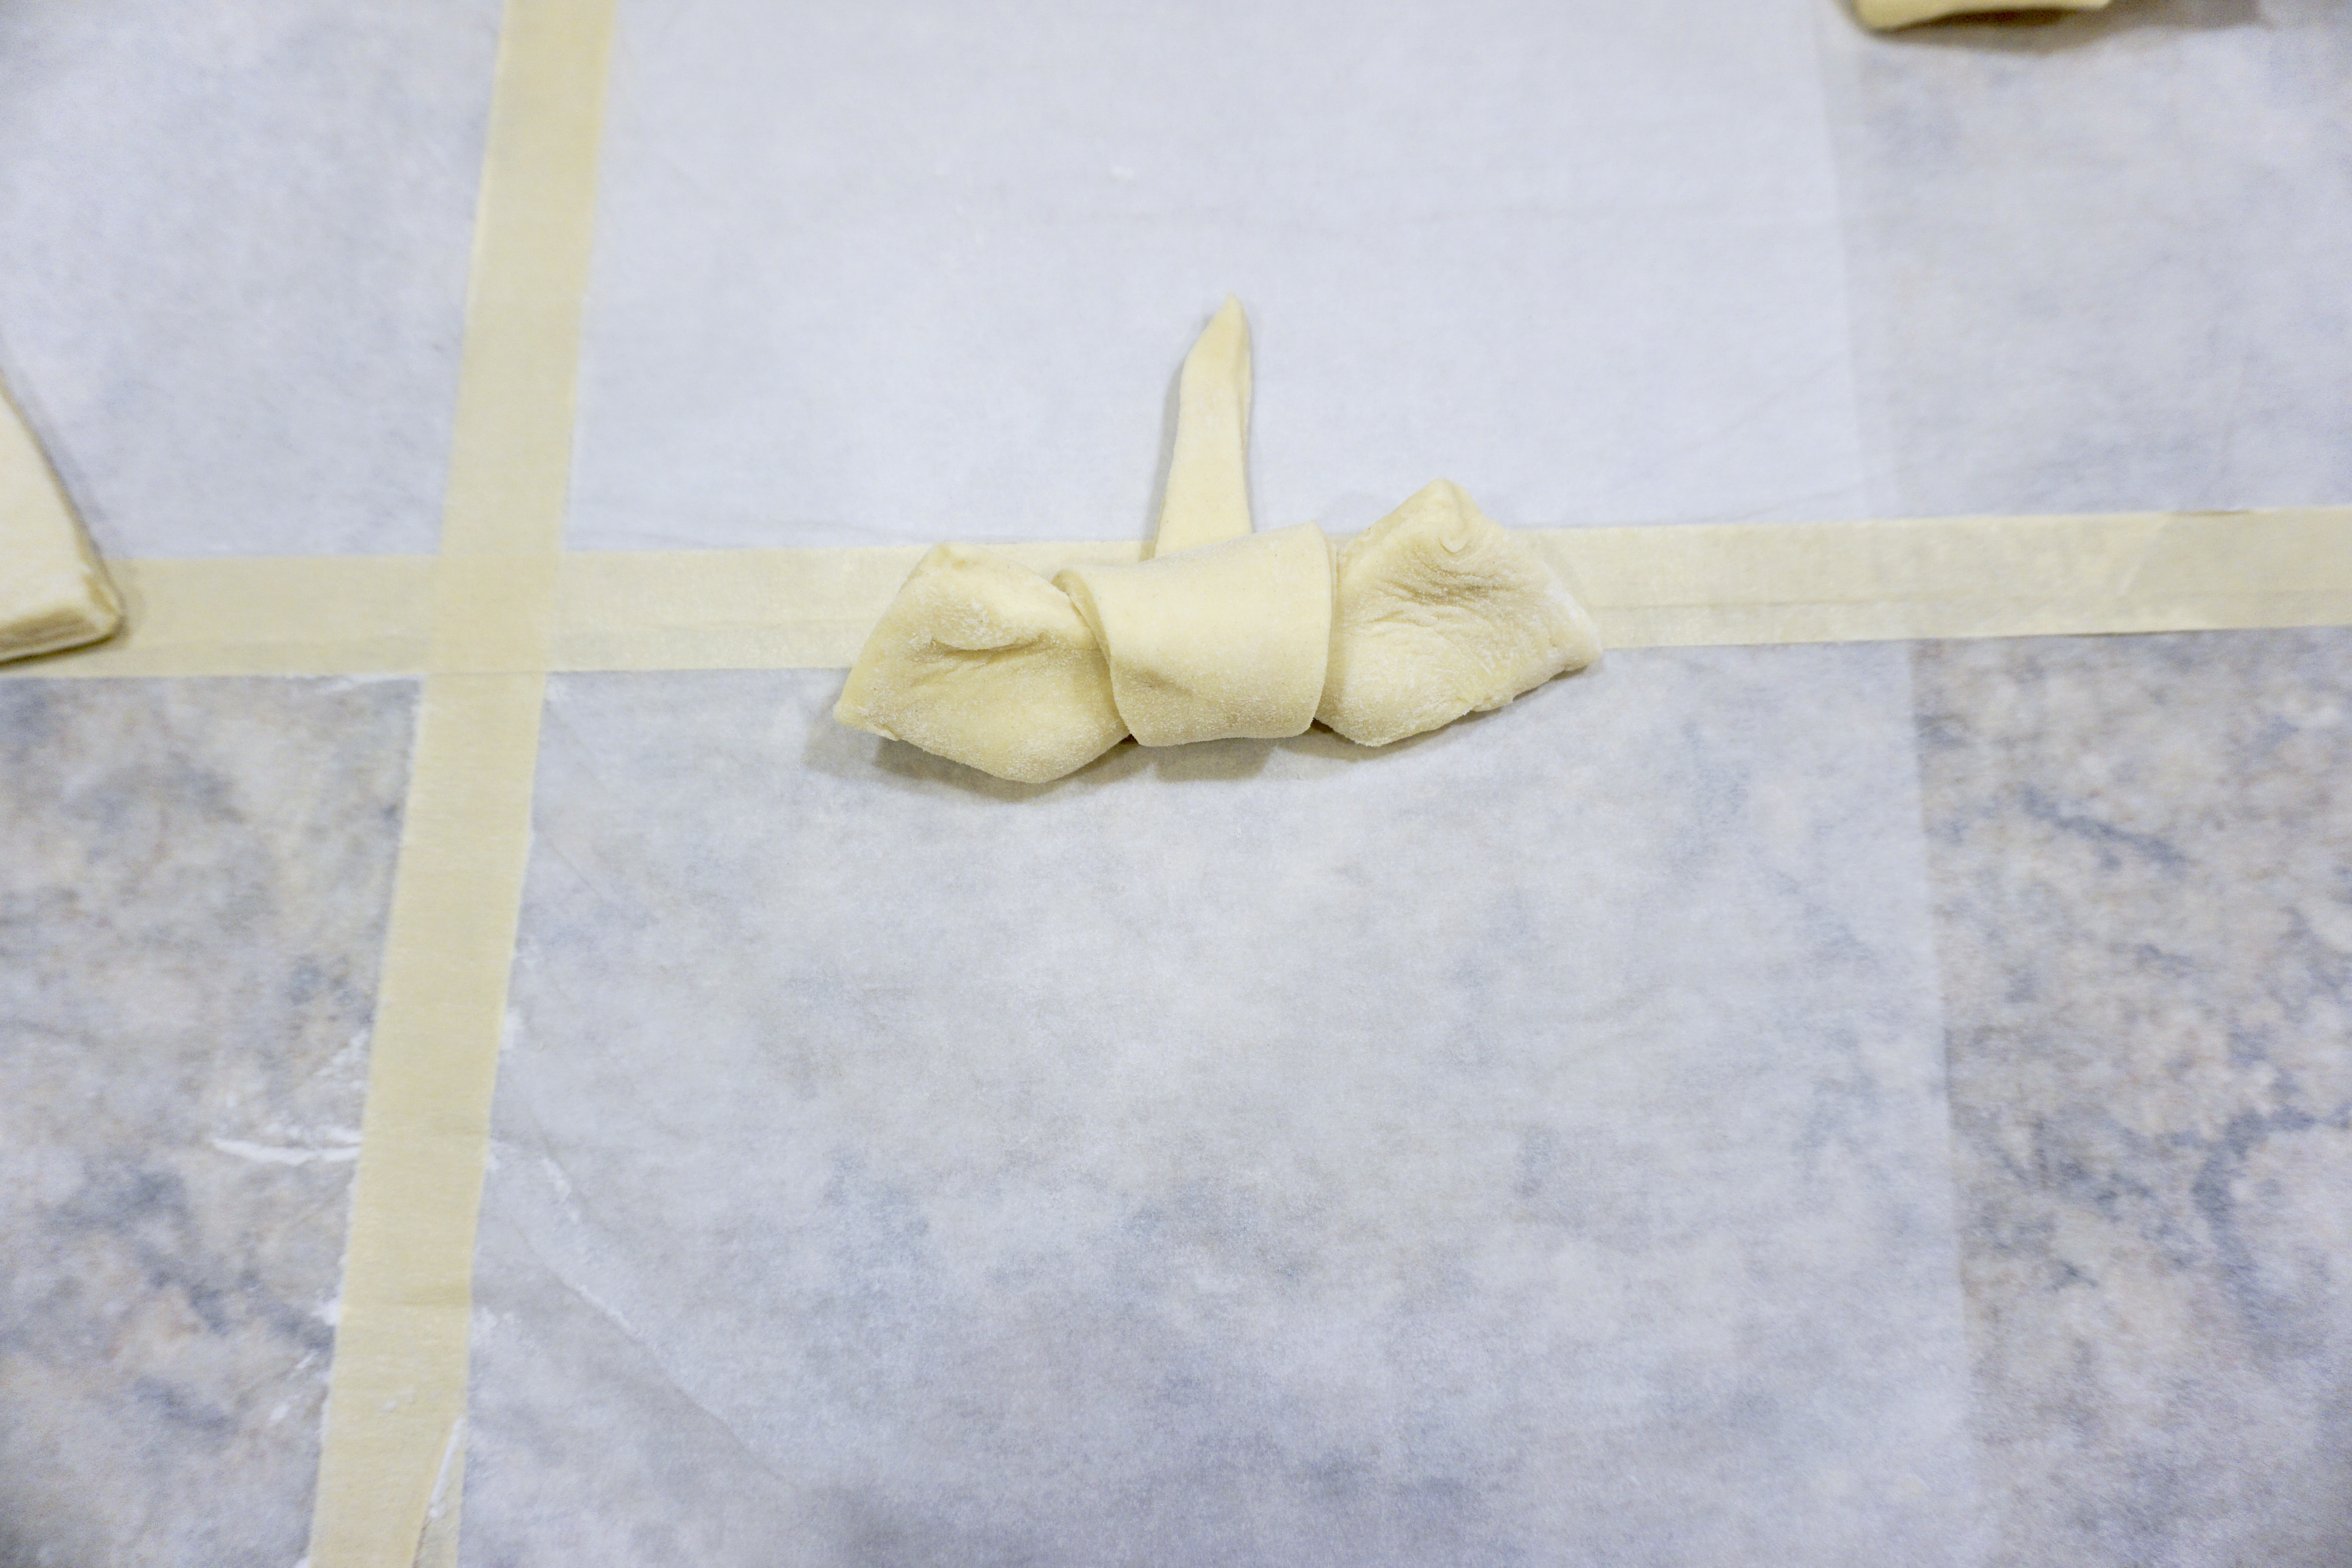
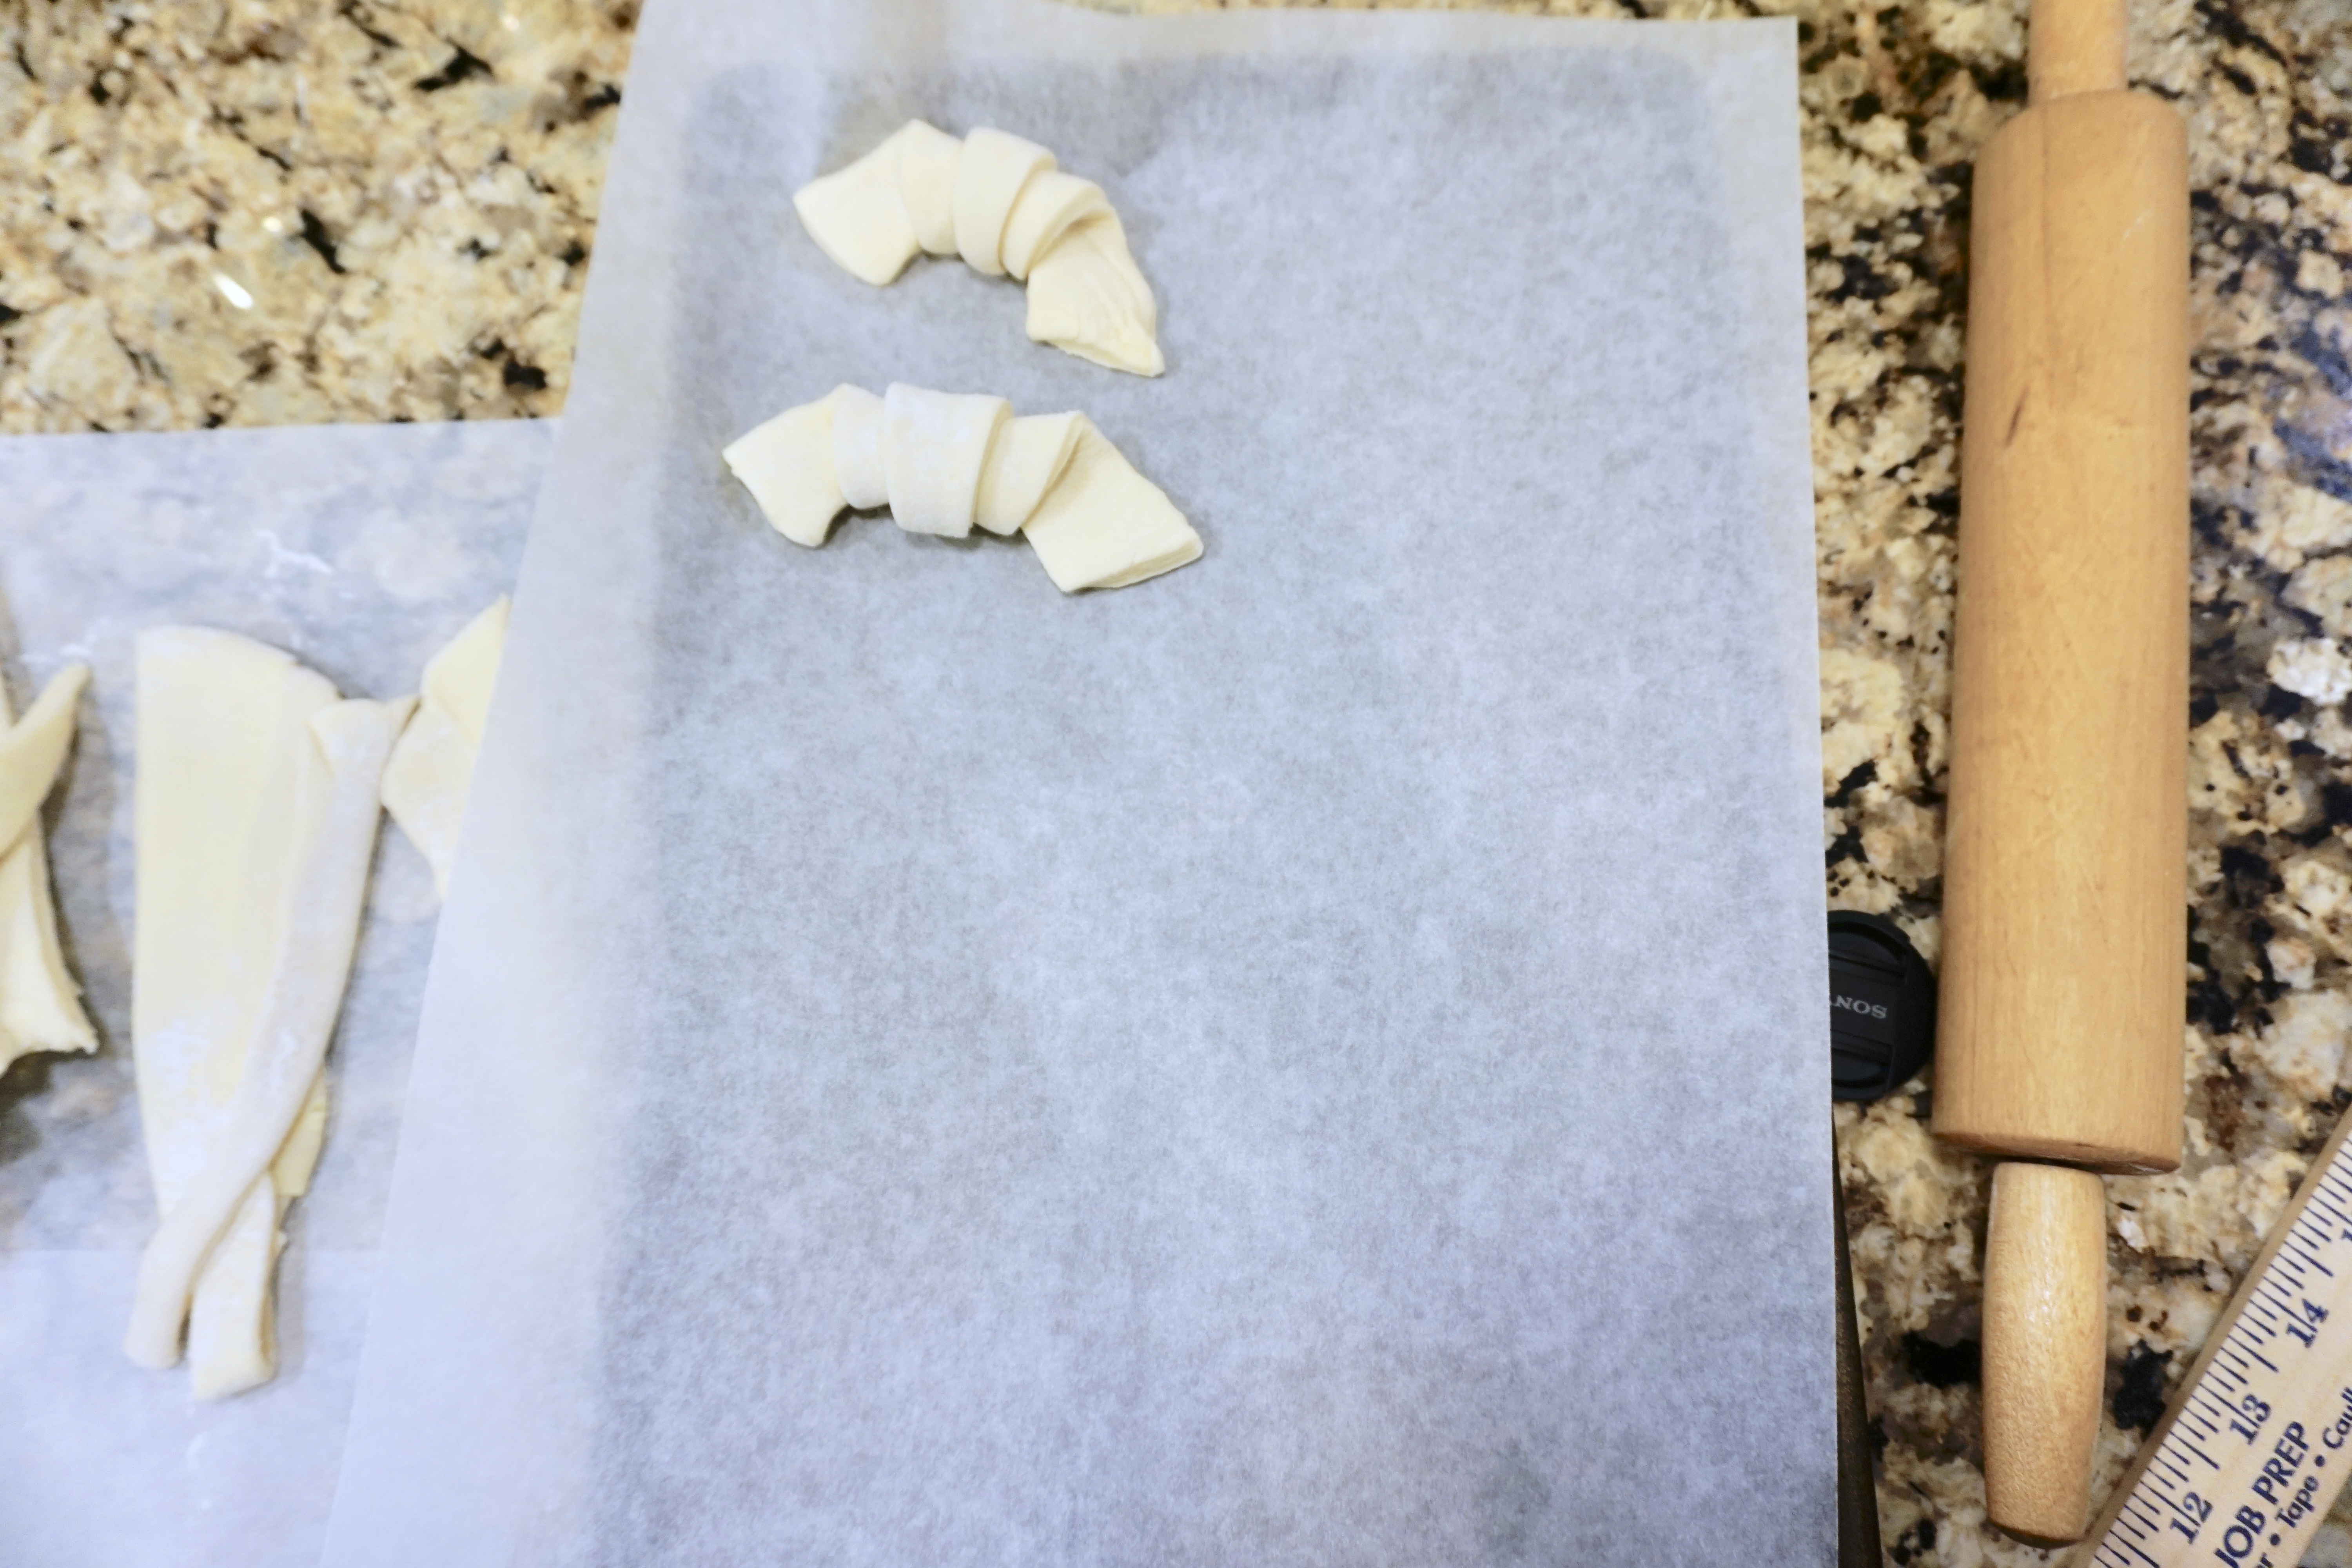
To shape the dough, I started by cutting a 1/2-inch-ish (I think I got a little overly generous with my cutting…oops) slit in the base of the triangle. Then I folded both sides of the slit over the rest of the dough, rolled the base over again, then stretched the tail so that it wrapped all the way around the roll and tucked it under the croissant. I placed each of the shaped croissants on a parchment lined baking tray. (Since I knew that my croissants were going to chill in the fridge until morning, I didn’t care how close they were knowing that I didn’t have tons of fridge space for baking trays.)
To fill the croissants, I simply added the cheese mixture or the chocolate slices to the triangles, right above the slits. Then I shaped the dough the same way I did for the unfilled croissants.
I put plastic wrap over the trays of croissants and placed them back in the fridge to rest overnight. The shaped and chilled croissants need at least an extra 30 minutes of time for the final rise.
The Final Rise:


I set my alarm for 4:30 am, since my boys both get up at 7:00 am, to give the croissants enough time to come to temperature and rise on our counter before baking. Before I went to bed though, I laid out extra baking sheets lined with parchment so that I could spread out the croissants before they rose and spread on the counter and while baking. At 6:30 I woke up and preheated my over to 425 F degrees.
We decided not to put egg wash on our croissants (kids food allergies) but if you want to, before putting your croissants in the oven, mix together 1 egg, 1 teaspoon cold water and a pinch of salt. Then use a pastry brush to brush the mixture over the croissants before baking.
Bake the Croissants:
Right before putting the croissants in the oven, lower the temperature to 400 F degrees and put two trays of croissants in the oven for 12 minutes. Then open the oven, switch the top and bottom pans and rotate each pan 180 degrees so that the back is now in the front. Continue to bake them for 8-12 minutes. Watch them carefully so that they do not burn. You will know they are finished baking when they are deep golden brown and fragrant. Transfer the croissants to a wire rack to cool down.
You finally get to eat your croissants:


Before you do, though, you should take lots of pictures (I got a new camera lens for Christmas that I am trying to learn how to use and photoshop to learn how to edit my pictures better) and gather some friends around to enjoy with you. This recipe makes a ton of croissants so you will want to share some or you can freeze some too. After shaping them, put them on a parchment tray and wrap with plastic wrap. Freeze them until solid and then you can transfer them to a plastic baggie and freeze for up to 2 months. We did this the first time we made them, the frozen ones were not a wonderful the second time we baked them, but I think we left them in the freezer too long.
Enjoy! Warm, homemade croissants are an amazing treat. Even though they take a lot of time and some effort – if you are looking for something spectacular – please give this a try!
Final Thoughts:
- No other croissant will be as good as a homemade croissant right out of the oven
- My boys are so so so so spoiled by trying the things that I made for this blog and hopefully will not grow up wanting homemade croissants all the time…eek!
- Having done this a few times I think that the biggest thing to watch out for is holes and tears when rolling out the dough – be gentle but get the job done – and try to patch everything you see with extra flour
- Have fun with fillings – put anything you want in there and see what happens!
Recipe: Croissants
Ingredients
- 24 tablespoons European-style unsalted butter, very cold
- 3 tablespoons unsalted butter at room temperature
- 1 3/4 cup whole milk
- 4 teaspoons instant or rapid-rise yeast
- 4 1/4 cup unbleached all-purpose King Arthur Flour
- 1/4 cup sugar
- 2 teaspoons kosher salt
- 1 large egg (if making egg wash)
- 1 teaspoon cold water (if making egg wash)
- pinch table salt (if making egg wash)
- block of sharp cheddar
- 1 tablespoon fresh thyme
- 4 oz dark chocolate bar cut into slices
Instructions
Dough:
- Melt 3 tablespoons butter in a saucepan over low heat. Remove from heat and immediately stir in the milk (check that the temp is below 90 F degrees). Whisk in the yeast.
- In a stand mixer with the dough hook, put flour, sugar and salt. Add the milk mixture to the dry ingredients and mix on low until a cohesive dough forms, about 2-3 minutes. Knead for 1 minute on medium low.
- Remove the bowl from the mixer and scrape the dough hook. Cover the bowl with plastic wrap and let it sit in a warm place for 30 minutes.
- Then shape into a 10-by-7-inch rectangle with your hands on a parchment lined baking sheet. Wrap the baking sheet tightly with plastic wrap and refrigerate for 2 hours. Then place in the freezer for 30 minutes.
Butter Block:
- Fold a 24-inch piece of parchment paper in half to form a 12-inch rectangle. Fold over the 3 open sides of the rectangle to form an 8-inch square with enclosed sides.
- Put 24 tablespoons of cold butter on a piece of parchment paper and using your rolling pin, beat the butter into a cohesive mass. You may need to use your parchment paper to help you fold the butter back on itself a few times until it is pliable.
- Shape into a rough 6-inch square and transfer the butter into the center of one of the squares. Fold the paper around the butter and turn it over.
- Use the rolling pin to gently manipulate the butter into all the spaces of the parchment square. Make sure it is an even thickness.
- Put the wrapped butter block back in the fridge for at least 45 minutes.
Laminating the Dough:
- After the dough has been in the freezer for 30 minutes, transfer it to a lightly floured surface and roll it to a 17-by-8-inch rectangle.
- Unwrap the cold butter and place it in the middle of the dough. Fold the long sides of the dough into the middle and pinch it shut.
- Use the rolling pin to press down on the dough at the top and bottom of the butter block to seal the butter inside the dough.
- Roll the dough out to a 24-by-8-inch rectangle begin careful that no butter is exposed.
- Fold the dough in thirds like a letter, being sure to brush off any extra flour.
- Turn the dough 90 degrees and roll it out again to a 24-by-8-inch rectangle.
- Fold the dough in thirds again. This time wrap it tightly in plastic wrap and place it on a baking pan and in the freezer for 30 minutes.
- After chilling, rotate the dough 90 degrees and roll it out for a third and final time to a 24-by-8-inch rectangle.
- Fold the dough in thirds and wrap it tightly in plastic wrap and place it on a baking pan and in the fridge for 2 hours. Then put it in the freezer for 30 minutes.
Make fillings:
- If making fillings – grate the sharp cheddar & de-stem the thyme then mix together
- Cut the chocolate bar into long strips
Shape the Croissants:
- Pull the dough out of the freezer and put on a lightly floured surface.
- Roll the dough out to a 16-by-18-inch rectangle
- Fold the dough in half.
- Using a ruler mark off 3 inch increments in the bottom of the dough. Mark off 1 1/2-inches from the top left side of the dough. Place the end of the ruler at the mark and then marked off 3-inch increments from there to the end of the dough. Using a pizza cutter connect the cuts from top to bottom making triangles.
- Unfolded the connected pieces and cut through the middle making them into triangles.
- Cut a 1/2-inch slit in the base of the triangles. Fold both sides of the slit over the rest of the dough, roll the base over again, then stretched the tail so that it wraps all the way around the roll and tucked it under the croissant.
- Place each of the shaped croissants on a parchment lined baking tray.
- If filling the croissant – put a small amount of filling right above the slit and roll the same way as above.
If you are not baking the croissants right away, cover the trays with plastic wrap and place in the fridge for up to 18 hours – Add at least 30 minutes to the final rise time
Final Rise & Bake:
- Lightly cover the croissants with plastic wrap and leave in a warm place to double in size about 2 1/2 to 3 hours or 3 to 3 1/2 hours if coming from the fridge or longer from the freezer.
- When the croissants are almost doubled in size preheat the oven to 425 F degrees.
- If using the egg wash – beat together the water, egg and pinch of salt and brush over the tops of the croissants.
- Turn the oven down to 400 F degrees
- Make sure the trays are uncovered and put them in the oven for 12 minutes on the middle and lower racks. Pull the trays out, rotate 180 degrees and switch the top and bottom trays. Continue to cook for 8-12 minutes or until the croissants are golden brown. Watch the second time carefully because they can easily burn.
- Cool on a cooling rack until they are cool enough to eat!
Enjoy!
Recipe adapted from America’s Test Kitchen and Home Cooking in Montana
Can we just take a second to appreciate how beautiful this set of measuring spoons is that my mother-in-law has at her house! I love them!
